Best ever fudgy chocolate brownies

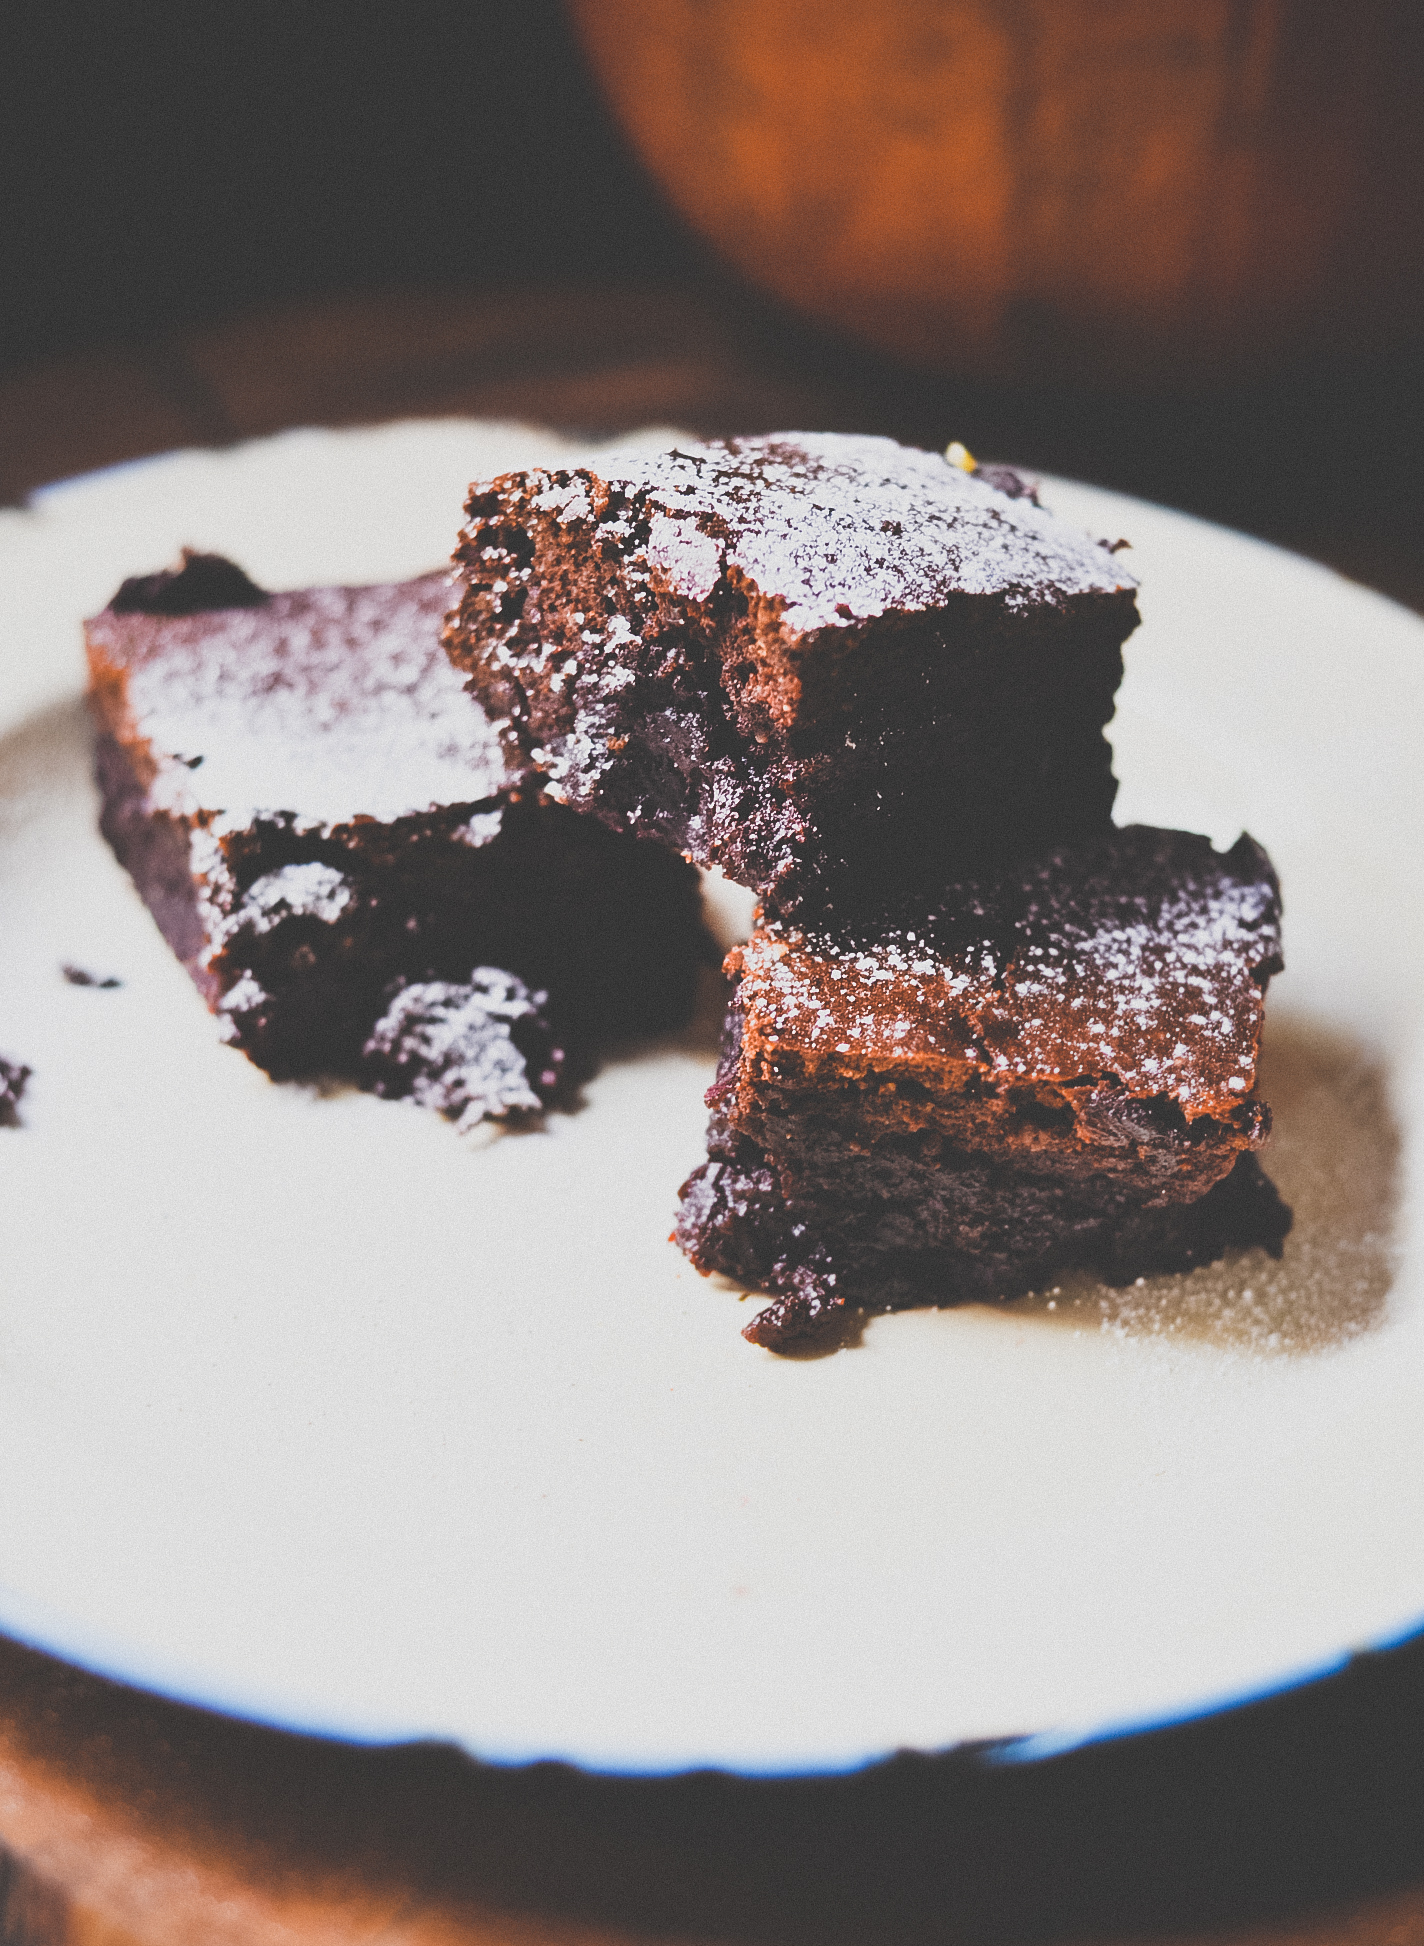
Dense, fudgy chocolate brownies have to be one of my all time favourite things to bake – simple, cheap and so goddam good they beg to be made as frequently as you can justify.

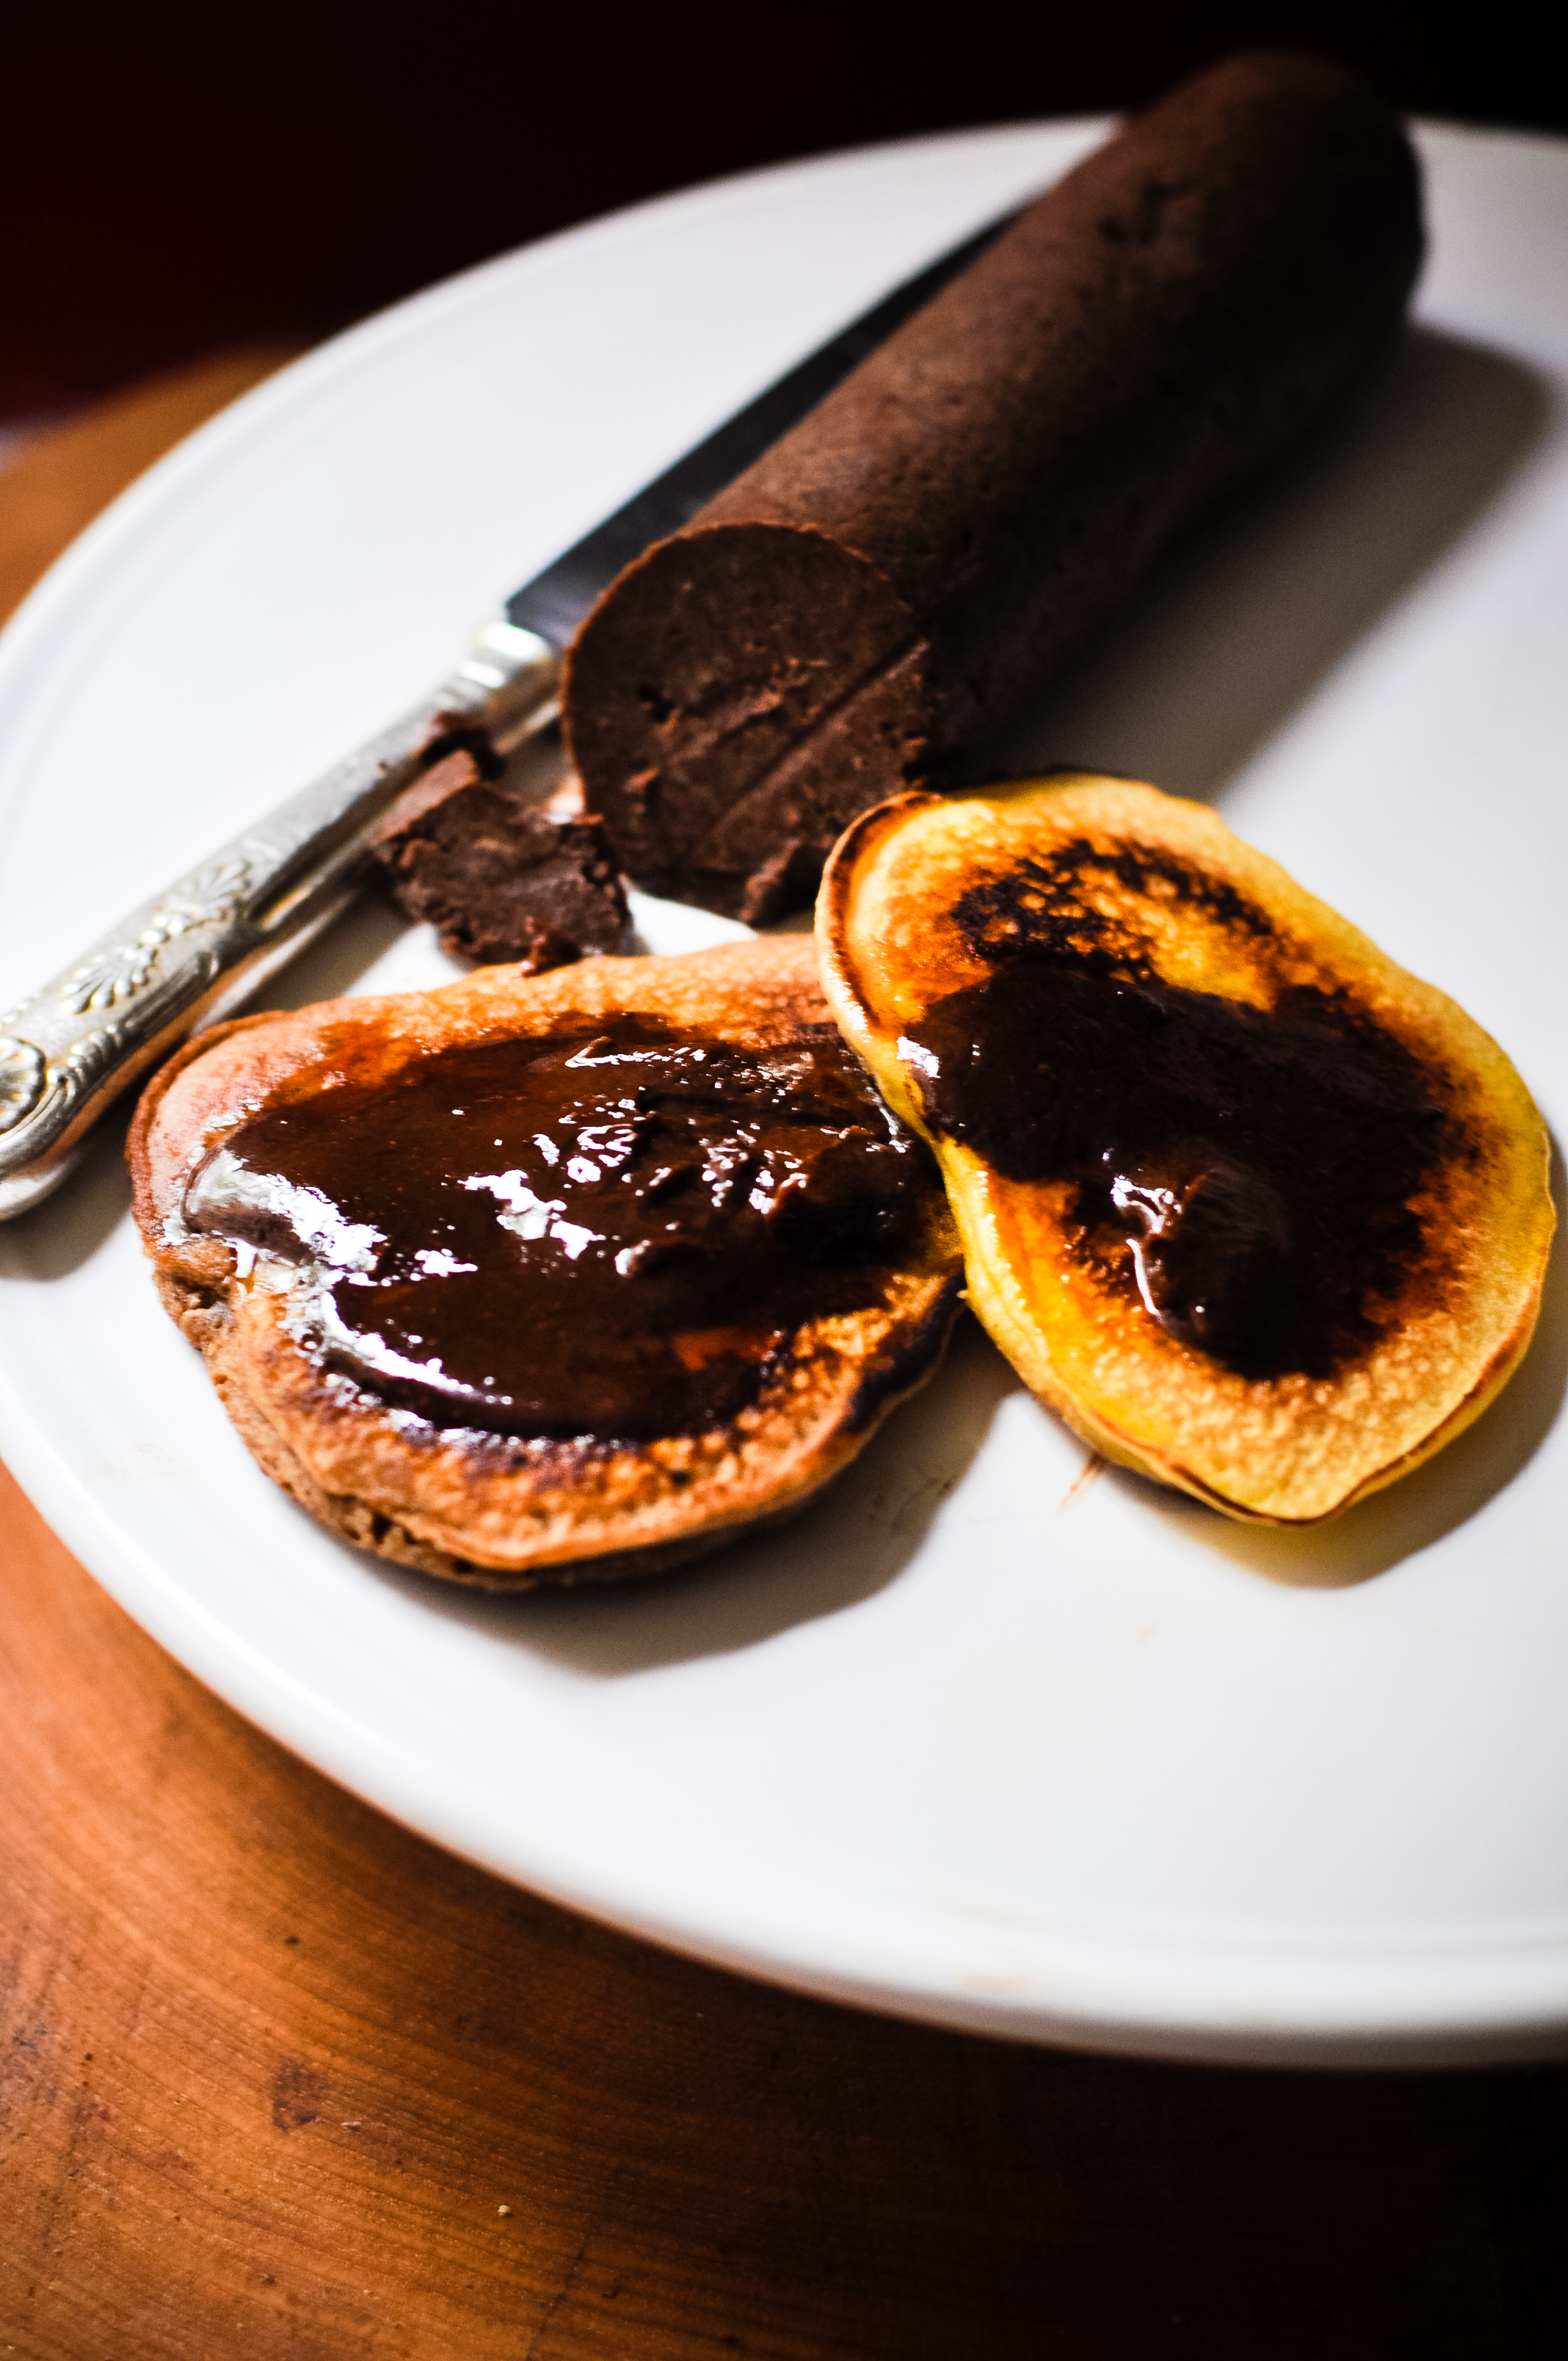
Joel has a pretty insatiable sweet tooth in comparison to me and so these were requested a few days ago as we have no treats in the cottage, and these are certainly a treat. Baked until just cracking on the surface yet still quivering in the centre, these are so rich and fudgy you don’t need to eat much at all to feel sated. Eat as they are or serve warm with vanilla ice cream or some indulgent chocolate custard.

These brownies are cheap to make as well as being really easy. I use the 40p 100g bars of dark chocolate from Sainsburys or Tescos (they were just 30p not long ago and I’m still grumpy about the increase). They are decent quality and a good cocoa content, no need to spend lots on expensive bars and never use cooking chocolate, that stuff is vile.

You can easily customise these by adding 100g chocolate chips/nuts/marshmallows after you’ve folded in the flour and cocoa. I usually add milk chocolate chips or big dollops of Biscoff spread or dulche du leche, in fact I cannot recommend this enough!

Ingredients:

  • 100g butter
  • 200g plain dark chocolate
  • 4 eggs
  • 250g caster sugar (use golden if you wish)
  • pinch salt
  • 100g plain flour
  • 30g cocoa powder
  • 1 tsp baking powder

Method:

  1. Heat oven to 180C. Scrunch up some baking parchment then unfurl and line a 20cm x 20cm baking pan.
  2. Smash up the chocolate, I just hit the packet hard against the worktop several times. Melt together the butter and the chocolate either gently in the microwave or over a simmering pan of water in a glass bowl. Leave the chocolate mix to cool down so it feels lukewarm to the touch.
  3. Beat together the eggs and sugar until light and fluffy then use a spatula to fold in the cooled chocolate mixture. I use an electric whisk to beat the eggs and sugar as I’m all for lazy baking but you could use a stand mixer or hand whisk. Add the salt.
  4. Gently fold in the flour, cocoa and baking powder, trying not to knock out the air. Don’t overmix as it’s this gentle folding that means your brownies will have such a glorious texture.
  5. Pour into your prepared tin and bake for 25-27 minutes. The top will be set as will the edges but the centre will still be quivering. This is what makes them so fudgy. Allow to cool then slice and devour.

No-bake mascarpone, Biscoff and Nutella cheesecake

cheesecake

A quick snap before devouring…

It’s currently 34C here in Melton Mowbray, I’m sat in the garden sipping on a lagerita and feeling very thankful.

I find myself feeling incredibly thankful for a lot these days. Despite the financial and emotional adversity that lockdown has brought, it has also brought a great deal of positivity into my life – the kindness of friends, family and strangers, the shift to working entirely from home, my new found love of succulent plants (seriously, I’m addicted just check out my Instagram!), my tiny garden (where I sit every day it doesn’t rain and indeed even some when it does) and today the fact that my cottage is like a fridge on the hottest of days.

I got up at 6:30am with the well placed intention of watering the garden before the sun unleashed its scorching rays on my unsuspecting plants, I looked at the hosepipe and then thought: I really fancy cheesecake…

I picked up a couple of very cheap tubs of mascarpone yesterday from Lidl, not entirely sure what they were going to be used for but with the best intentions of something to do with fruit…yes, more well placed intentions.

You can make this with cream cheese instead of mascarpone but I just love the silkiness that the Italian softy cheese brings, full fat though, always full fat. I had some Biscoff biscuits knocking about, half a pat of butter and a pot of double cream that was bought for a pasta dish and a punnet of strawberries picked up from the Reduced Section for just 15p, so I was all set for a fruity cheesecake. Then I spotted the jar of Nutella winking at me seductively.

So this is a pretty experimental cheesecake that turned out to be perfect. If I had a bar of chocolate I would have melted it and drizzled it across the top but alas the pantry was bereft of such delights.

This is really easy to make, needs time to set in the fridge before serving but an hour or two later and you are good to go…

Ingredients:

  • 400g Biscoff biscuits
  • 100g melted butter
  • 500g mascarpone
  • 2 tblsp icing sugar
  • 300g Nutella
  • 300ml double cream
  • 1 tsp vanilla paste
  • chocolate balls to decorate (or some melted chocolate to drizzle)

Method:

  1. Put 300g of the Biscoff biscuits in a processor and bliss to a fine crumb then pour in the melted butter and blitz again to mix.
  2. Put almost all of the biscuit mixture in the bottom of a 23cm springform cake tin and press down with the back of a spoon. Reserve a bit to sprinkle on the top later if you like or chuck the lot in.
  3. Put the mascarpone, icing sugar and Nutella in a big bowl and beat together until well incorporated. I’m lazy so use an electric beater for ease.
  4. In separate bowl beat the double cream and vanilla paste until it is fluffy and full of air but not overly stiff. Fold the double cream into the mascarpone mix and mix until all is the same colour.
  5. Put the mascarpone and double cream mix on top of the biscuit base and put in the fridge to chill for a few hours or even overnight.
  6. Once ready to serve release it from the tin and then decorate with the crushed biscuits, the remaining whole biscuits and your chocolate balls (or melted chocolate).

Blackberry and sloe gin posset with rosemary shortbread

fullsizeoutput_2cd5

It’s a dark, damp, wintery Sunday here at the cottage. The fire is lit, the cats are all snoozing contently and I’m feeling the need for something zingy, boozy and comforting to brighten the day, step up the winter posset.

Possets are ridiculously easy to create – back when I was a chef I always used to put lemon posset on the dessert menu, it’s delicious, very cheap to make and ready in no time at all which is an all round win for the kitchen.

I love, love LOVE sloe gin. It’s a hip flask staple on a winter walk through frosty fields and so easy to throw together in the last days of autumn. I have bottles of sloe gin in my cupboard dating back to 2010, they have outlasted several relationships and I ration them out as if they were made using the tears of unicorns. I anticipate feeling a great aching loss when the last of the 2010 batch is gone. If you are lucky enough to try some one day then know that you are indeed very special to me! If you don’t have any homemade to hand then you can easily buy a bottle, Sipsmith do a good one.

Now I love shortbread, according to my boyfriend I don’t make enough of it. He’s not a fan of adding any flavours to it mind, he’s a shortbread purist you see – plain, straight down the line, no fucking about shortbread or not at all. I, on there other hand, love lemon shortbread, vanilla shortbread and this wonderfully aromatic rosemary shortbread which goes so well with the rich posset.

If you fancy listening to me make this then click here (you will need iPlayer access as it’s on the BBC).

I’m using blackberries foraged last year that have been in the freezer, but there are plenty to be found on supermarket shelves even at this time of year.

Blackberry and sloe gin posset with rosemary shortbread

Ingredients:

For the posset:

  • 600ml double cream
  • 250g caster sugar
  • 150g blackberries
  • Pinch freshly ground pepper
  • Sloe gin (for quantity see recipe instructions)

Method:

  1.  Heat the cream and sugar together over a medium heat, stir frequently.
  2.  Bash the berries to release the juice then strain into a measuring jug, get all the juice out of the berries.
  3. Measure the juice and add enough sloe gin to bring the liquid up to 250ml.
  4. Once the cream mix is just simmering, remove from heat and stir in the blackberry mix.
  5. Pour into dessert glasses, leave to cool for 20mins then refrigerate for at least 2 hours.
  6.  To serve, simply dust with icing sugar and garnish with a few blackberries.

Rosemary shortbread:

  • 225g butter
  • 110g caster sugar
  • 225g plain flour
  • 110g cornflour
  • 1 tsp fresh finely chopped rosemary

Method:

  1.  Heat oven to 160C.
  2. Cream together butter and sugar.
  3. Sift in flours and add rosemary.
  4. Stir, then use hands to bring it together to resemble crumble mixture.
  5. Turn onto baking parchment. Knead a few times to form rough dough. Cover with another sheet of parchment and use a rolling pin to roll out a slab around 15mm thick.
  6. Cut into rounds with a cutter or whatever shape you prefer then refrigerate for 30mins.
  7. Bake for around 12-15 minutes. Keep a close eye on them as you don’t want them to burn.
  8. Remove from oven, sprinkle with caster sugar. Leave for 2 mins then transfer to a cooling rack.

Lemon drizzle gin cakes

IMG_6043

Excuse my appalling icing attempts in this post, I’ve always been utterly shit at icing, one day I’ll actually learn how to do it but until then you’ll just have to try look beyond the disastrous attempts at prettying cakes and bear with me

Gin and lemon, two happy bedfellows that sing about sunnier times and come as welcome relief in these cold winter days. These cakes are light and fluffy yet boozy and indulgent, what’s not to love?

You can hear me making these cakes by clicking here (you’ll need Iplayer as it’s a BBC clip). There’s no bad language so it’s perfectly safe to listen to in the kitchen whilst whipping up a batch of these tasty treats with the kids around.

IMG_6044

Lemon drizzle gin cakes:

Ingredients:

For the cake mixture:

  • 200g Stork
  • 200g caster sugar
  • 200g self raising flour
  • 3 large eggs
  • zest of 3 lemons
  • 90ml Sipsmith Lemon Drizzle Gin (or you could use a citrusy gin)

For the drizzle:

For the icing:

  • 1 x 500g tub ready made lemon frosting (yeah I totally cheated and got one from Morrisons)
  • Edible decorations such as fondant flowers and white chocolate stars.

Method:

  1. Heat oven to 170C (fan). Place 12 cupcake cases into a muffin tray
  2. Use an electric whisk to cream together the Stork and the sugar until it’s light and fluffy.
  3. Add flour, eggs and zest and beat together.
  4. Gradually beat in the gin.
  5. Fill the cases around two thirds full, use all the mixture
  6. Bake for 12 minutes or until the cakes pass the skewer test.
  7. Make the drizzle by combining the ingredients in a pan, heat over a medium heat until the sugar has dissolved, bring to the boil and boil for 30 seconds them carefully remove the juniper berries.
  8. Prick the cakes all over the top with a pointed chopstick or skewer then carefully pour all of the syrup over them, leave to cool completely.
  9. Put the frosting in a piping bag, pipe all over the tops of the cakes (try and do a much better job that I did!) then decorate as you please.

IMG_6045


Black Forest chocolate brownies

Gooey, fudgy awesome.

Gooey, fudgy, awesome.

So yesterday was my first day back doing BBC Radio Leicester’s Food Friday show with Ben Jackson since my knee operation last month. I’m still wobbly and having to use a crutch or two but by far the most agonising thing has been not being able to stand up to cook. It still hurts but my body feels completely out of kilter and my mind suffers if I can’t spend at least a small amount of time each day creating stuff in my kitchen.

One of the positives of being on crutches is that I’ve had to get a cleaner to come and help me around the house, she’s all kinds of ace and as it turns out an awesome cake maker who was telling me about a Black Forest cheesecake she made recently, a lightbulb flashed on in my mind and these rather kickass fudgy brownies were created.

You can hear me making this, it’s only 11 minutes long, by clicking on this link where you will also find the recipe. We always have a blast in my kitchen and yesterday was no different, although he did edit out my “only special people get to drink out of Lady Diana’s cup” line….

What I also forgot about was the “surprise” that I mentioned in the clip, this is simply to swap the cherries for Cadburys mini eggs, perfect for Easter 🙂

Black Forest Chocolate Brownies (makes 12)

  • 300g unsalted butter, cubed
  • 250g dark chocolate broken into small pieces
  • 1 handful dried cherries
  • 2 handfuls walnut pieces
  • 1 capful vanilla extract
  • Pinch sea salt flakes
  • 80g plain flour
  • 360g caster sugar
  • 80g cocoa powder
  • 1 teaspoon baking powder
  • 4 eggs, lightly beaten
  • 1 x 400g can dark cherries in syrup, drained

For the glaze: (optional not essential)

  • 2 heaped spoonfuls morello cherry jam
  • 50ml kirsch or other alcohol such as dark rum

For the topping:

  • 300ml whipping cream
  • 3 heaped tablespoons mascarpone
  • 1 teaspoon cocoa
Method:

  1. Heat oven to 180C. Put the butter and chocolate in a bowl set over simmering water and melt until silky and thoroughly combined then add the dried cherries and nuts.
  2. Combine the flour, cocoa, sugar and baking powder in a separate bowl and stir to mix.
  3.  Add the flour mx to the melted chocolate and gently stir to combine then add the eggs and continue to mix gently with a spatula until it is all thoroughly combined.
  4.  Line a 25cm x 25cm baking tray with greased baking paper that overhangs by a few cm to make it easy to remove the brownie later, and pour in the brownie mix, scatter over half of the cherries and push them into the mix.
  5. Bake for 25-30 minutes (it will be quite wobbly, it will harden on cooling) then remove from oven and leave to cool completely in the baking tray.
  6. Put the glaze ingredients in a small saucepan and cook over a medium heat for 4 minutes. Brush over the cold brownie.
  7. Remove the brownie from the tin.
  8. Beat the whipping cream until firm then ad the mascarpone and mix well, put it in a piping bag and pipe over the top of the brownie to cover. Decorate with the remaining cherries and a dusting of coca.


Quick Chocolate Orange Brioche

chocolate orange brioche-1-2

Chocolate orange brioche has been my baking Everest. A few weeks ago I was asked to make a selection of pastries for Lord Hall, the Director General of the BBC, err.. hell yeah I’m going to do that! But what on earth was I going to make him?

I was working away for the week running up to the big day and only returned two days before it was all happening and I STILL wasn’t sure what I was going to make him. Then it all just popped into my head on the drive back to my cottage, he was going to be presented with Chocolate Chip Pecan Cinnamon Swirls (kickass), Banana and Bacon Mini Muffins (AWESOME) and…mini Chocolate Orange Brioche: basically food clouds of total JOY.

chocolate orange mini brioche

My lovely friend Amanda very kindly lent me her Kitchen Aid and I found a plain brioche recipe and away I went. I’m not used to using a food mixer, I always create my recipes using sight, taste and touch and a mixer removes the touch element of the dough so I put blind faith in the recipe I’d found. It didn’t work. I tried another recipe, that didn’t work either so I decided to go back to instinct and just make up my own quantities and hey presto, perfect brioche! I then tried my version a second time so I could write down quantities and made the loaf at the top of this post, perfect result so I feel I can now happily pass on my recipe. This is a fast brioche recipe, only let it prove for a maximum of 2 hours each time but it does mean you can have lovely brioche is super quick time.

Chocolate orange mini brioche (makes 24 muffin sized brioche)

  • 10g fast action dried yeast
  • 80 ml warm whole milk
  • 450g plain flour
  • 1 teaspoon fine sea salt
  • 5 duck eggs, beaten
  • 1 teaspoon vanilla paste
  • 2 capfuls orange blossom water
  • finely grated zest of 1 orange
  • 50g caster sugar
  • 300g butter, softened and cubed
  • 150g dark chocolate chips
  • 1 beaten egg to glaze
  • finely grated zest of one more orange to sprinkle once baked
  1. Stir the yeast into the warm milk and set aside for 1 minute.
  2. In the bowl of an electric mixer combine the flour and salt then add the eggs and yeasted milk.
  3. Fit the dough hook to the mixer and start mixing very slowly for about 5 minutes then scrape all the dough down the sides and mix again at a medium speed for 10 minutes. It may look a bit like cake mixture rather than dough at this stage.
  4. Add the vanilla, orange blossom water and zest and sugar and mix for a further 5 minutes.
  5. Whilst the mixer is still kneading add the softened butter cube by cube, very slowly, waiting for the butter to be thoroughly mixed in, once all the butter is in the mix increase the speed of the mixer to fast for about 7 minutes, the dough will make spider web patterns on the bowl as the gluten is all stretchy.
  6. Add most of the chocolate chips as the mixer runs and stop once they are all mixed in.
  7. Scrape the dough into a large bowl that has been lightly oiled (it will seem very wet compared to a bread dough). Cover with cling film and leave to rise in a warm place for about 2 hours or until doubled in size.
  8. Prepare your muffin tin. I prefer not to use muffin cases for this but to cut squares of baking parchment and press them into the muffin holes to make cases.
  9. Once the dough has risen cut half of it out of the bowl and put onto a lightly floured work surface. It will be very light and fluffy, carefully push most of the air out, lightly flour the dough to make it easier to work with, roll it into a sausage (about 30cm x 8cm) and then use a sharp knife to cut rounds of dough. Put each round into a muffin case then cover very loosely with cling film and leave to rise again for about an hour.
  10. Preheat your oven to 200C. Brush each mini brioche with the beaten egg and sprinkle over more chocolate chips. Bake for 10 minutes  then reduce the temperature to 180C and bake for about 12-15 minutes or until the tops are golden brown. Remove from oven and zest the orange using a microplane over the brioche whilst still warm so the orange oils spray over the brioche as the zest falls. Allow to cool in the cases for 5 minutes before transferring to a wire rack. Repeat with the rest of the mixture.

If you want to make a large to make one batch of mini muffins and one large loaf then once you have divided the mixture into half lightly knock back the remaining half on a floured surface, sprinkle with extra flour to make it easier to work with then place into a lightly oiled loaf tin. Allow to rise covered in cling then bake at 200C for 10 minutes then 180C for about 45 minutes, if the top starts to brown too much simply cover with tin foil. If after 45 mins you remove it from the oven, let it sit for a few minutes for it to come away from the sides and gently lift the loaf out to check the base, if it needs more time simply pop it back in for a bit longer.

Lychee and Rose cakes & Poppy Bumface gets stuck up a tree

lychee rose cake

Well my posts have been pretty much non-existent as I’ve been away travelling around the UK doing lots of photo shoots recently but I’m back at Wyldelight Cottage and back in my lovely tiny kitchen. Anyone who follows me on Twitter or Instagram (hazelpatersonphoto) will be familiar with my cats, Boris and Poppy Bumface. Poppy Bumface is a very strange little creature, mostly antisocial and with a voice like a drunken docker she’s more Oscar the Grouch than lovable kitty. She’s also never been allowed out of the cottage, up until last Monday that is.

The hot weather has meant that the cottage windows have been open and the ever resourceful PBF had managed to climb up and out of the living room window to the wilds of Melton Mowbray. For a couple of days she came back obediently when called, checking in every 20 minutes or so to make sure the cottage hadn’t upped and left it’s little spot tucked away in the town, all was good. Then on Thursday lunchtime she didn’t come back when I called her. I called and called but no little bell could be heard, no squawking meow. I went round the front of the cottage and could hear her crying. It took me a while to figure out where it was coming from but there she was, up in the big lime tree that grows in the park next to my cottage, she was about 17ft up and she was stuck.

lime tree

I called, I rustled her biscuits, I put tuna at the bottom of the tree and she just wouldn’t budge, she just cried. Now PBF is afraid of being alone, she cries if someone leaves the cottage to pop to the shop and she doesn’t like loud noises. I kept popping out to call her and see if she had moved but nothing. I rang the RSPCA and was told she needed to be up there for at least 24 hours before they will investigate. It was getting dark, the wind was picking up, the tree began to rustle loudly and sway and Poppy Bumface went from crying to howling with fear, it really was awful. I went round to the park (at this point I’m now in my Pyjamas), I’m rattling her biscuits and talking to a tree, it wasn’t my most attractive moment, tears welling up in my eyes and obviously having just split up with my boyfriend that was the exact moment he called: “sorry I can’t talk now I’m being a crazy cat woman in the park” is basically how the conversation went…

I didn’t sleep, her terrified howls carried straight through my bedroom window, in the morning I went out to see her. She’d now moved higher up onto a branch, not just any branch though Poppy had found a nice comfy nest to bed down in and there was a rather angry wood pigeon that wanted it back. There really was no chance of her coming down of her own accord, she just kept going higher and higher.

I rang the RSPCA again, she’s only a kitten and hadn’t had any food or water for 24 hrs now and her little voice had gotten so quiet. I was told to carry on waiting. I decided to bake some cakes for whomever managed to rescue her.

Lychee, Almond and Rose cakes (makes 10)

  • 100g unsalted butter
  • 120g caster sugar
  • 1 tsp cream of tartar
  • seeds from 1 vanilla pod
  • 120g ground almonds
  • 120g self raising flour
  • 1 tsp baking powder
  • pinch salt (I use Halen Môn Vanilla sea salt)
  • 1 25g tin lychees, roughly chopped
  • 2 tblsp lychee juice

Lychee Rose Buttercream: (really approximate quantities as I just kept tinkering unit it was right)

  • 200g homemade butter (from Maria at Melton Cattle Market)
  • about 2 mugfuls of vanilla icing sugar
  • 2 capfuls rose water
  • 2 tablespoons double cream
  • 1 capful natural red food colour
  • 1 tablespoon lychee juice

To decorate: edible glitter, gold shimmer spray, edible flowers.

Method:

  1. Put the butter in a mug and microwave it for 30 seconds then leave to cool. In a big bowl combine the eggs and caster sugar and using an electric whisk beat until very light and getting quite firm (about 4 minutes on high power) then stir in the cream of tartar and vanilla sees and beat for another 30 seconds.
  2. In another bowl combine the ground almonds, flour, baking powder and salt and mix well.
  3. Gently stir the cooled butter into the egg mixture being careful not to knock the air out then the butter, then carefully fold in the flour mixture then finally the chopped lychees.
  4. Divide the mixture between muffin cases in a tin and bake in an oven preheated to 180C for about 20 minutes or until skewer comes out clean when pushed through the centre. Allow to cool on a wire rack.
  5. Make the buttercream by beating the butter with an electric whisk until light and fluffy then gradually beat in the icing sugar, add the rose and lychee waters and food colouring and continue to beat and add icing sugar. Add a bit of double cream and keep beating until the mixture is smooth. If it splits just add more icing sugar and bit of cream and keep beating. When the cakes are completely cool splodge a decent amount of icing on top then decorate.

So the cakes were made and Poppy was still up in the tree, except now she was so high I could no longer see her, I could tell she had climbed higher than the cottage roof as her cry was no so quiet. The old lager boys in the park came over to investigate clutching their cans of super strength beer, they wanted to climb up to get her, oh dear this was all going to end quite badly. I stood with them for about 20 minutes saying it was going to be way too dangerous, they were pretty adamant though. They all know mybothr cat Boris as he goes over and hangs out with them on their bench, Boris knows everyone, he has a better social life than I do.

Now at about 23 hours and after another call to the RSPCA Inspector Keith Ellis arrived, I could have hugged him, the CAVALRY! We stood in the garden and tried to spot her, after about 10 minutes she appeared, she was SO HIGH up now, perhaps 40 – 50ft, well above the height of my chimney on the roof, she was now out on a branch. Inspector Ellis called the duty fire chief from Melton Mowbray fire and rescue to come and have a look.

Fire brigadeThe chief arrives, he can hear her but not see her, he calls the truck to come to the park and the boys get out. They can hear her but she is so high up they can’t see her, they go and get the thermal imaging camera…

fire brigade thermal imaging

Then, they spot her. The chief thinks she is too high up to reach but they get the ladder anyway.

melton firemen

It’s pretty rare they do this kind of thing so they were saying that its actually a really good training exercise for them, this made me feel much better.

fire crew rescue Poppy Bumface

As thunder started to rumble a fireman named Dex suits up into a climbing harness and the rescue mission is underway. One of the guys (bottom left picture) mentions to me that when they are called out to talk down someone sat on the edge of a roof they send a fireman that smokes up, apparently most jumpers are smokers and the act of sharing a cigarette bonds the pair together which helps talk them down. He jokes that they should adopt a cat that climbs up and talks down other cats from trees, a smoking cat preferably. Boris volunteers himself by heading over to their equipment and watching on…

boris and firemen

Boris in the centre of the picture supervises the rescue…

Dex comes down the ladder for the grabber then heads back up feeling pretty confident he can get her. It was actually incredibly sweet as I could hear him meowing at Poppy Bumface 🙂 Then I heard her bell and then very slowly Dex started to climb all the way back down clutching a very frightened kitten to his chest, I very nearly burst into tears.

Dex climbs down carrying Poppy Bumface

Dex climbs down carrying Poppy Bumface

And then after 24 hours stuck up a tree, little Poppy Bumface is down!

cat in tree, cat rescued by firemen, poppy bumface

Dex my absolute hero holding Poppy Bumface, RSPCA Inspector Keith Ellis on right

Hurray for Dex! Hurray for Keith, hurray for all the guys from Melton day shift Fire and Rescue, total stars!

2013-06-18_0009

So Poppy Bumface was rescued and the wonderful day shift from Melton Mowbray Fire and Rescue went off heroically with a tin full of the lychee rose cakes covered in edible glitter and flowers (and with 25% off a photo shoot if they wanted one for them and their families, although I’m totally up for taking pictures of semi naked firemen *if* thats what they really want!). Poor Inspector Ellis missed out on a cake though so I owe him one, everyone really was wonderful and yes Poppy Bumface is well and truly grounded for the foreseeable future….

Salted Caramel & Vanilla Panna Cotta “boiled eggs” for Easter

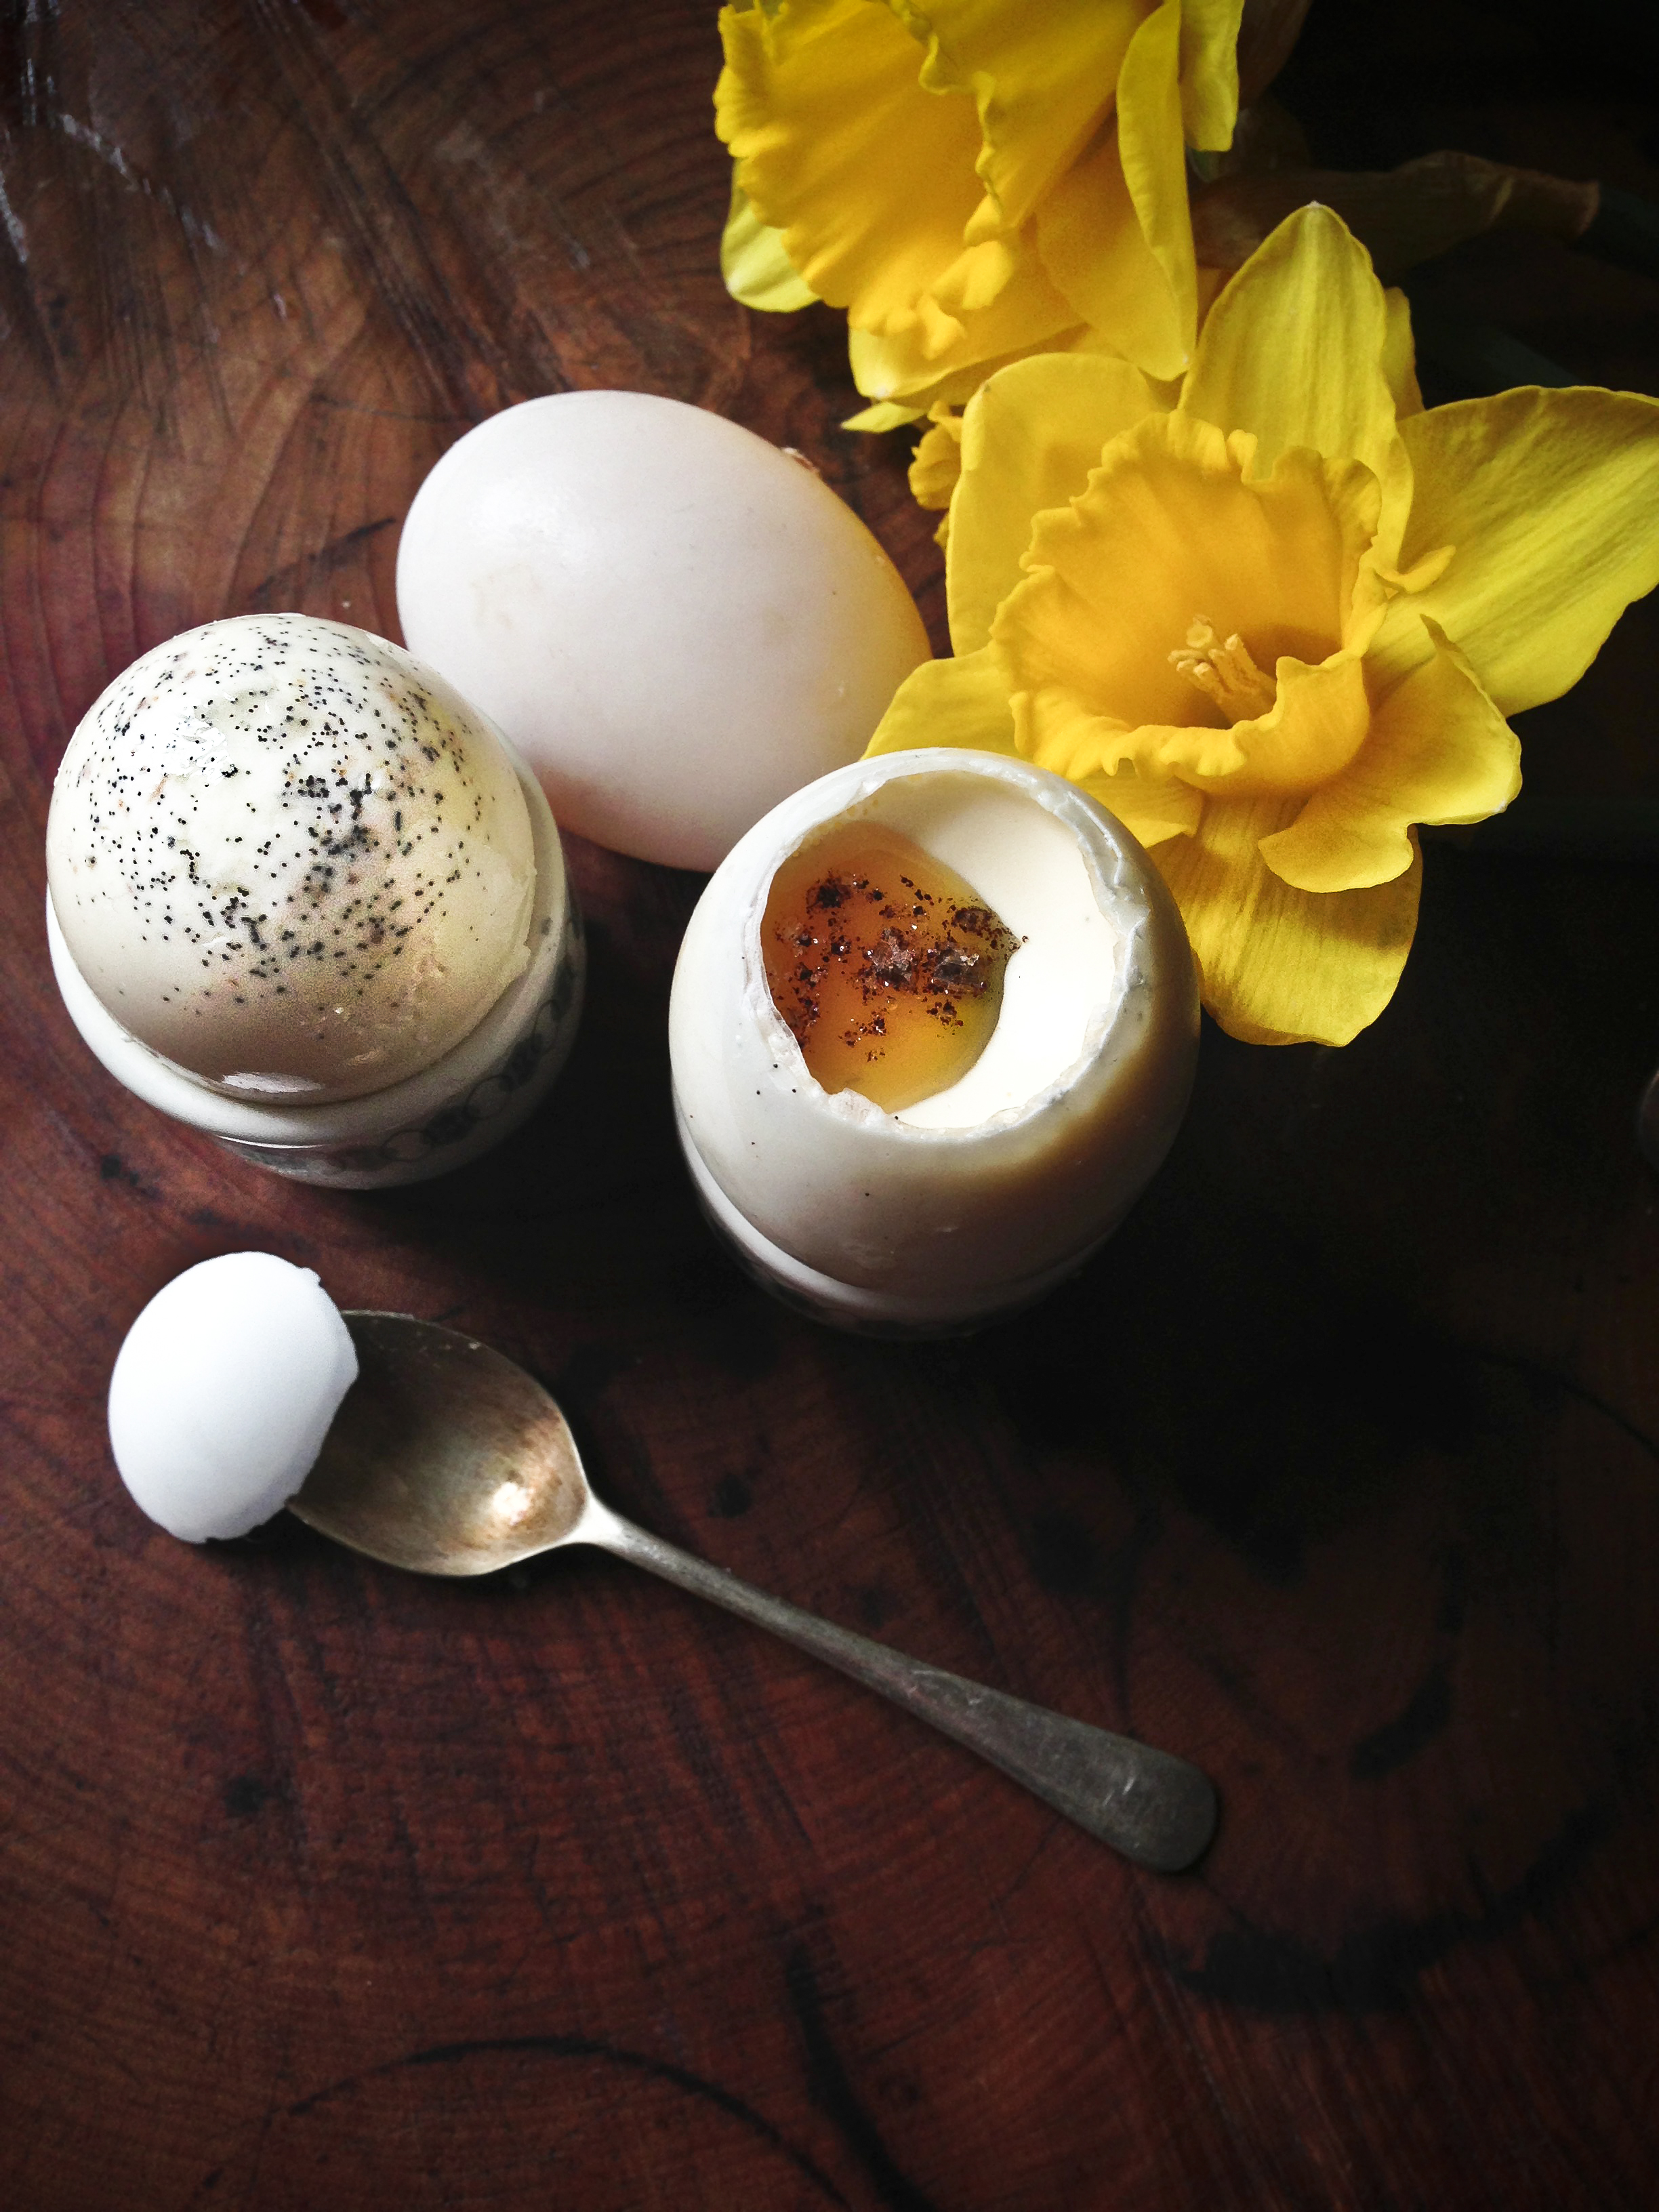
Easter panna cotta salted caramel egg-5

Happy Easter! I decided to try something a bit different this year that incorporated one of my all time favourite things: salted caramel. Panna cotta is one of the easiest desserts to make, the only tricky bit of this recipe is actually peeling the duck eggs.

I did a few different experiments ranging from the REALLY easy (simple moulded vanilla with salted caramel topping) to the slightly trickier panna cotta with hidden salted caramel  centre. We are very lucky here in Melton Mowbray to be able to get hold of fresh duck eggs very cheaply so I used those as the white shell looks fab. You can use any egg shell though, sadly my chicken doesn’t lay those very pretty pastel blue eggs otherwise I would have used those.

This recipe makes a nice big jar of salted caramel sauce that will keep nicely in your fridge for a couple of weeks, not that it will last that long as it’s highly addictive.

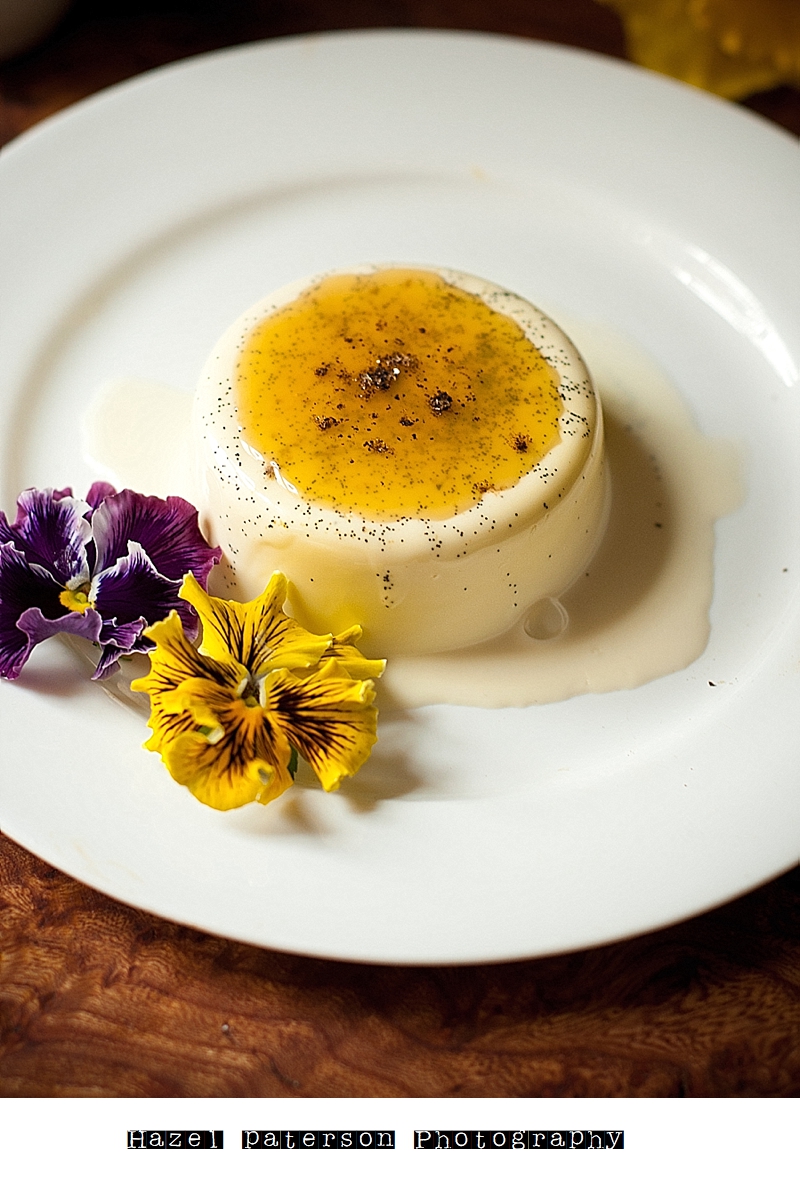
The easiest of the lot is to make a simple vanilla panna cotta:

vanilla and salted caramel panna cotta

Ingredients:

  • 350ml double cream
  • 250ml full fat milk
  • 100g sugar
  • 2 vanilla pods, split and seeds removed
  • 3 1/2 sheets gelatine (if making the “boiled eggs” use 4 1/2)

Salted Caramel Sauce:

Method:

  1. Pop the gelatine sheets in a bowl of cold water to soak. Put the cream, milk, sugar, vanilla seeds and pods into a saucepan and heat gently until it simmers then remove from heat.
  2. Squeeze any excess water from the gelatine sheets then stir them into the cream mixture until completely dissolved, remove the vanilla pods, pour into ramekins and put them in the fridge to set for about 2 hours whilst you make the caramel sauce.
  3. Put the butter, sugar and water into a saucepan over a low heat. It’s important that you don’t stir it, simply swirl the pan to mix everything and agitate it every now and again, it will start to bubble and get darker. After about 3 -4  minutes of bubbling very quickly whisk in the double cream and add the salt. Taste and add more salt if needed (If you want a darker caramel let it bubble longer before adding the cream).
  4. Once the panna cottas have set simply turn out onto a plate, top with a dollop of caramel sauce and a few more flakes of vanilla sea salt. If you are having trouble getting the panna cotta out of the ramekin just pop it in a bowl of boiling water for about 10 seconds to loosen the sides and turn out.

Easter panna cotta salted caramel egg-6

Now, if you wanted to make the ‘boiled eggs”:

  1. First you need to remove the tops from your duck eggs, this recipe makes about 12 eggs.
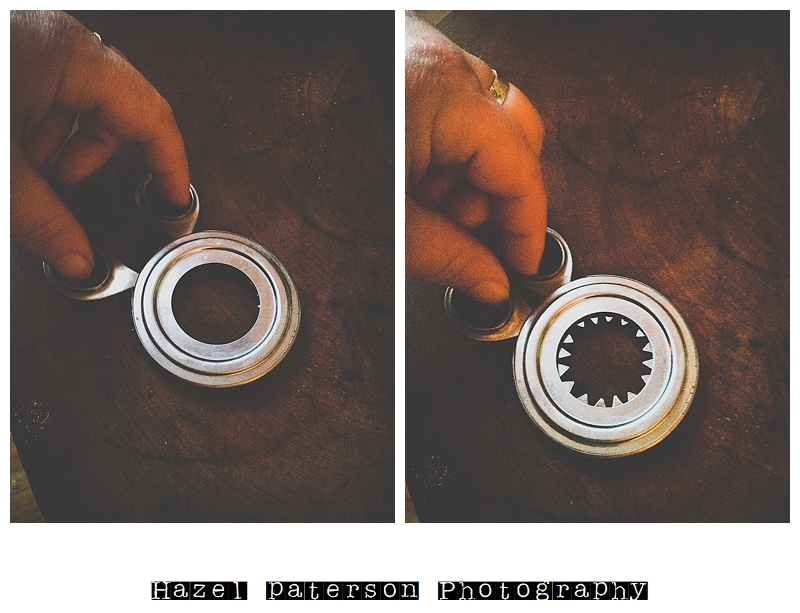
  2. egg cutters

    I picked this little gadget up for 99p and have FINALLY found a use for the bloody thing. It neatly nips the top of a raw egg.

  3. Pour out the raw egg into a bowl and put in the fridge to use for something else (I made kickass duck egg pasta).
  4. Make the caramel sauce and panna cotta mix as above using the extra gelatine sheet.
  5. Pour the panna cotta mixture into each egg (stand them in the egg tray to keep them nice and upright). *If you want a hidden yolk see note below.
  6. Place in the fridge to set then scoop out a small bowl in the centre of the panna cotta and fill with caramel sauce, sprinkle with more vanilla sea salt so it looks like salt and pepper

*OR  if you want a hidden yolk like the egg on the right in the above pic, carefully peel the shell away from the egg turn upside down so you get the vanilla seeds on the top, carefully slice the top off then scoop out a little bowl in the centre, fill with sauce and replace lid.

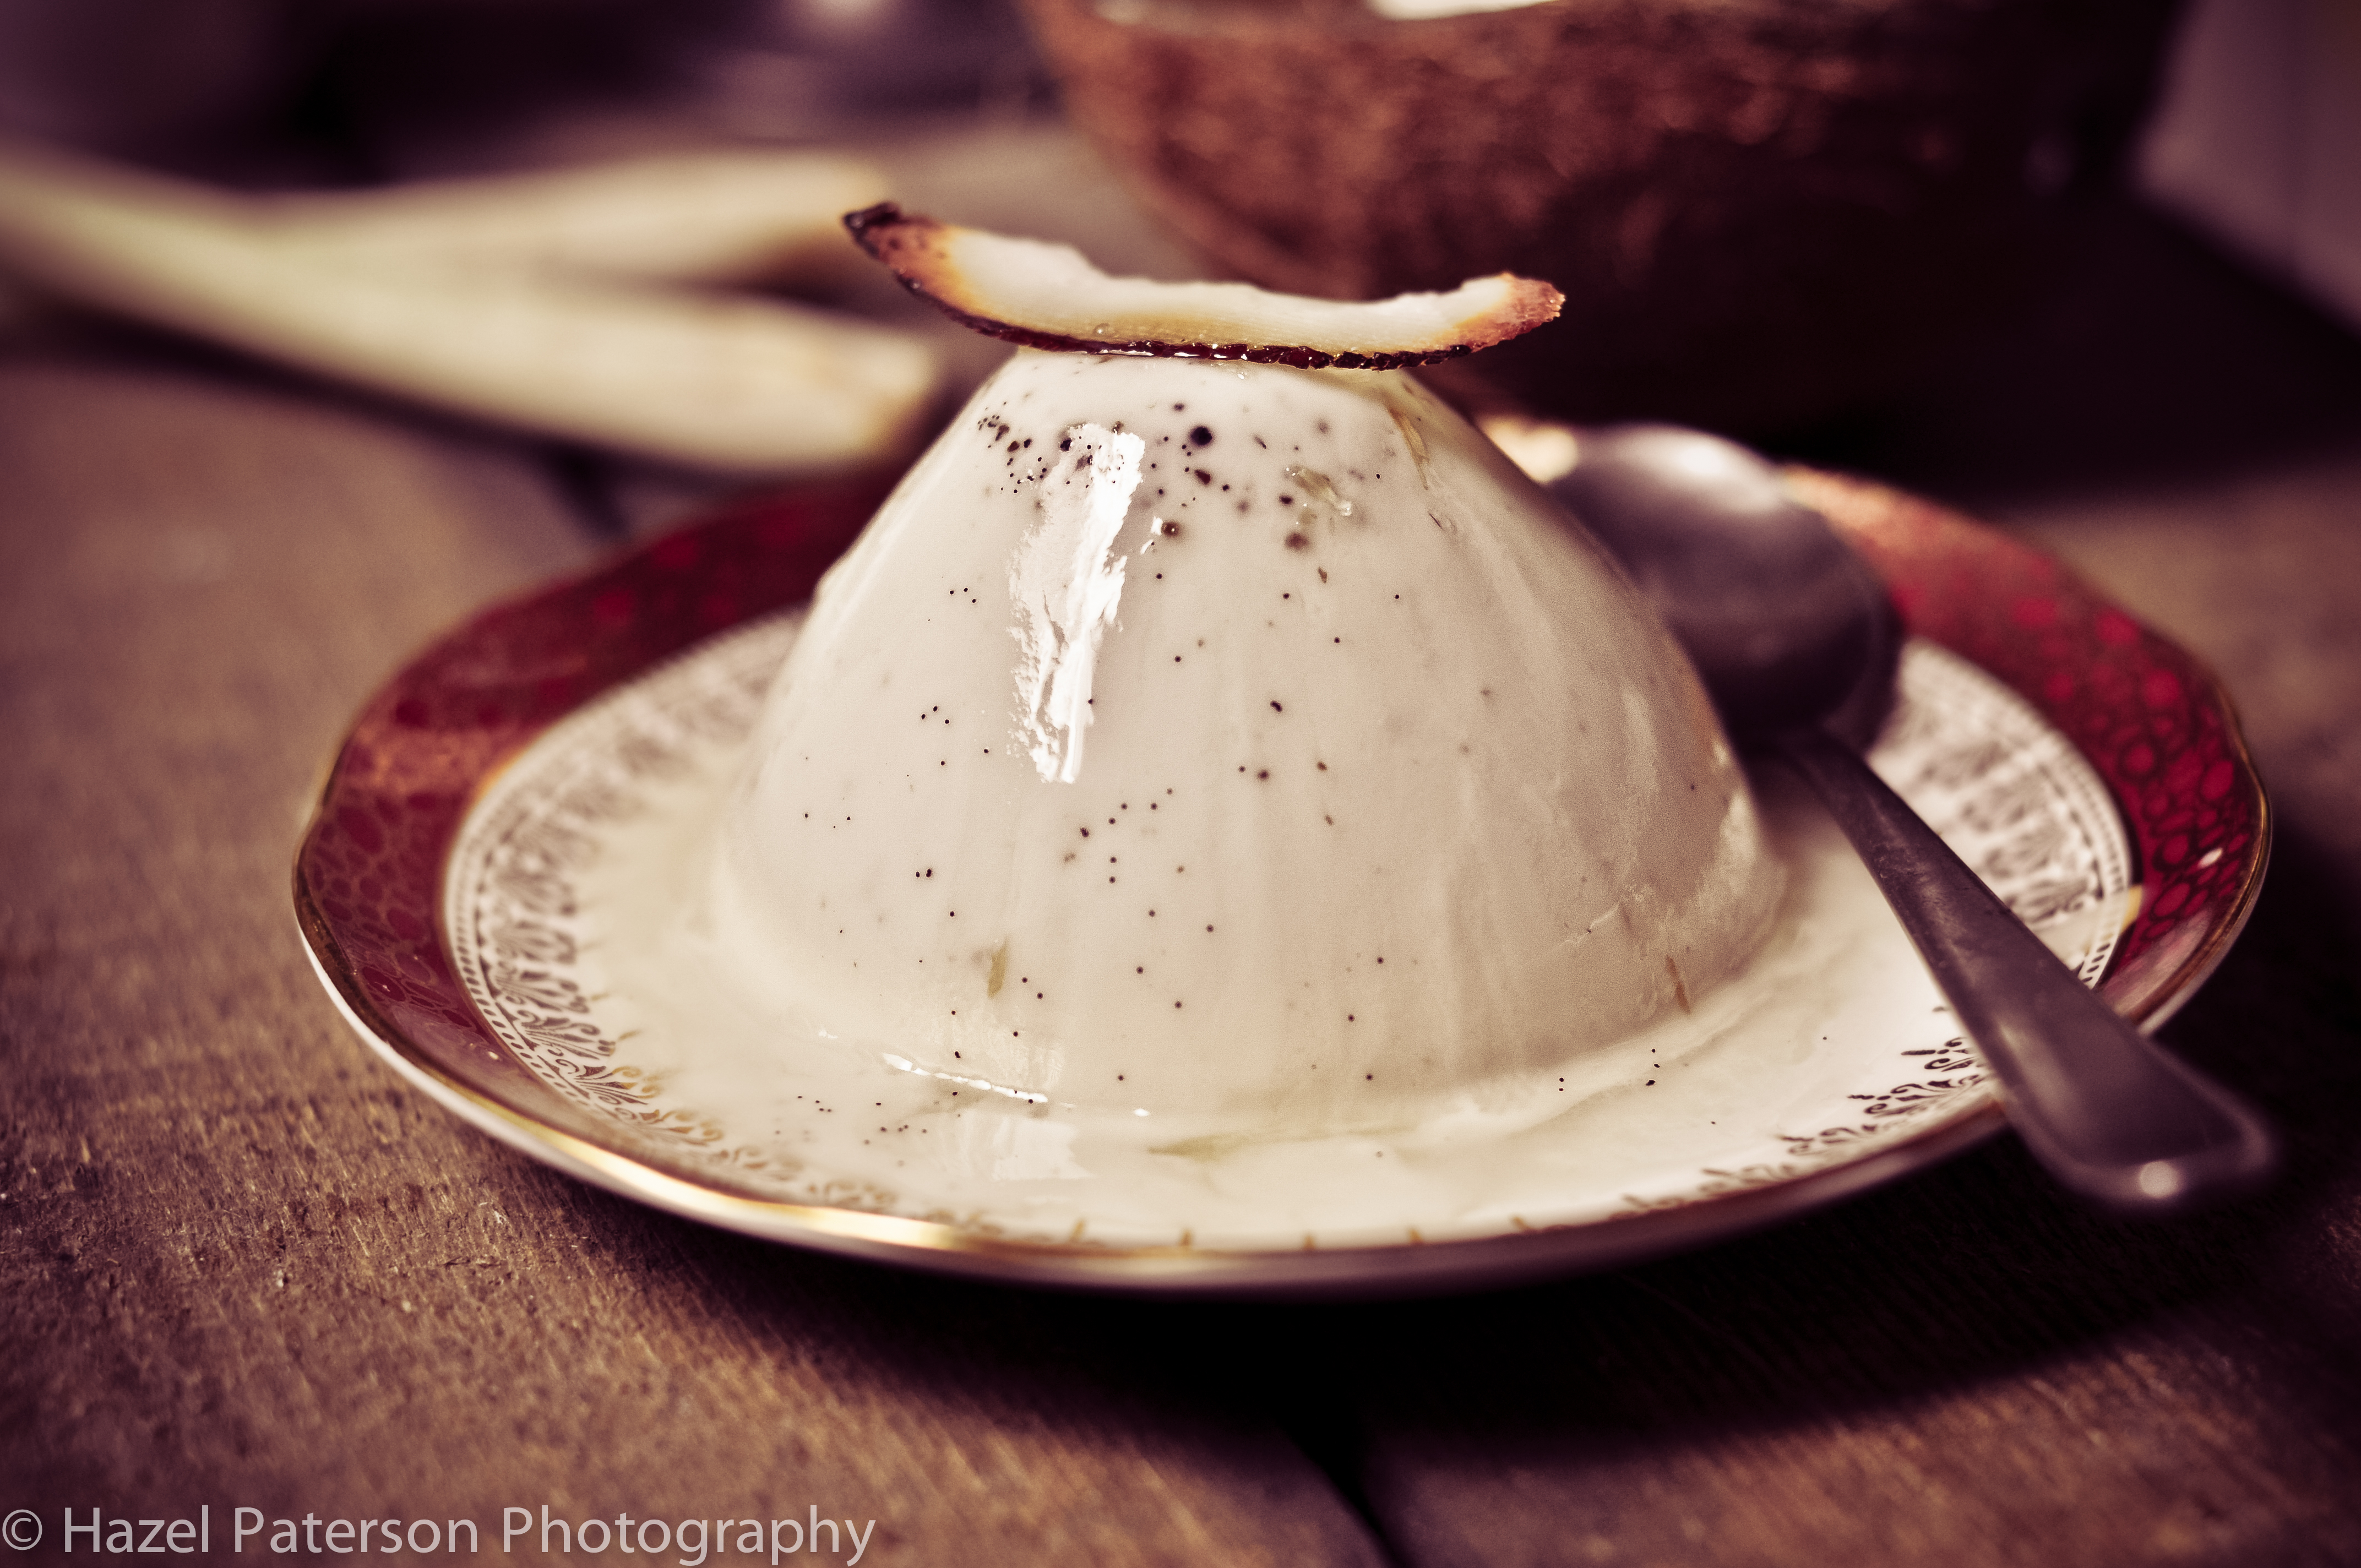
This also gives me an excuse to pop a clip of a panna cotta wobble I filmed when I made my coconut panna cotta for Domestic Sluttery last year:

Triple Chocolate Fudge War Cake

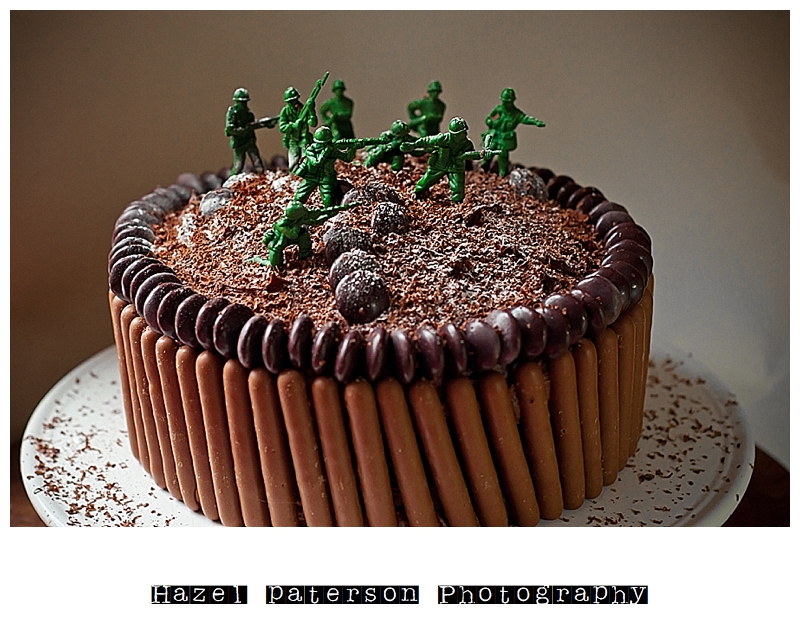
Yes, it's actually cake

Yes, it’s actually cake

Yesterday was Glen’s 40th birthday and as he has been dreading this for the last 10 years I decided to make him a rather special cake. Now I hate baking cakes and I REALLY hate baking sponge cakes, they are fickle things that don’t like to be fiddled with and the science behind getting them to rise and stay there often goes against all my natural “bit of this, dollop of that” instincts.

Cakes for people who hate baking have got to be pretty kickass in some way as an incentive to actually bake the bloody things. For me this is usually achieved by packing them full of booze and making them ridiculously easy to make, unfortunately I had no booze and all I had decoration wise in the pantry was some crystallised flowers and edible glitter, not exactly the butchest of decorations, so I popped out and bought a bag of toy soldiers instead, aces.

This cake wasn’t without its disasters though, the first one I accidentally made using plain flour instead of self raising so I ended up with an extra flat cake layer (see below pic) to stick on the top (bonus).See, nothing bad really happens when you screw up a recipe as long as the ingredients are nice, and cooked then it will be fine 🙂 . Halfway through baking I also realised I had no icing sugar for the fudge topping so whizzed up my own by sticking some vanilla pod caster sugar in my trusty coffee grinder- forget regular icing sugar, this is the way forward. Now vanilla pod icing sugar does have a brown “heroin-y” tint to it thanks to the dark sticky vanilla seeds and it’s probably just as addictive (not really, and I don’t advise substititing smack for icing sugar either).

I posted the recipe for my Triple Chocolate Fudge Cake over on DomesticSluttery.com, it’s dead simple so you can have lots of fun with the decorating 🙂

triple chocolate fudge cake

Follow the recipe on Domestic Sluttery to get the cake to this stage then get all creative…

I picked up a bag of toy soldiers from Co-op for 50p, they have little plastic bases that just needed a camouflage smear of fudge icing before being positioned, a few more Minstrels served as rocks…


triple chocolate fudge cake soldiers 3

Then I gradually built the terrain with freshly grated Willies solid cacao bar as soil/leaves…And then a dusting of the vanilla icing for snow…

triple chocolate fudge cake 5


My mind created entire scenarios and personalities for them  by the time the cake was finished…

chocolate fudge cake2


I may have gotten as little carried away with my iPhone…

Defend the CAKE!!!

Defend the CAKE!!!

So there you go, ways to make cake making more fun…cover them in still life scenes.

Beetroot, Chocolate and Cardamom Brownies

squidgy, fudgy brownies that count towards your 5 a day…

Oh brownies how I love you and your squidgy, gooey wonderment. Yesterday I headed into the BBC Radio Leicester studio to see presenter Ben Jackson with whom I do the Food friday radio cooking sessions with and gardening guru, chilli head and all round ace guy Ady Dayman. I decided to bake them something using goodies from my tiny garden and despite managing to set fire to the baking parchment TWICE during cooking the brownies turned out pretty damn awesome.

Ben and Ady enjoying the brownies during the phone in…

I managed to get to the studio whilst they were still warm and joined Ben and Ady for the Gardening phone-in, you can listen to us giving seasonal gardening and food tips by clicking here. It was a fab afternoon and the brownies went down a storm, even with Ben’s producer Nam who is somewhat vegetable averse! That’s the secret to people who don’t like vegetables, cover them in CHOCOLATE 🙂

They are really easy to make too:

Ingredients:

I use a mug to measure everything out in, my mug holds 350ml water.

  • 4 eggs
  • 1 mug caster sugar
  • 1 heaped teaspoon cardamom powder (or 8 crushed cardamom seed pods)
  • 1/2 mug  good rapeseed oil (or olive oil would be nice also)
  • 1 capful good vanilla extract
  • 2 beetroot (about tennis ball size)
  • 1 mug plain flour
  • 3/4 mug cocoa powder
  • pinch salt
Method:
  1. Preheat your oven to 180C. Put some gloves on or you will get very purple hands from handling the beetroot. Peel the raw beetroot, chop roughly and put into a food processor until chopped finely. If you don’t have a processor just grate the beetroot.
  2.  In a large bowl whisk the eggs, sugar and cardamom powder until quite creamy (I use an electric whisk but a hand whisk will be fine) then whilst still whisking pour in your oil in a steady stream.
  3.  Tip in your beetroot and stir in until fully mixed together.
  4. Sift in your flour, salt and cocoa and fold into the mixture completely.
  5.  Line and grease a 20cmX30cm tin, pour in your brownie mix and bake for about 25-35 minutes or until you can insert a skewer into the centre and just a few crumbs are stuck to it.  Leave to cool for at least 10 minutes before eating if you can manage to resist, sprinkle with a dusting of icing sugar and serve warm with some good vanilla ice cream.
If you find that your brownies are still too squidgy for you just pop them back in the oven for a little bit longer.

Smoked Rum and Ginger Cheesecake for the Domestic Sluttery Pudding Club

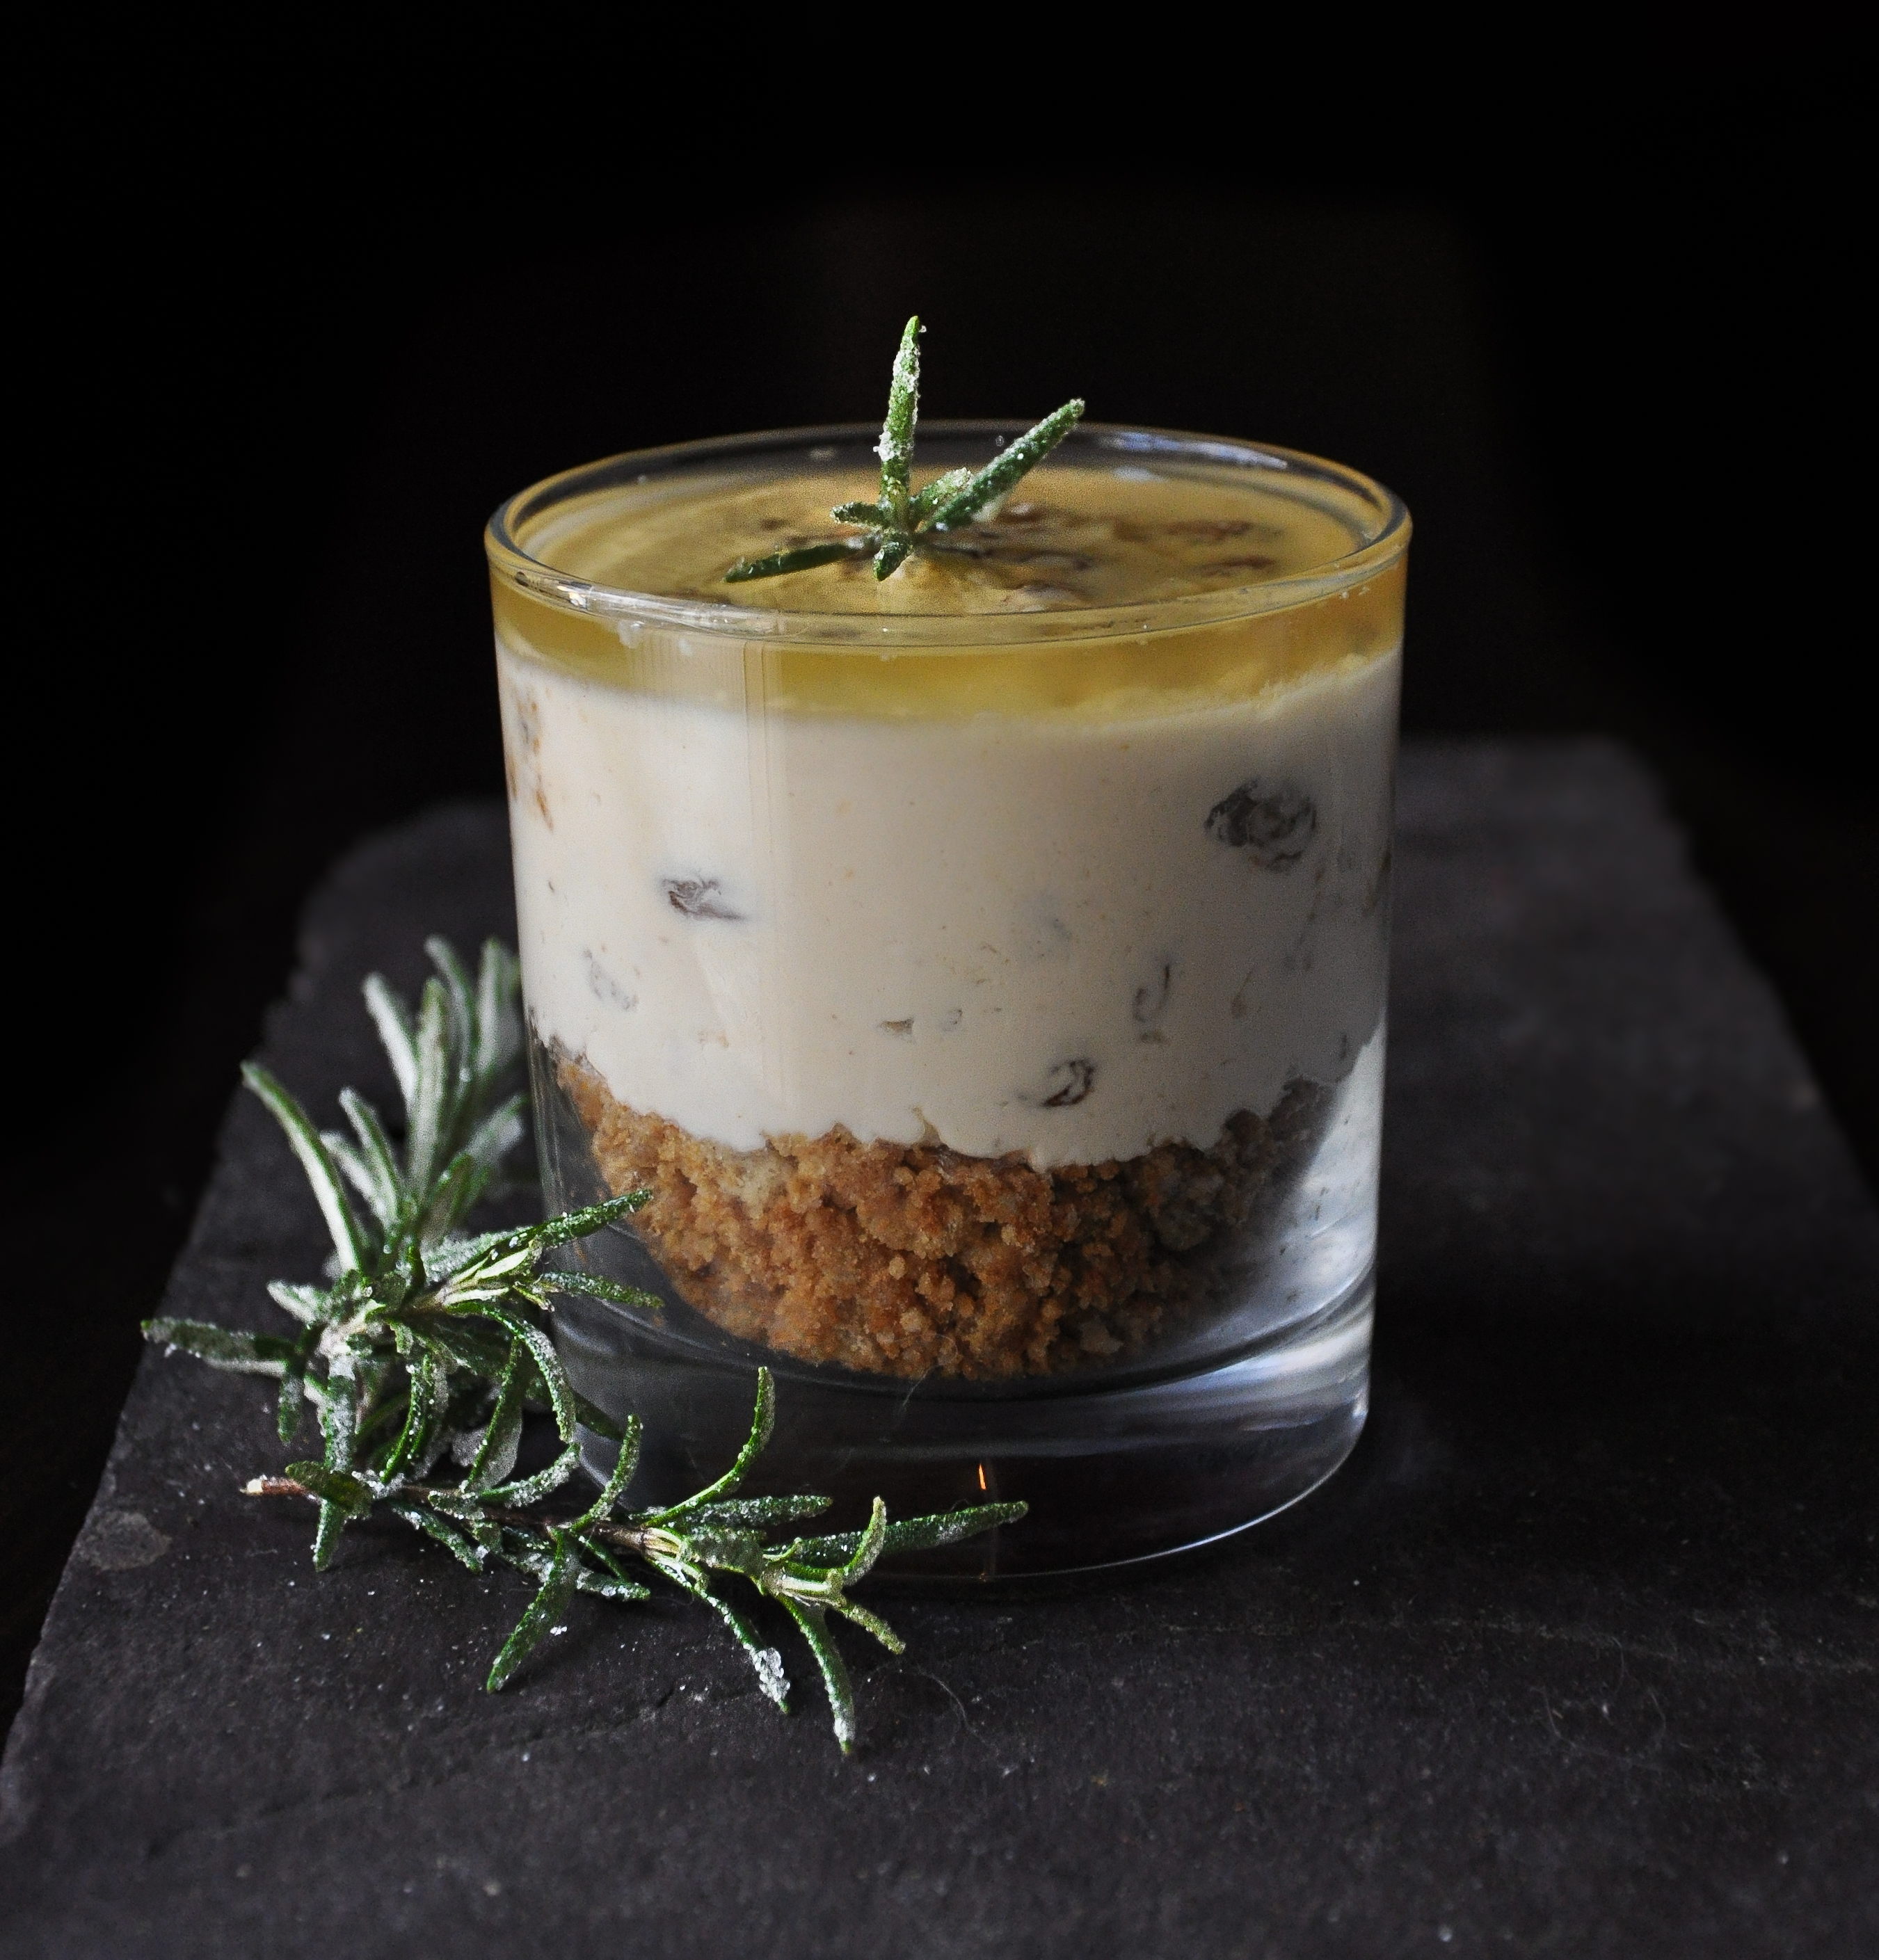
This month’s Domestic Sluttery Pudding Club is all about cheesecake (last month was chocolate and I made Sex Pots), my favourite pudding of all! This cheesecake takes a bit of prep in as much as you will need to get things infusing for few days before you make them but that takes pretty much zero effort and once done you can knock this together in minutes, PLUS you get the most incredible smoked rum to use in cocktails 🙂

This recipe uses a fresh unpasturised sheep’s curd made by Homewood Cheese, it’s wonderfully fresh and creamy and therefore perfect for this recipe.  If you can’t get hold of ewe’s curd however you could use ricotta instead.

 To make the smoked tea rum: (5 days before dessert required)

  • 250ml golden rum
  • 12 strands good quality Lapsang Souchong tea

Simply pop the strands into the rum and leave to infuse for a minimum of 2 days. I’ve said use 250ml rum as it keeps forever and just gets better with time so it’s there for the next time, it’s also amazing in cocktails!

Ingredients:

  •  100ml Smoked Tea Rum
  • 50g sultanas (go for the jumbo ones)
  • 100g stem ginger biscuits
  • 30g unsalted butter (melted)
  • 150ml whipping cream
  • 150g fresh sheep’s curd
  • 1 jar stem ginger in syrup
  • 1 big sprig fresh rosemary

Crystallised rosemary (optional)

  • 3 sprigs fresh rosemary
  • 1 egg white
  • fine white caster sugar

 3 days before you need you dessert:

  1.  Place your sultanas in a cup and pour over the smoked tea rum making sure all the sultanas are covered.  Cover the cup with cling film and leave to infuse for 3 days.  This may seem a long time but after 3 days the sultanas will be so plump that they pop when you bite into them releasing a burst of flavour.
  2. Take a clean sprig of rosemary and push it into the centre of your jar of stem ginger and syrup in order to infuse.

The day before:

  1. Dip the remaining sprigs of rosemary into the egg white, then using a small sieve (a tea strainer is perfect) gently dust the rosemary with the caster sugar, coating evenly but lightly. Lay the sprigs gently on a baking sheet and leave overnight in an airing cupboard in order for it to crystallise.

On the day:

  1.  Crush the stem ginger biscuits and add the melted butter.  Stir to combine then divide the mixture between 4 glasses and push down gently to even off using the back of a spoon. Pop into the fridge to set whilst you make the next layer.
  2. Whip your cream until it will happily stay stuck to a spoon when held upside down. Stir in in the sheep’s curd and make sure it is evenly mixed then stir in the sultanas and rum. Take your glasses out of the fridge and divide the mixture between them carefully pushing the cream down onto the biscuit base to avoid air gaps and leaving room at the top for a layer of rosemary ginger syrup.
  3. Pour over the syrup then top each dessert with a small sprig of rosemary.  The beauty of making these in glasses is that as your spoon travels through the layers you pick up all the flavours, and its a lot less faff than using dessert rings!

Pudding Club and Chocolate Sex Pots

Booze, caramel, cream, chocolate, yeah it doesn’t get much better than that

Have you heard about Pudding Club yet? You haven’t? Well then where the hell have you been? Pudding Club ROCKS. Pudding Club was created by the awesome Domestic Sluts because quite frankly, there is a big pudding club shaped hole in our lives that needed to be filled (with mountains of pudding obviously). Can you tell I’m feeling the love for pudding right now?

You look like you need more pudding in your life too so I highly advise you get involved. Its dead simple too! Here are their guidelines for Pudding Club: (from DomesticSluttery.com)

  • Each month, we’ll announce a different pudding theme and we’ll share an awesome pudding recipe with you.
  • If you want to get involved, you make your pudding and blog the recipe and photos, linking back to us  and mentioning the pudding club.
  • You can either email us to tell us about your recipe, leave us a link in the comments on this post or use the Twitter hashtag #SlutteryPuddingClub so we can find it (we may miss them on Facebook). We’ll try any retweet any mentions throughout the month so people can see what you’re up to.
  • On the first Monday of every month, we’ll do a round up of all of your amazing recipes and link to them all so readers and other pudding club members can try them out for themselves

See it’s dead easy!

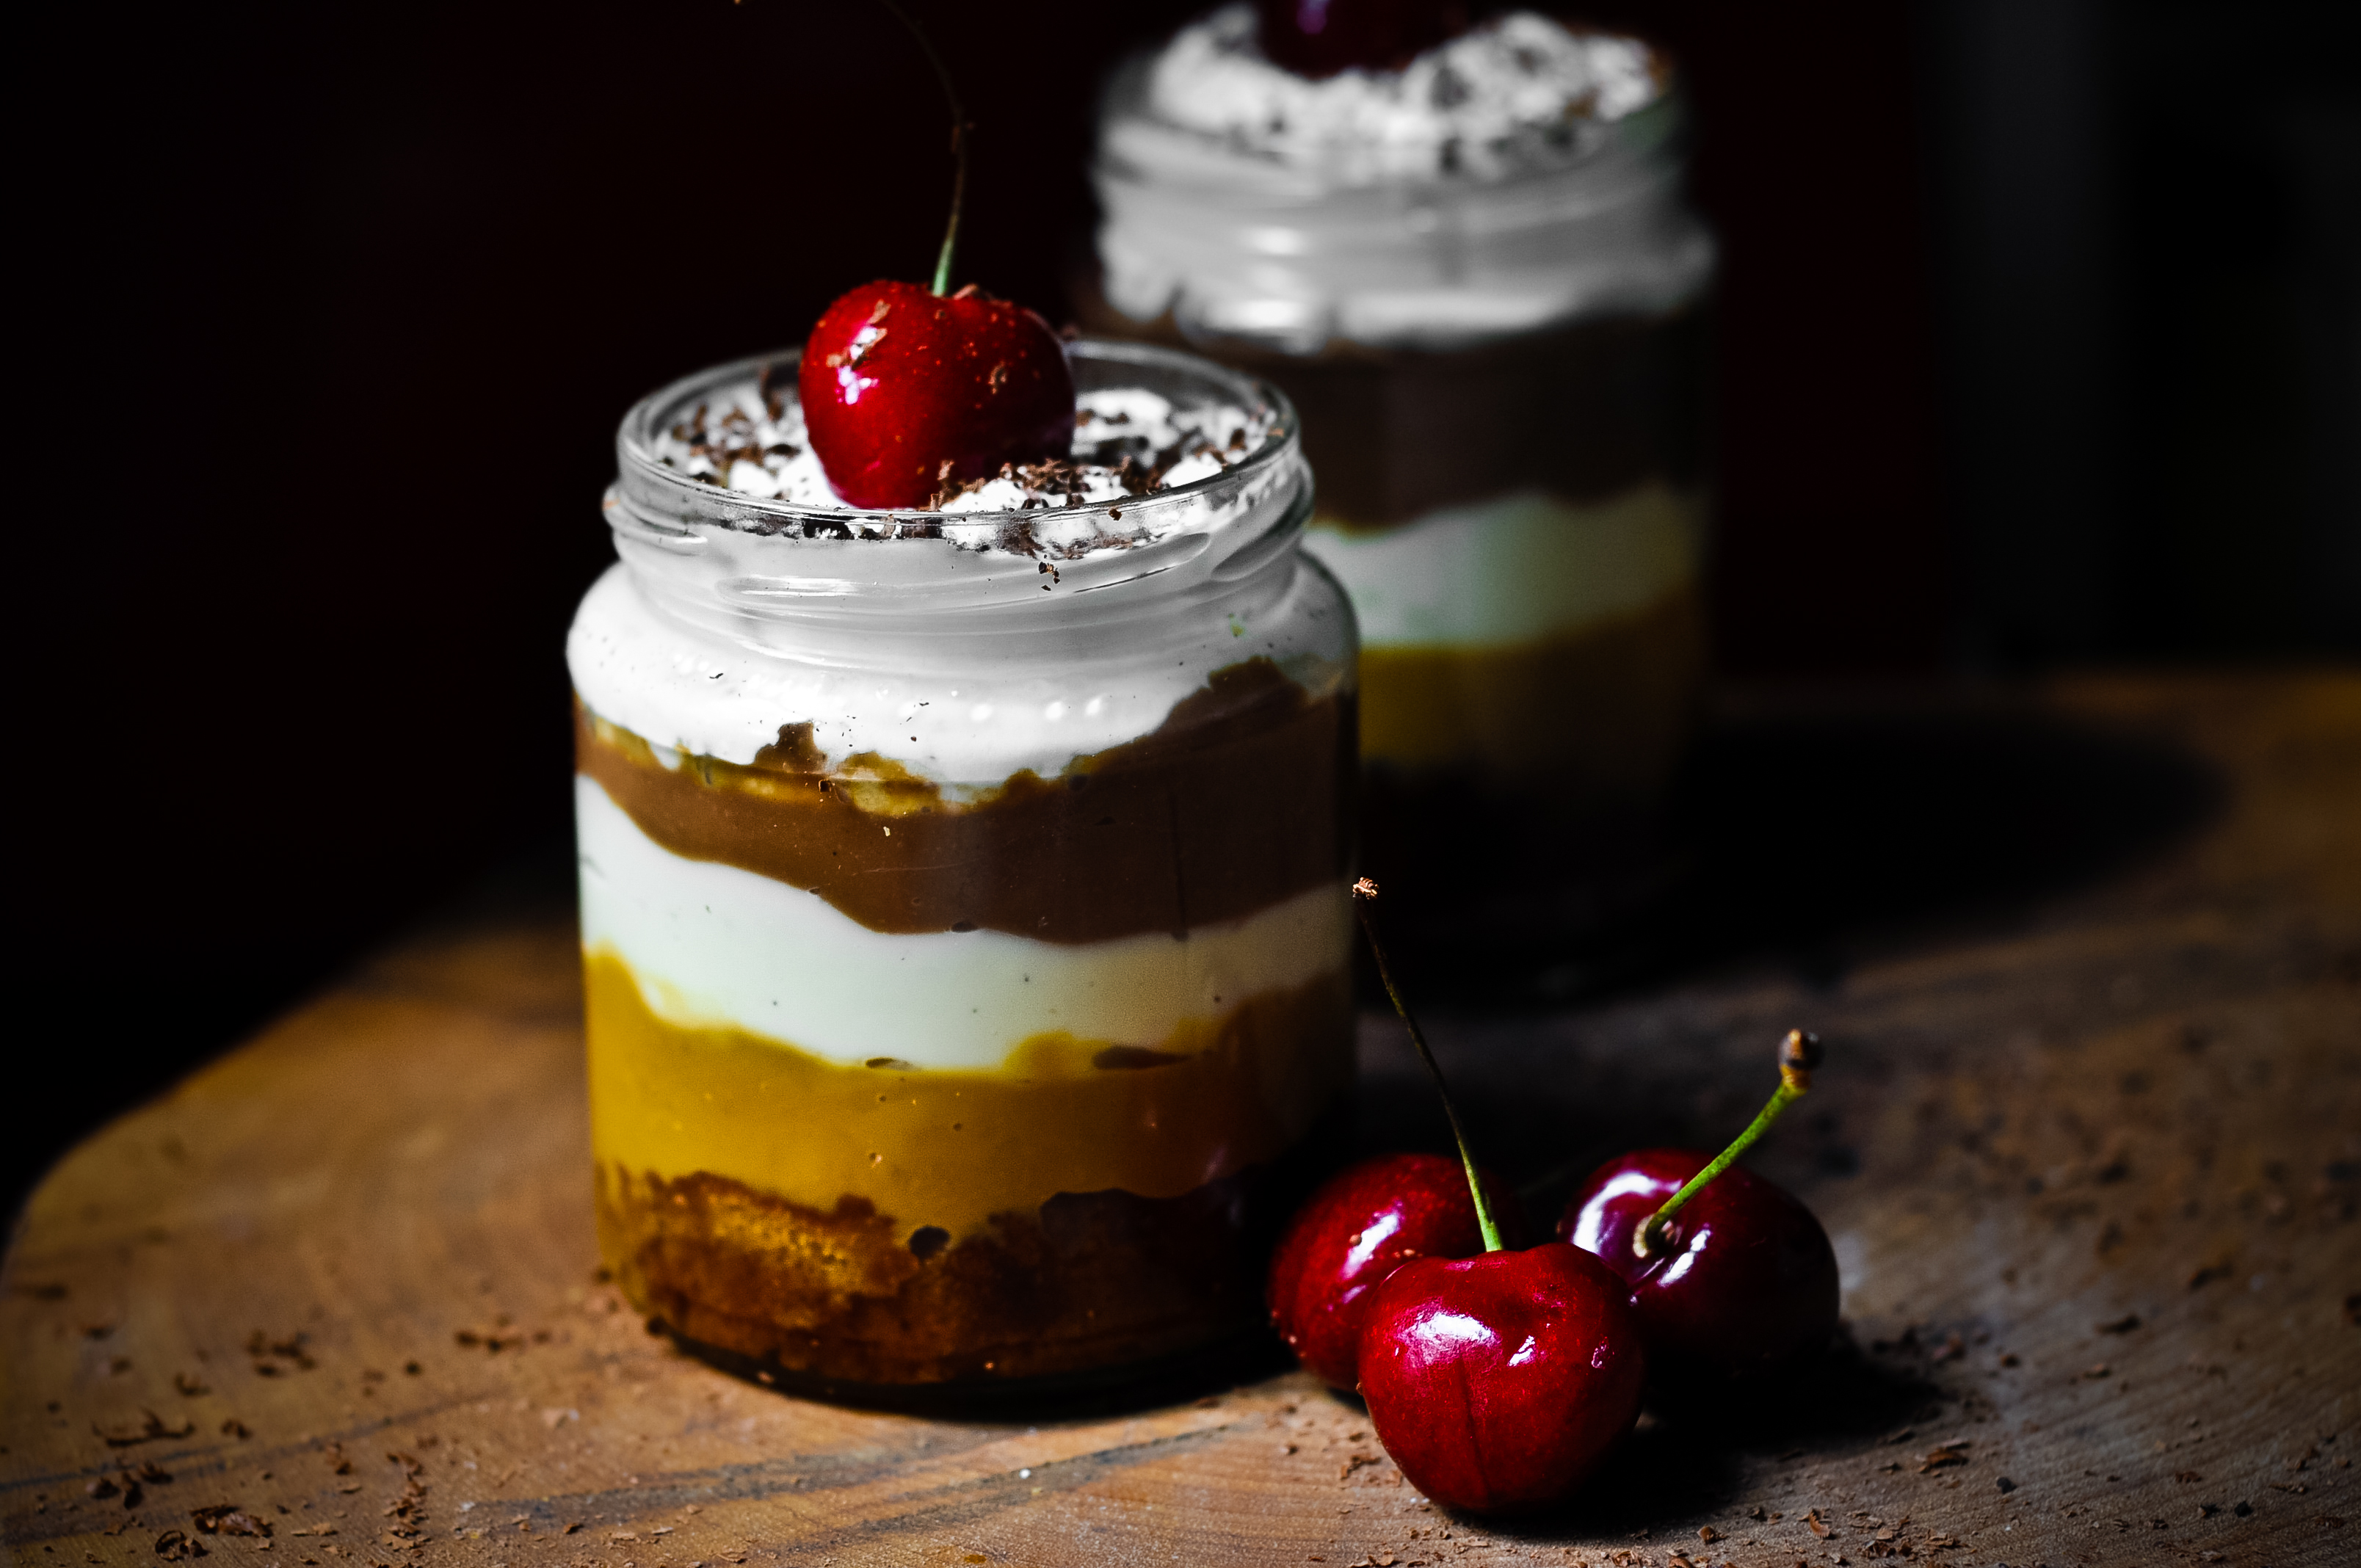
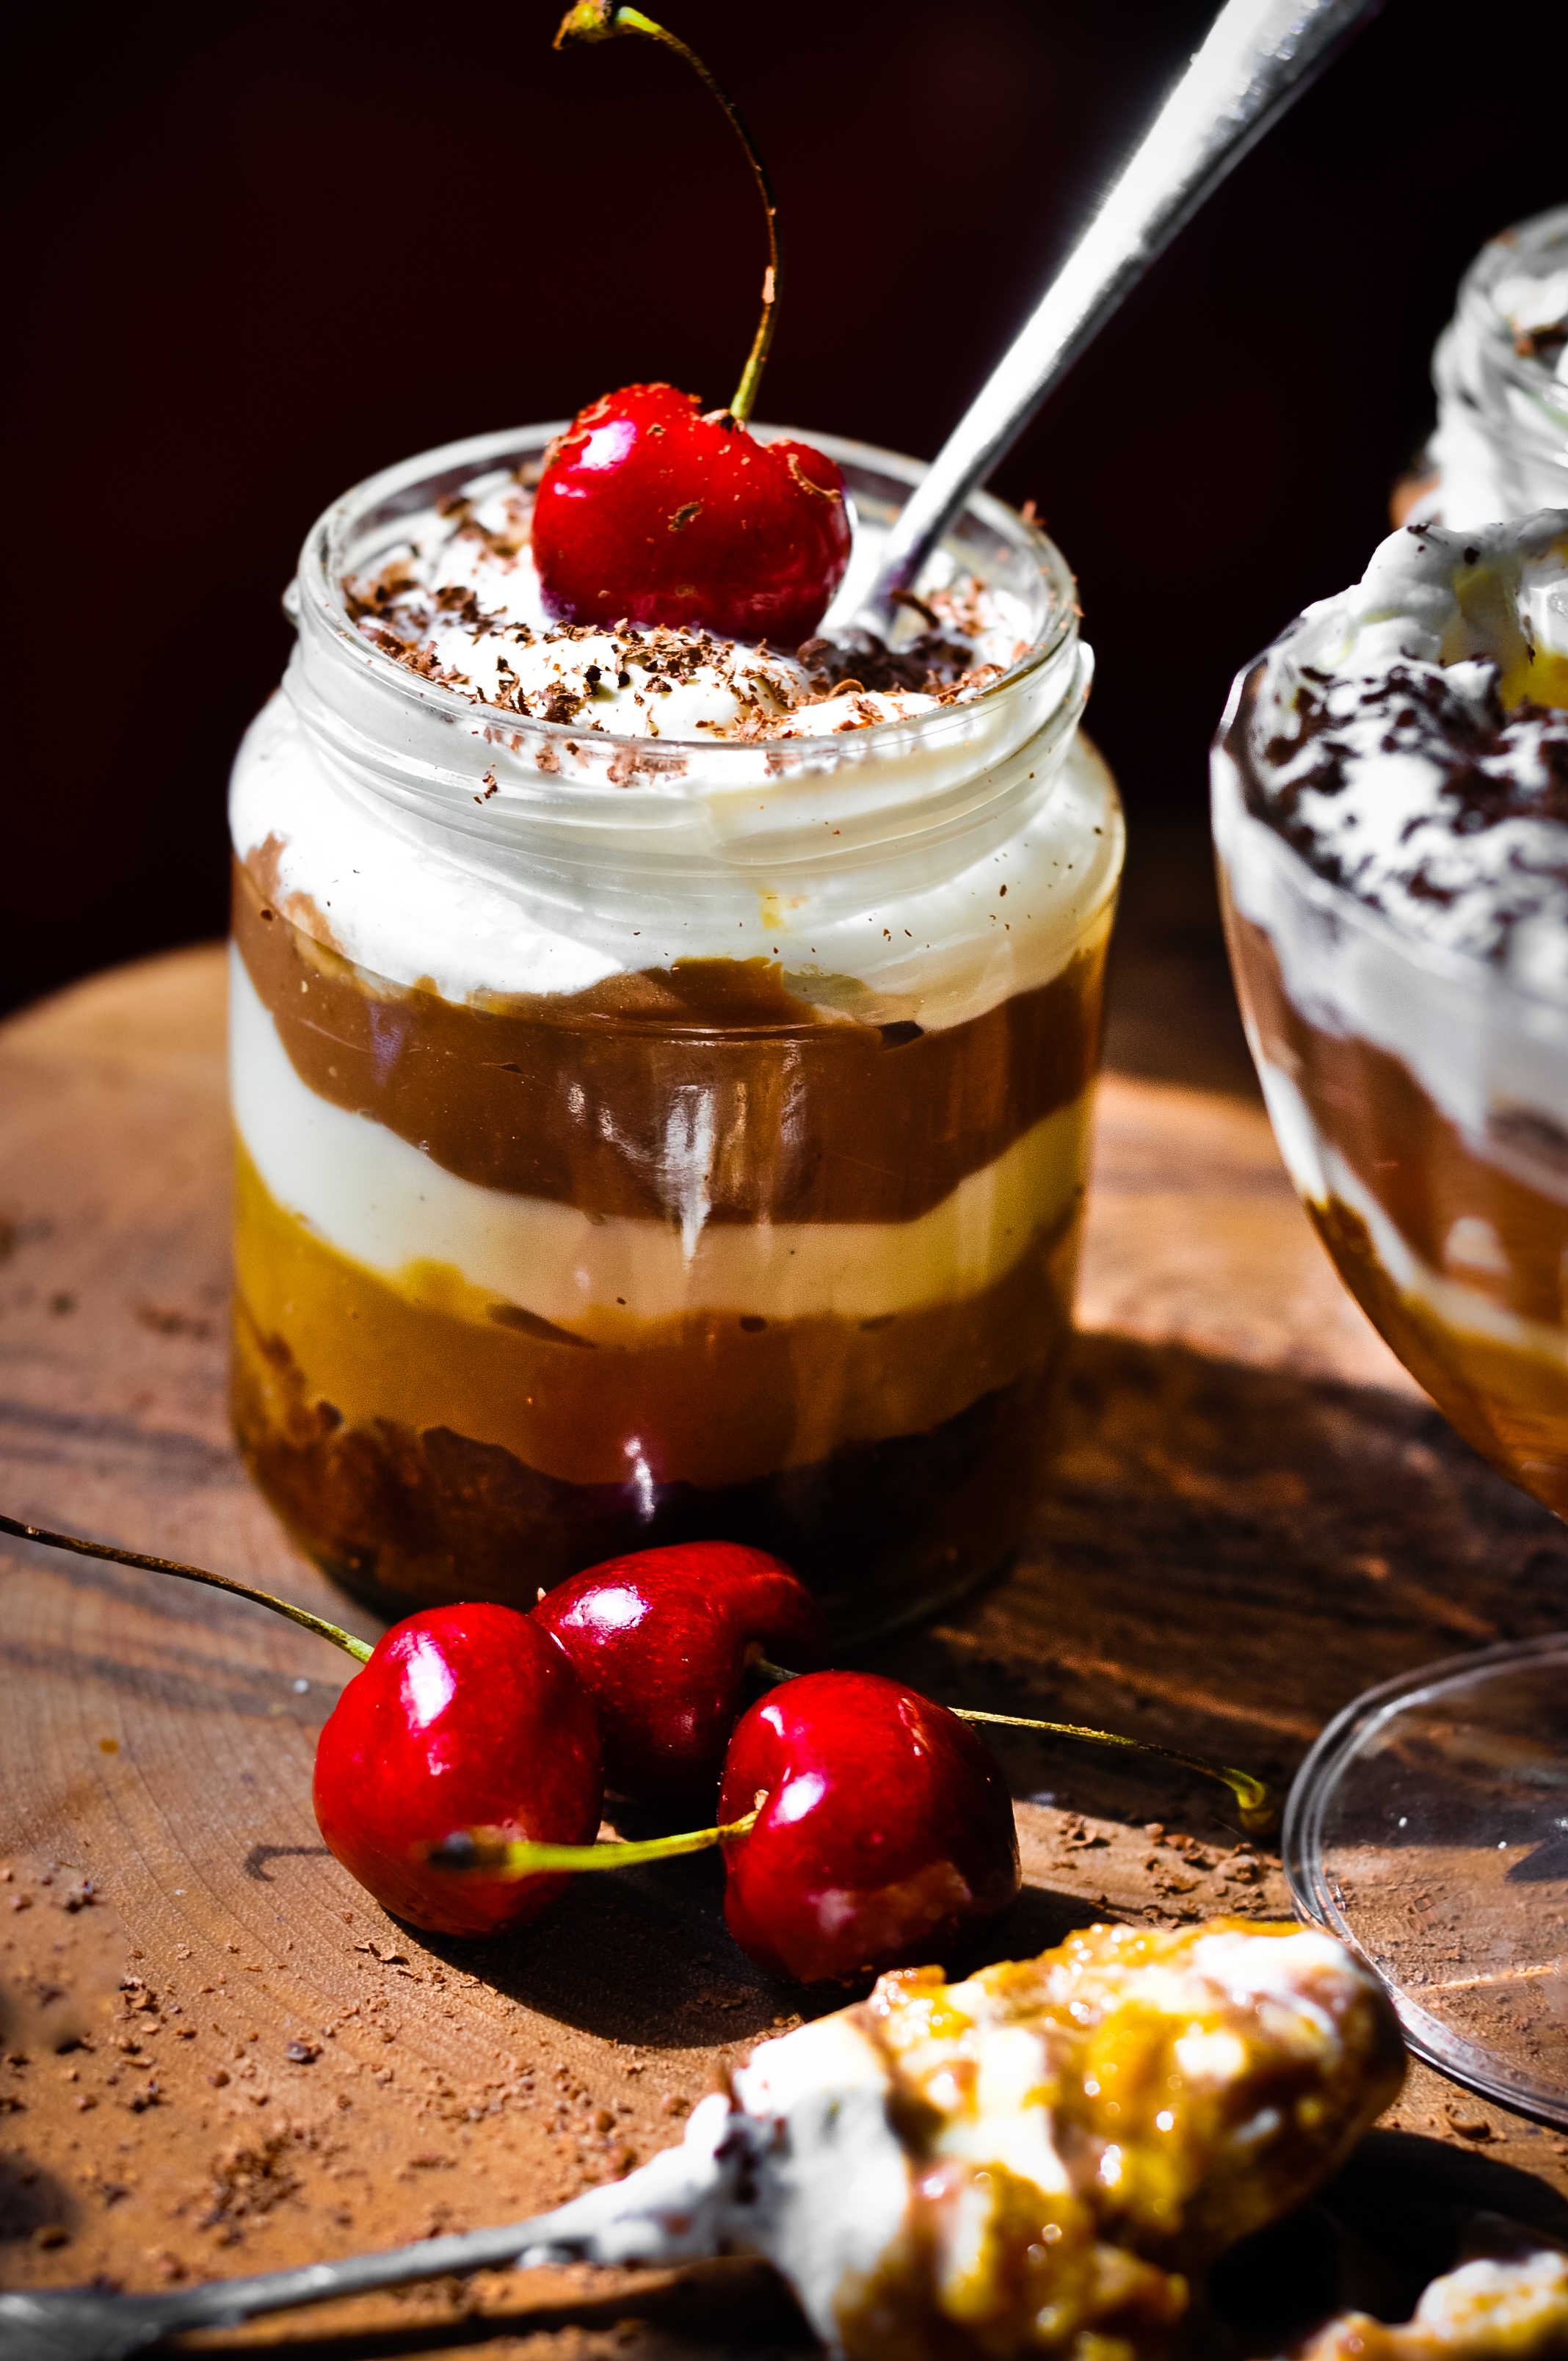
Now when it comes to dessert I can’t be arsed faffing about, I want something that can be thrown together in under 10 minutes that looks and tastes amazing and basically makes me want to bathe in it. I’ve gone one further here and made one that not only ticks all those boxes but you can carry around in your handbag too for all those pesky pudding emergencies, or just throw a few in your bag and take them round your mate’s house for a Pudding Party (I need more of those in my life).
This little dessert kicks serious ass, it’s really indulgent and contains all my favourite things. I’ve used Amaretto in this one  and Golden Syrup sponge but I often make it with golden rum and ginger sponge which is divine.

Get in my face

Ingredients: (makes about 6 generous servings)

  • Lyle’s Golden syrup cake
  • Amaretto
  • 100g dark chocolate (plus a little but extra to grate for garnish)
  • 500g pot fresh custard, must be nice and cold.
  • 1 x 397g tin Carnation Caramel (or Dulche du Leche)
  • 300ml whipping cream
  • 1 tablespoon stem ginger syrup (optional)
  • cherries to garnish

Method:

  1. Slice some of your cake and put it in the bottom of your clean jam jar then pour over your Amaretto (about 25ml for each jar is about right but add more if you want it more boozy)
  2. Break your chocolate into pieces and put it into a glass bowl set above a saucepan of simmering water. Make sure the water doesn’t touch the glass bowl. When fully melted remove from the heat and whisk in half of your cold custard.
  3. Spoon a layer of caramel over your booze soaked sponge then top that with a layer of plain custard. Follow this with a layer of your chocolate custard.
  4. Whip your cream. If adding the stem ginger syrup or some more booze then do this before you start whipping. You want it to be quite firmly whipped. Spoon it over the chocolate custard.
  5. Top with a cherry and some more grated chocolate. It can be eaten straight away or pop a lid on it and it will keep happily in your fridge for another day, although I recommend taking them round to your favourite friend’s house and having a Pudding Club party and basically totally making their day.

So thats my chocolate Pudding Club recipe, whats yours?

BBC Radio Leicester Food Friday team BBQ

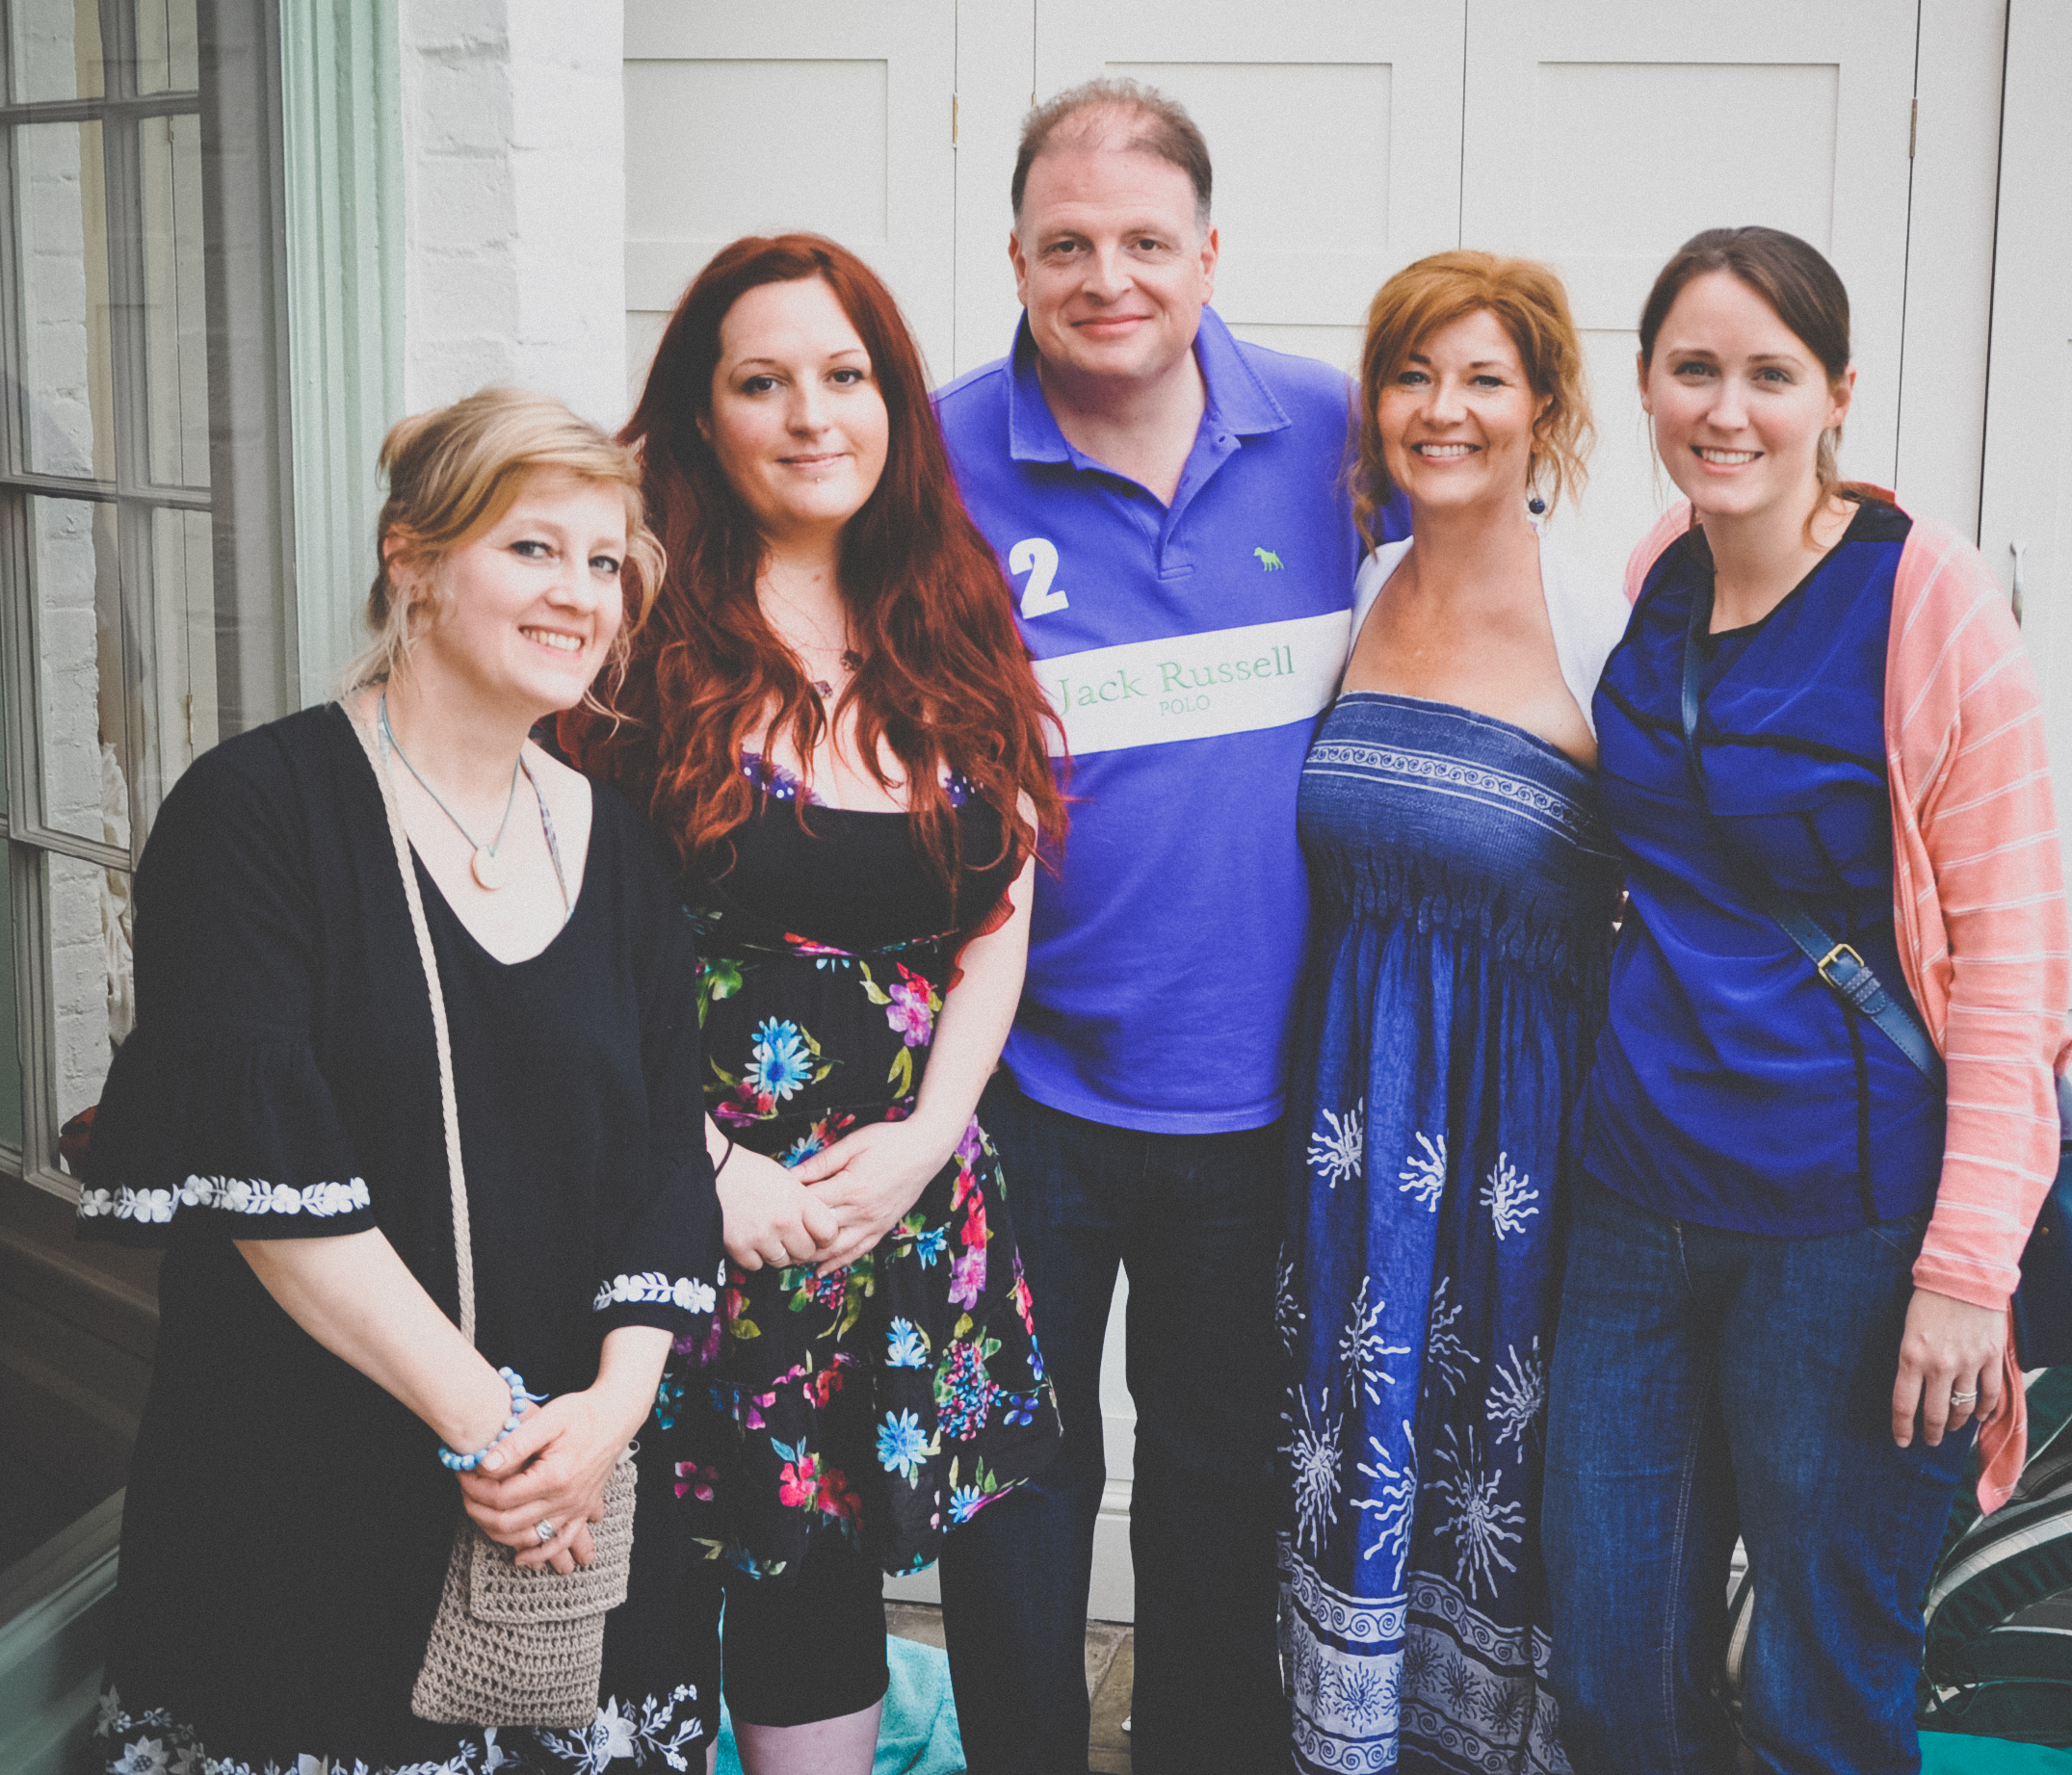
Jo, myself, Ben, Penny and Holly

If you drop by this blog every now and again then you may know that I’m one of Ben Jackson’s Food Friday Team who cook on the radio every Friday afternoon at about 4:40pm on BBC Radio Leicester. Ben comes to our homes and we cook up something fabulous and easy for people to give a go themselves.

Yesterday we all met up at Ben’s beautiful home for a BBQ and all brought lovely homemade treats to eat. We had an absolute blast too…

The most AMAZING ribs ever

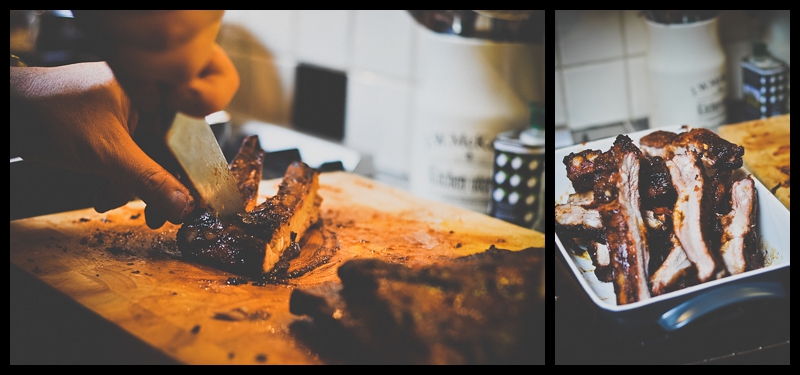
Ben had been slowly cooking his St Louis style ribs (when the sternum, cartilage and rib tips have been removed) marinated in Big Bob’s dry rub for 5 hours in his BBQ, oh my days they were absolute ribs of joy! He buys them from a chap down the road who breeds different pigs for different cuts. These ribs were just pure meat wrapped around juicy bone, hardly any fat and to die for.

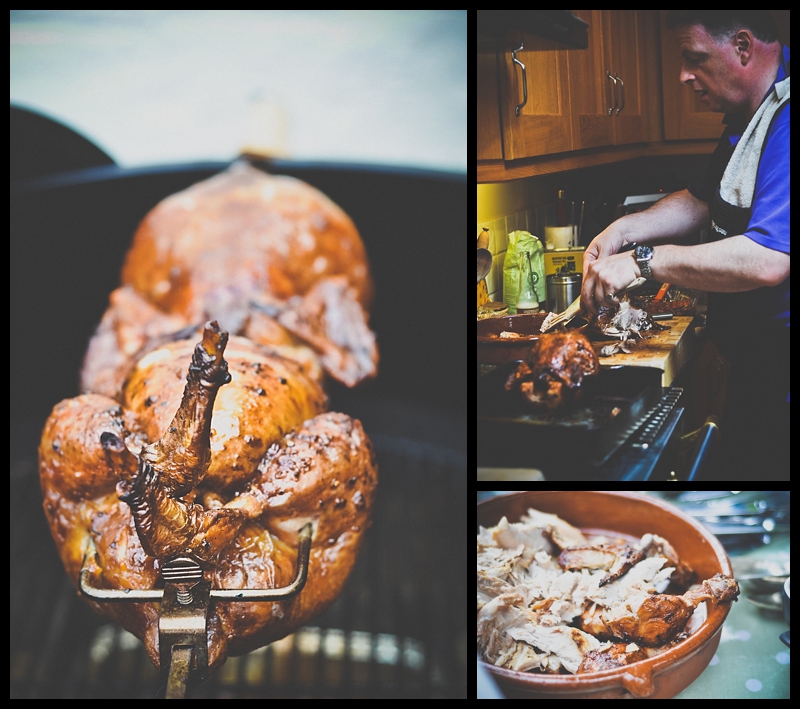
rotisserie chicken on the BBQ

2 lovely free range chooks cooked on a rotisserie over the hot coals, just oozing flavour.

How many cooks does it take to carve a chicken? Well Ben and the 3 of us drooling it seems

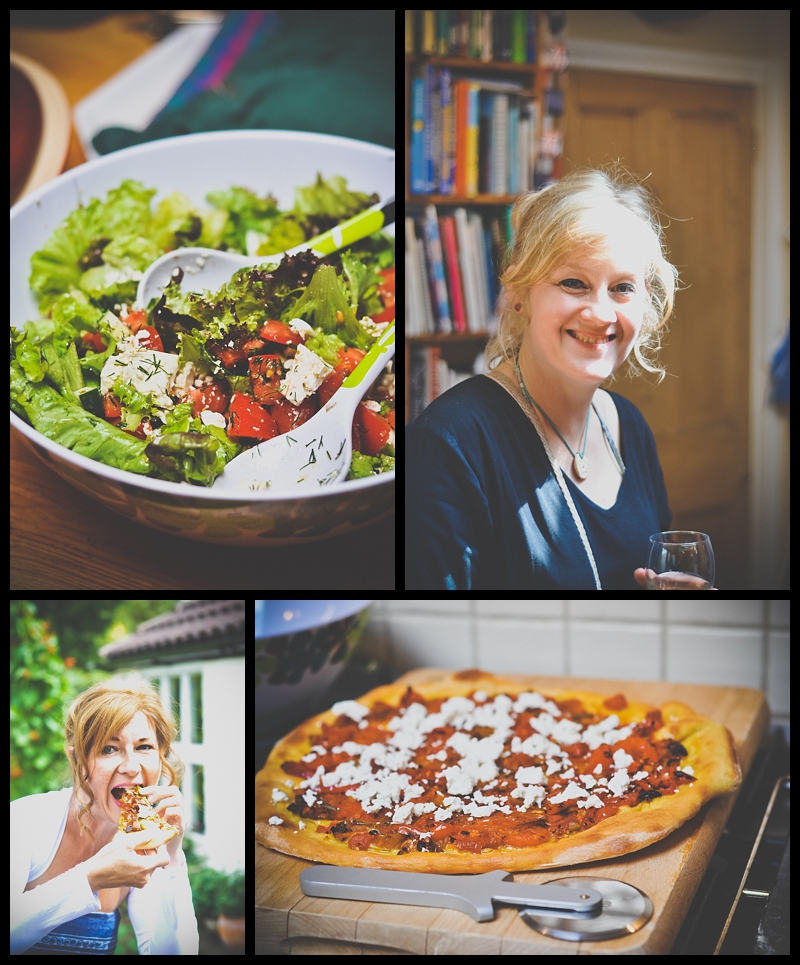
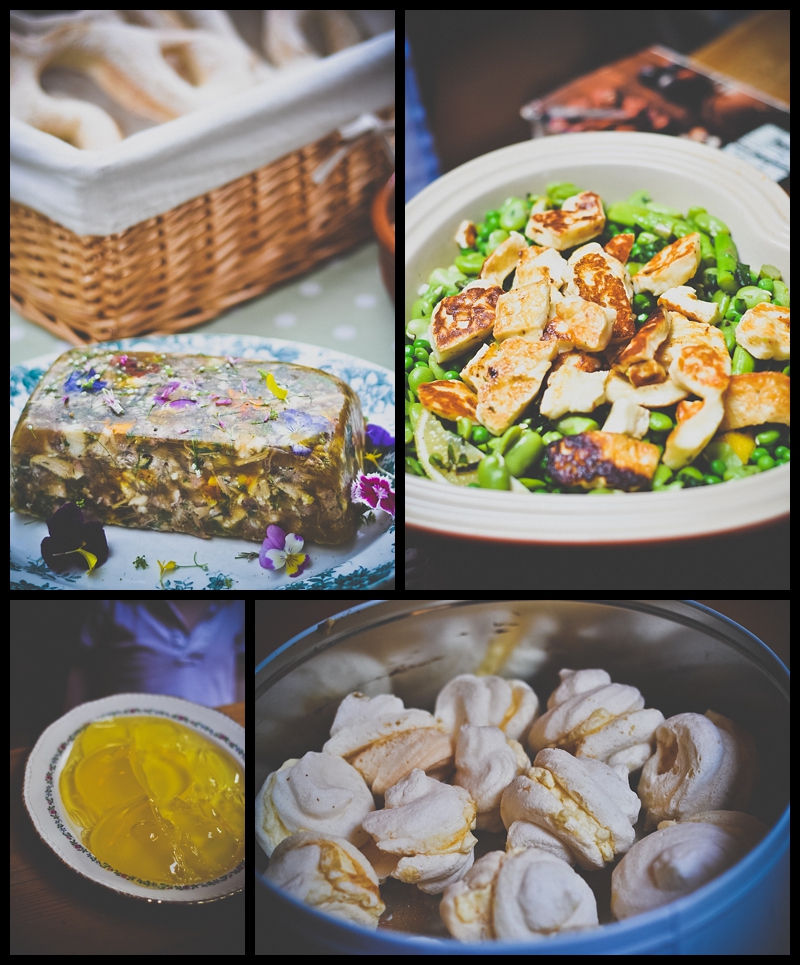
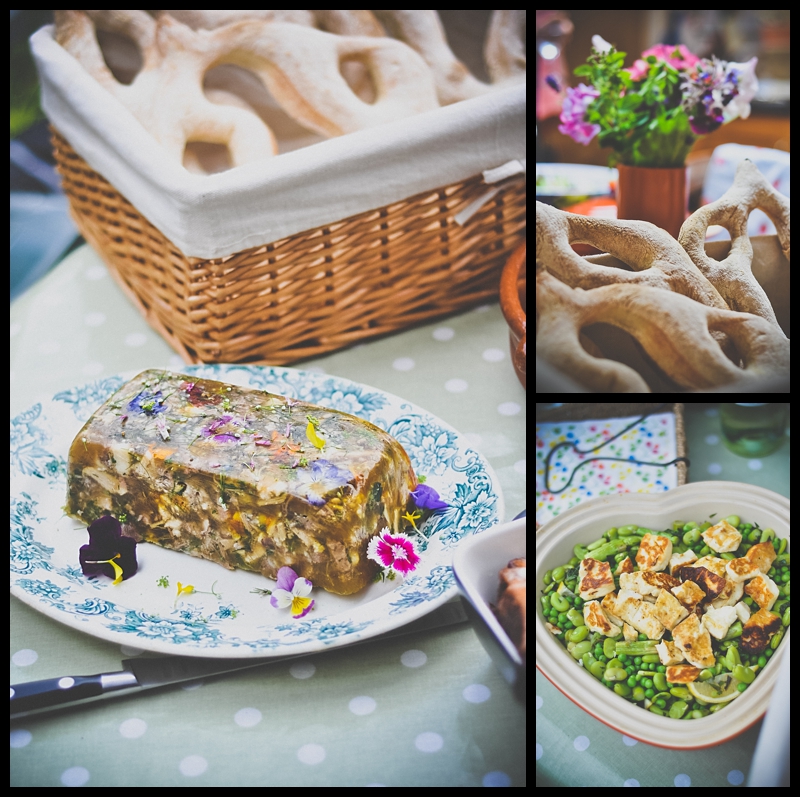
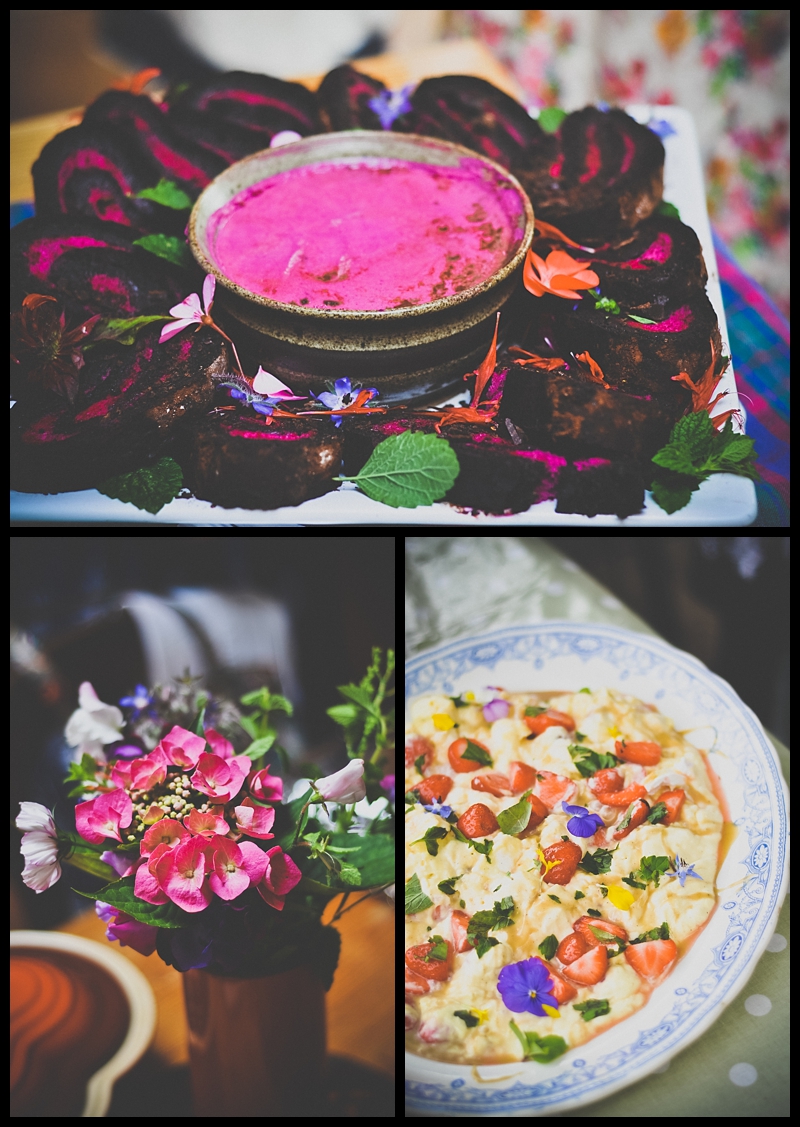
Penny made some beautiful fougasse and I brought along one of my pig head and edible flower terrines. I’d found an old 15th Century recipe for a strange meat dish that says if you use brawn then you should add saffron so I added some for this one, hence the beautiful golden colour and it worked brilliantly.

Penny and her pizza, Ben’s fabulous Greek salad and the gorgeous Jo

Holly brought along a pea and halloumi salad, Penny made a jelly baby shaped jelly for the kids (which somehow collapsed and actually looked like a fabulous pair of jelly boobies) and Ben’s grandmother made the most beautifully light meringues.

Ben and BBC Radio Leicester gardening guru Ady Dayman have been busy building and tending the Grow Your Own Garden for a feature that ben does with his show that encourages people to give it a go.

Oh ribs I love you

Edible flowers featured heavily in the pretty menu.

Jo made a beautiful chocolate and beetroot roulade that was just wonderful (I must get that recipe!). I brought along one of my Melton Mess (which as you can see has collapsed a bit!) and a big jar of homemade vanilla sea salted caramel sauce that was literally just being guzzled straight from the jar!

Meat Feast

Radio Leicester food friday: ginger and caramel trifle

The lovely Ben Jackson from BBC Leicester in my kitchen

So every month the wonderful Ben Jackson heads out to my cottage in Melton Mowbray to record a cooking session.  Last time we made my divine Melton Mess which went down a storm with the radio team and listeners so this time I made another really simple dessert, in real time, for people to make this weekend:  I made a rum, ginger, chocolate trifle….yum!

What happens each time is that Ben arrives, we spend about an hour and a half catching up, geeking out about food and inevitably about knives! I was at the BBC Good Food Show on Wednesday and saw the gorgeous Natalie from I.O.Shen knives and came home with the most beautiful new Sahm Khom knife. Now Ben loves a good knife just as much as I do so when he felt it slice through a potato using just it’s own weight it really was love at first slice!

This link will take you to the recording, I am 1hr:42 into the show .Now I’ve just listened to it again as lots of people have sent me messages saying how rude it sounds! Yes, I *may* have sniggered at the name “Willy” but it would seem the whole 10 mins is all a bit naughty…something to do with the sounds of the cream and custard being whipped and our noises….

The mini version with oozy caramel filling

Ingredients:
  • 1 x Jamaican Ginger Cake
  • 35-100ml Golden or dark rum (depending on how boozy you like it, obviously I used 100ml!) or for non  alcoholic version use stem ginger syrup.
  • 100g milk/dark chocolate
  • 1 x 500g pot fresh custard
  • 1 x capful vanilla extract
  • 300ml pot whipping cream
  • 1 x 400g tin dulche du leche/tinned caramel (or make your own from a tin of  sweetened evaporated milk)
  • buttons/grated chocolate to garnish
Method:
Slice your ginger cake and lay it on the bottom of your trifle dish and pour over your rum and spoon over a layer of dulce du leche. Melt the chocolate, add your vanilla extract then whisk in your pot of custard.  Allow the custard to cool then layer it over the caramel. Whip your cream, spoon it over the chocolate custard and garnish with your grated chocolate/chocolate buttons. See, dead easy!

I always open my cupboards and introduce him to fab food products that I come across and send him home with a bit of a goody bag! We spent a long time talking BBQs, Ben has just acquired his first Weber and so I introduced him to the wonderful Laissez Chef new Orleans spice blend, yep he fell in love with that too! Her is now also a new convert to Essential Cuisine powdered stocks having tried their powdered veal and Little Doone Ginger Balsamic which I discovered at the show which also blew me away.

So I will be cooking again in 4 weeks time with Ben but in a couple of weeks I am taking him around my local Farmer’s Market so he can meet my favourite producers. Ahhh we can geek out about food all morning!

Jubilee Choc Pops!

Ready and set in about 20 minutes

In the run up to this Jubilee weekend I have seen dozens of Jubilee Battenburgs and Union Jack cupcakes on Twitter and glossy magazines. My nod to the red white and blue mania that’s so abundant at the moment are these Choc Pops that I made for Domestic Sluttery.  If you haven’t visited the Sluttery website then you really are missing out on a whole host of awesomeness that covers food, travel, fashion, homewares and booze, yes, there is lots of booze.

Because chocolate can always be naughtier

You should most definitely check out the naughty bunting that caused a bit of a fuss the other day then buy some and make some of these naked chocolate people and head off to the village Jubilee tea party….

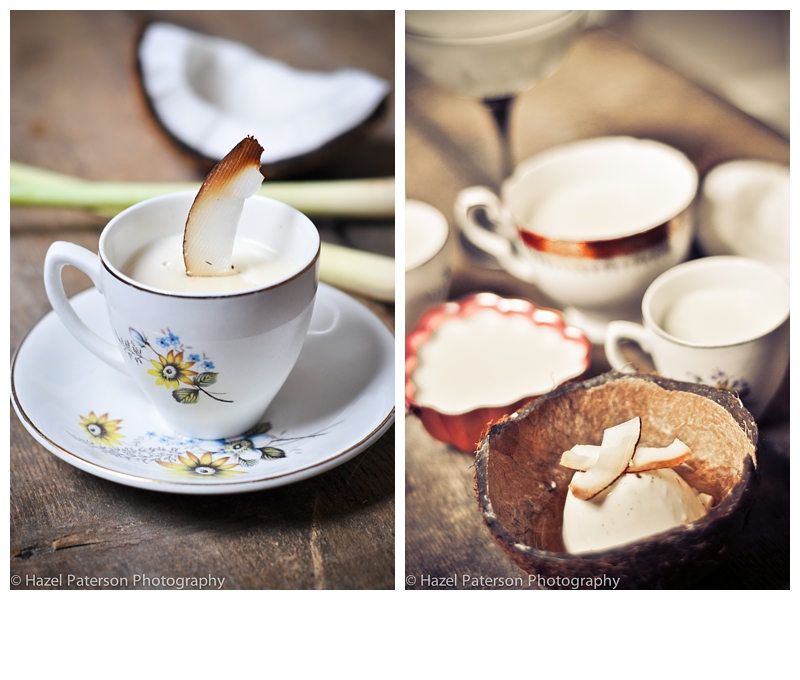
Coconut Panna Cotta with Ginger and Lemongrass Syrup

This week marked the start of the Thai New Year so the Domestic Sluttery food writers were all asked to make Thai inspired recipes. I made a Thai style Kedgeree for my savoury post (reckon I will always make it this way from now on but with the addition of some Lapsang Souchong too) but I needed to come up with a dessert for Friday’s post.

I’ve never made a panna cotta before, I don’t really do desserts, I much prefer a cheeseboard at the end of the meal. I have had a few wonderful panna cottas in my time though so I knew I needed to achieve that perfect Boob Wobble if it was to be a success.

I’ve had a pack of gelatine leaves in my pantry for a few weeks now, the intention was to make some lovely Elderflower and spring flower jellies as my collection of glass jelly moulds never actually get used.  Coconut panna cotta it is then.  According to the gelatine instructions I just needed 4 leaves for every pint of liquid, simple enough so off I went to buy coconut milk, coconut cream (because I love it) and regular cream (because I wanted it to feel luxurious in the mouth).

I had received some very sad news the day before and thought I was coping really well (cooking is great for grief, eating not so easy) but I found myself crying in Tescos (they’d changed it all around AGAIN) and so did a rubbish job of shopping and returned home with gin, dried porcini mushrooms and chorizo.  I didn’t even realise I’d forgotten to buy any coconut ingredients until I got home and spoke to Glen (who detests coconut so was pretty happy about the shopping fail but obviously a bit worried about the girl crying in the doorway holding a bottle of gin and some chorizo). I had another cry at being rubbish at shopping.  I wasn’t really crying about that at all, I was crying because Nain, my grandmother, had died and I didn’t know what to do.

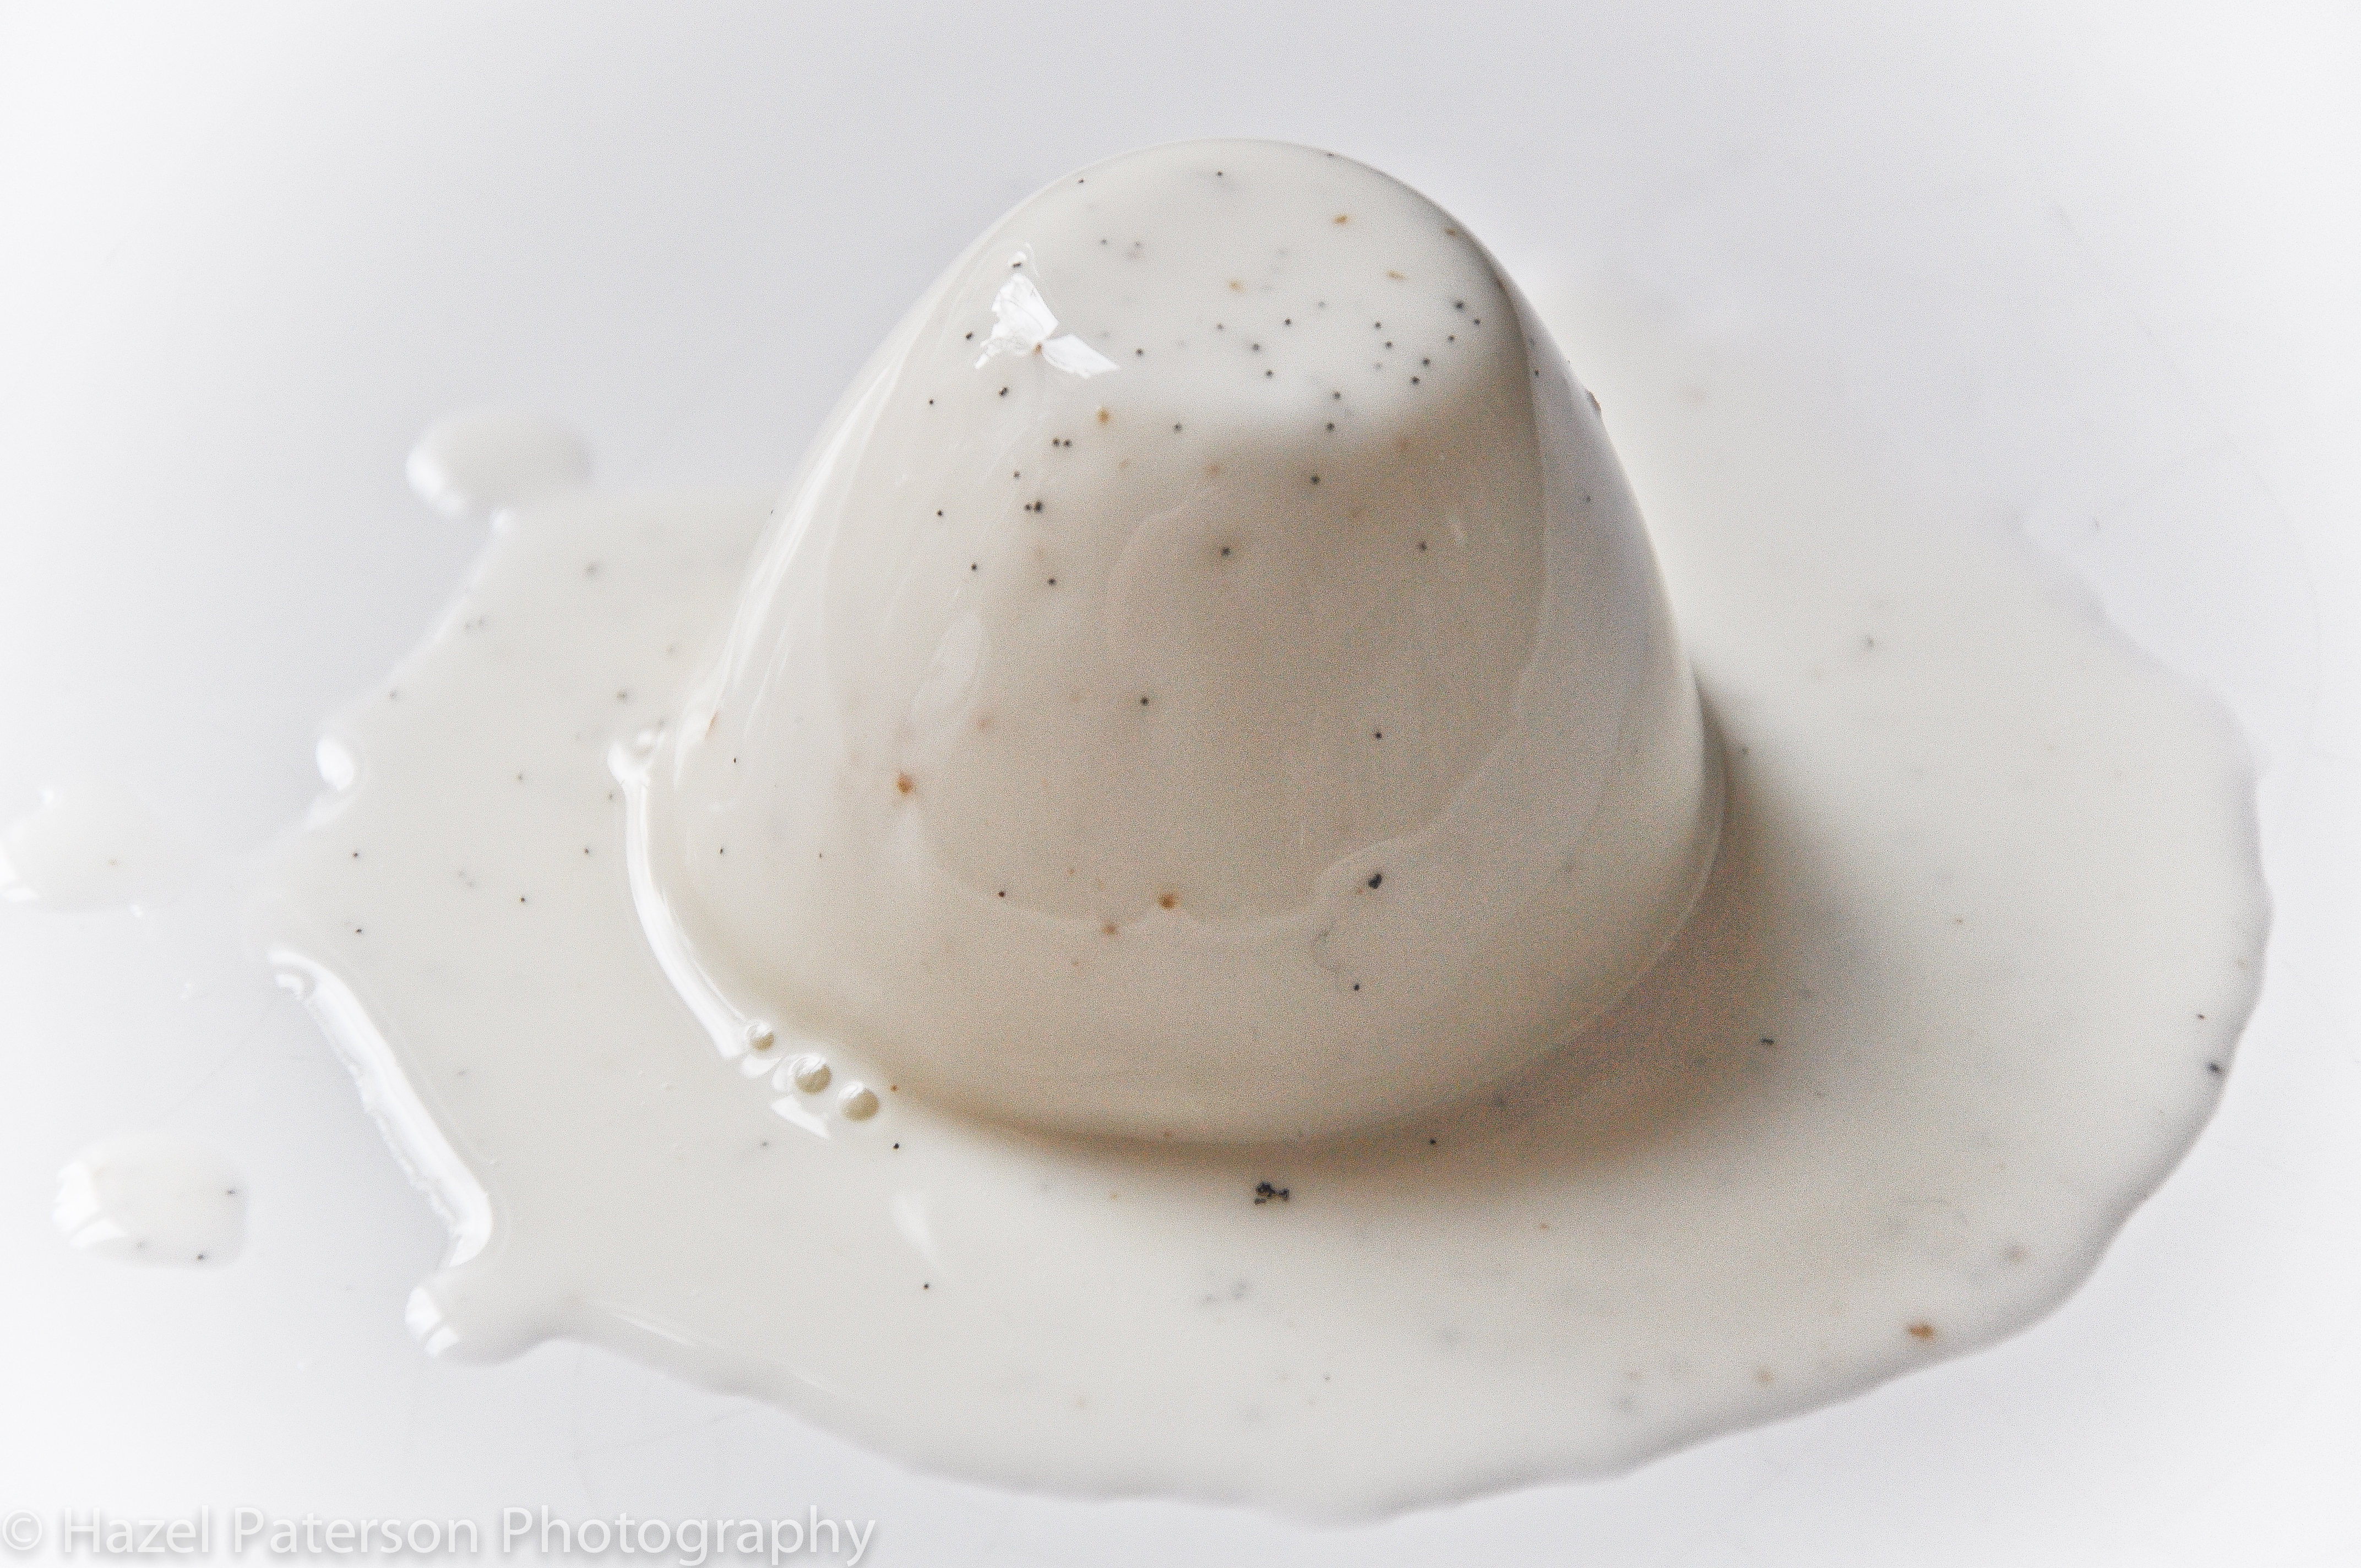
Another shopping trip later (this one without tears) and I was ready to go.  I love making up recipes but it’s always a bit nerve-racking when doing things like this (science-y).  The coconut mixture I had made was quite thick so would I need more gelatine? Having worked out how much gelatine I would officially need for a Boob Wobble set I threw it all together. It was only when I was putting the unused gelatine leaves back in the packet that I realised 2 must have been stuck together so I’d added a bit more than I should have.  I wasn’t bothered though as it just seemed right.

I don’t have any Dariole moulds so I just poured the mix into whatever I had: a few espresso cups, an old teacup, a couple of jelly moulds and a cocktail glass.

Once set the first cup was turned out and a nervous Boob Wobble test carried out – perfect. Phew, now to taste them.  I poured over my Ginger and Lemongrass syrup that had been infusing away, and tentatively spooned in.  Wow, it was so silky.  Rich in flavour but light in texture it just melted in my mouth. Yeah, I had a little cry, but this time I think I was also crying because something good had happened for the first time in 24 hours of sadness.

The first one turned out onto a plate ready for the Boob Wobble Test

I was so happy I recorded my Boob Wobble, you can see it HERE.

As I mentioned earlier, Glen hates coconut.  He used to love it but his Mum went through a phase of putting desiccated coconut into EVERYTHING when he was little so he just can’t stand it anymore.  I was so pleased with my new creations though that I made him try a bit.  He loved it! He ate 2 of them straight away.  

So if you want to give my recipe a go, and you really should because it’s really easy and tastes like it wasn’t, then you can see my recipe HEREIt really is stupidly easy to make and as always  you should check out all the other brilliant stuff on Domestic Sluttery!