Gin, coconut and pineapple martini AKA Malibu Barbie

Sunny days call for sunny drinks in the form of this gin, coconut and pineapple martini

Gin, coconut rum, pineapple, fresh lime – a recipe for sunshine even on the greyest of days.

This time last year we were at the head of a gloriously long heatwave that carried us though the worry of the first lockdown and well into Autumn, the sunshine was heavenly and made what we were all experiencing just that bit easier. Days were spent decamping the office to the garden and working under the shade of the umbrella and when work was over, sipping on a cocktail and procrastinating on the garden work that needed to be done.

This year we have had some sunny days creeping sheepishly in but they’ve been bitterly cold, so I’ve been turning to bright, sunny drinks to cheer the spirits during my Cocktail Hour tipples. I’ve been posting my Cocktail Hour drinks over on my social media – head on over to my Insta to see what I’ve been up to. I usually only post a list on ingredients and basic instructions but people have been asking for recipes so here we are.

I thought I’d kick off with this gorgeous cocktail, a tropical delight that slips down ever so easily, whatever the weather.

Ingredients:

  • 50ml gin
  • 50ml coconut rum
  • 25 ml fresh lime juice
  • 1 tbsp agave syrup
  • 100ml pineapple juice
  • ice to shake
  • sprig of rosemary to garnish ( I also sometimes shake with a sprig for extra rosemary flavour)

Method:

Combine ingredients in a cocktail shaker and shake vigorously for 20 seconds then strain into a coupe glass and garnish with a sprig of rosemary.

Best ever fudgy chocolate brownies

Dense, fudgy chocolate brownies have to be one of my all time favourite things to bake – simple, cheap and so goddam good they beg to be made as frequently as you can justify.

Joel has a pretty insatiable sweet tooth in comparison to me and so these were requested a few days ago as we have no treats in the cottage, and these are certainly a treat. Baked until just cracking on the surface yet still quivering in the centre, these are so rich and fudgy you don’t need to eat much at all to feel sated. Eat as they are or serve warm with vanilla ice cream or some indulgent chocolate custard.

These brownies are cheap to make as well as being really easy. I use the 40p 100g bars of dark chocolate from Sainsburys or Tescos (they were just 30p not long ago and I’m still grumpy about the increase). They are decent quality and a good cocoa content, no need to spend lots on expensive bars and never use cooking chocolate, that stuff is vile.

You can easily customise these by adding 100g chocolate chips/nuts/marshmallows after you’ve folded in the flour and cocoa. I usually add milk chocolate chips or big dollops of Biscoff spread or dulche du leche, in fact I cannot recommend this enough!

Ingredients:

  • 100g butter
  • 200g plain dark chocolate
  • 4 eggs
  • 250g caster sugar (use golden if you wish)
  • pinch salt
  • 100g plain flour
  • 30g cocoa powder
  • 1 tsp baking powder

Method:

  1. Heat oven to 180C. Scrunch up some baking parchment then unfurl and line a 20cm x 20cm baking pan.
  2. Smash up the chocolate, I just hit the packet hard against the worktop several times. Melt together the butter and the chocolate either gently in the microwave or over a simmering pan of water in a glass bowl. Leave the chocolate mix to cool down so it feels lukewarm to the touch.
  3. Beat together the eggs and sugar until light and fluffy then use a spatula to fold in the cooled chocolate mixture. I use an electric whisk to beat the eggs and sugar as I’m all for lazy baking but you could use a stand mixer or hand whisk. Add the salt.
  4. Gently fold in the flour, cocoa and baking powder, trying not to knock out the air. Don’t overmix as it’s this gentle folding that means your brownies will have such a glorious texture.
  5. Pour into your prepared tin and bake for 25-27 minutes. The top will be set as will the edges but the centre will still be quivering. This is what makes them so fudgy. Allow to cool then slice and devour.

Lazy lamb stew

lazy lamb stew

Dark days and cold winter nights call for hearty comfort food and this lazy lamb stew steps up and gives you a big cuddle when you need it most.

Lamb neck on the bone is a highly underrated and economical cut of meat, packed full of rich flavour and with enough fat to create an unctuous stew that’s silky and moreish without feeling fatty. Cooked on the bone the lamb is meltingly tender, a real treat for sure.

We are lucky to have a fab butchers just down the lane from the cottage and also a brilliant fruit and veg shop just around the corner. My butchers have come to my rescue many times over the years. They have been working so incredibly hard over the lockdowns and the queues are often long but a visit is always a joy and their dry cured smoked middle bacon is second to none. Make friends with your local butchers, they have a wealth of knowledge and will be happy to give you tips for cooking the lesser well known cuts that are usually much cheaper too.

You can pretty much chuck whatever root veg you have to hand into this stew, likewise add leeks if you fancy or if you are trying to bulk it up then a tin of chickpeas or butter beans would work really well. It makes lots of rich liquid that’s perfect mopped up with some nice crusty homemade bread.

I call this lazy as I pretty much just bung everything in the casserole pot and let the oven do the work. I do recommend that you brown the lamb first though for those lovely Maillard flavours.

Lazy lamb stew

Serves 4

Ingredients:

  • 4 rounds of lamb neck on the bone
  • 3 tablespoons oil or fat for frying ( I used leftover goose fat)
  • one onion, chopped/sliced – whatever your preference
  • 3 handfuls of rainbow Chanternay carrots (or just regular carrots sliced but my veg shop sells these incredible mini rainbow carrots that just taste wonderful)
  • 3 sticks celery, chopped
  • 2 parsnips, peeled and sliced into rounds
  • a few handfuls of baby new potatoes
  • 3 sprigs fresh rosemary or 1 tablespoon dried
  • 3 bay leaves – I have a bay tree so use them all the time but just leave out if you don’t have any
  • 4 cloves of garlic, sliced
  • 1/2 bottle of full bodied red wine
  • chicken stock and water to cover (I used powdered chicken bouillon that I buy in bulk from Amazon, 1.2kg for £14.99, it lasts for ages and is lovely as a drink too), I would use Lamb stock if I had it but its expensive and chicken works just fine, plus cooking the lamb on the bone creates a wonderful lamb stock anyway.
  • salt and pepper
image of veg in the pot being cooked with herbs

Method:

  1. Heat your oven to 160C.
  2. Pop the oil, or goose fat if you have it, into a hot casserole pot then add the lamb in batches and cook until nicely browned on each side then remove and set aside on a plate.
  3. Add the onions, veg, garlic and herbs and cook until the onions are starting to colour.
  4. Add the lamb and red wine and season with salt and pepper. Scrape the bottom of the casserole to dislodge any crusty bits and cook the wine for a few minutes then add in the stock, enough to just cover everything, it may seem like a lot of liquid but you lose a lot in the oven as it simmers away.
  5. Pop the casserole pot in the oven and leave to gently cook for 4 hours. Check on it after 2 hours and add more seasoning if required.

Easy white loaf – good baking for bad days

Lockdown means that we are not venturing to the shops very often so I’m back baking bread again. Baking bread fulfils 2 roles for me right now, one it means we have something gorgeous to eat that fills the cottage with the heady scents of baking and two it brings a sense of achievement to days when I feel like I’m not able to do much else, but want to feel useful and competent at something, anything.

Bread is a staple of feeling like we are not going without. It’s such a valuable commodity in my kitchen, toasted and slathered with butter and sea salt, dunked into thrifty yet hearty soups and stews, turned into sandwiches, grilled with cheese or simply when I can’t face cooking, bread is an easy and filling go-to.

This is not a sourdough loaf, I killed my starter though abject neglect, they’re needy little buggers. Very easy to make though so I may get another one on the go in the coming weeks but right now I just want things that are easy, low maintenance and come without the threat of death.

Like all my recipes this is another lazy loaf, I let the Kitchenaid dough hook do all the work for me but if you don’t have a dough hook and mixer you can knead it yourself and get those arm muscles working.

Easy white loaf

  • 500g strong white bread flour
  • 1 x 7g sachet fast action died yeast
  • 3 teaspoons salt
  • 370ml warm water

Method

  1. Put the water and yeast into your food mixer bowl, stir and leave for a minute or two, some people leave until it goes frothy but I find a couple of minutes work just fine.
  2. Add the flour and salt and stir well to mix using a spoon (I find this speeds up the mixing process).
  3. Using the bread hook attachment let the machine knead the dough for 10 minutes then put the dough into an oiled bowl, cover with a tea towel and leave until doubled in size. It’s cold at the moment in the cottage so this took 2 hours but in the summer this would be much less.
  4. Gently tip the dough onto a floured surface then gentle fold in the edges to the centre and form it into a ball. Try not to knock all the air out. Put the dough seam side up into a well floured round proving basket (this will give the lovely flour rings on the loaf). Pop some floured cling film loosely over the bowl and then leave for about 45 minutes.
  5. Cut a circle of baking parchment that’s larger than the base of your casserole pot (I use the lid as a guide).
  6. Heat your oven to 230C and put a cast iron lidded casserole in to heat up for at least 20 minutes..
  7. When ready to bake your loaf remove the cling film and place the baking parchment over your proving basket then in one swift move tip and flip the dough out of the basket and onto the parchment.
  8. Remove the casserole pot from the oven, take the lid off and gently lower the dough into the pot. Slash the top however you fancy (I use a scalpel) and then get the lid back on and the pot into the oven.
  9. Bake for 25 minutes then remove the lid and bake for 15 more minutes.
  10. Admire your loaf as it cools and feel an enormous sense of glowing achievement.

Best ever Yorkshire puddings

I am always getting asked about my recipe for Yorkshire puddings whenever I post pics of them on my social and they really are the easiest things to make.

Yorkshire puddings aren’t just for roast beef either, we have these with whatever we are roasting on a Sunday, usually a chicken, and I often pop a bit of powdered chicken stock into the mix if so and maybe some chopped fresh sage.

The fundamental principles of yorkies are equal volume of eggs, flour and milk, a very hot oven and smoking hot beef dripping or oil, also don’t be tempted to open the oven door whilst they are cooking.

I usually make these first thing on Sunday morning and then when nearly ready to serve with the roast I just pop them back in the oven for a couple of minutes.

Best ever Yorkshire puddings (makes 10 yorkies)

Ingredients:

  • 300ml free range eggs (about 5 or 6 eggs roughly)
  • 300ml plain flour
  • 300ml semi skimmed milk
  • beef dripping or veg/sunflower oil (not olive)

Method:

  1. Combine the milk, eggs and flour in a mixing bowl and beat together for a minute. Don’t over beat, I’ve found this doesn’t give as good a rise. Put the mix into a jug and refrigerate for at least 30 minutes or even overnight.
  2. Heat oven to maximum temp, mine is 240C.
  3. Put some beef dripping or oil into each hole of a metal muffin tray. I use enough dripping to come about 1cm up from the bottom of the muffin hole once liquid. Place muffin tray in the oven to heat until smoking hot, around 10 minutes.
  4. Pour batter into each hole quickly and put back in oven, try not to let heat escape too much whilst doing this.
  5. Cook for 25 minutes or until crisp and brown.

Slow roast lamb shoulder on Boulangère potatoes

Autumn has arrived and with it comes roaring log fires, the twinkling flicker of scented candles and hearty fare here at the cottage.

I’ve been pretty poorly for a while now but I’m finally getting back into the kitchen occasionally and it’s doing the world of good for my mental health. I still have a really foggy mind but I’m breathing better, so I’ll take that as a sign that I’m on the mend, and being enveloped in the scents of this beautiful lamb dish as it gently roasts on a Sunday is some pretty good medicine.

Because I can’t stand up for very long or focus, I’m sticking to recipes that take barely any prep, or if they do then Joel has been doing the vast majority of it, and it’s working out nicely – minimum effort, maximum results and this recipe sums that ethos up completely.

This is one of my all time favourite go to’s for a lamb dish. The oven does all the work and makes the magic happen. Lamb/hogget is expensive so it’s a rare treat here at the cottage, usually only when we find it on offer or drastically reduced. This particular recipe uses a half shoulder cut so its much more affordable than getting a whole one and there’s always plenty of leftovers for the following day. Win.

Slow roast half lamb shoulder on boulangère potatoes:

Ingredients:

  • half a lamb/hogget shoulder
  • potatoes, thinly sliced (I used about 6 large ones for this sized roasting tray just use as many as you need to almost fill the tray)
  • 3 cloves garlic, sliced plus 5 whole cloves
  • 1 onion, sliced
  • fresh thyme leaves
  • chicken stock
  • salt and pepper

Method:

  1. Heat the oven to 160C, bring your lamb/hogget out of the fridge 30 minutes before you start to prep. Pierce the lamb shoulder all over and pop a clove of garlic in each slit.
  2. Mix together the potatoes, sliced garlic, onion and thyme and layer into a roasting tray. Pop the lamb on top, skin side up then pour over hot chicken stock until it comes 3/4 of the way up the potatoes. Sprinkle everything liberally with salt and pepper then pop in the oven for 3 1/2 hours or until the lamb is soft and tender and simply falls apart. Cover with foil and leave for 20 minutes before serving.

No-bake mascarpone, Biscoff and Nutella cheesecake

cheesecake

A quick snap before devouring…

It’s currently 34C here in Melton Mowbray, I’m sat in the garden sipping on a lagerita and feeling very thankful.

I find myself feeling incredibly thankful for a lot these days. Despite the financial and emotional adversity that lockdown has brought, it has also brought a great deal of positivity into my life – the kindness of friends, family and strangers, the shift to working entirely from home, my new found love of succulent plants (seriously, I’m addicted just check out my Instagram!), my tiny garden (where I sit every day it doesn’t rain and indeed even some when it does) and today the fact that my cottage is like a fridge on the hottest of days.

I got up at 6:30am with the well placed intention of watering the garden before the sun unleashed its scorching rays on my unsuspecting plants, I looked at the hosepipe and then thought: I really fancy cheesecake…

I picked up a couple of very cheap tubs of mascarpone yesterday from Lidl, not entirely sure what they were going to be used for but with the best intentions of something to do with fruit…yes, more well placed intentions.

You can make this with cream cheese instead of mascarpone but I just love the silkiness that the Italian softy cheese brings, full fat though, always full fat. I had some Biscoff biscuits knocking about, half a pat of butter and a pot of double cream that was bought for a pasta dish and a punnet of strawberries picked up from the Reduced Section for just 15p, so I was all set for a fruity cheesecake. Then I spotted the jar of Nutella winking at me seductively.

So this is a pretty experimental cheesecake that turned out to be perfect. If I had a bar of chocolate I would have melted it and drizzled it across the top but alas the pantry was bereft of such delights.

This is really easy to make, needs time to set in the fridge before serving but an hour or two later and you are good to go…

Ingredients:

  • 400g Biscoff biscuits
  • 100g melted butter
  • 500g mascarpone
  • 2 tblsp icing sugar
  • 300g Nutella
  • 300ml double cream
  • 1 tsp vanilla paste
  • chocolate balls to decorate (or some melted chocolate to drizzle)

Method:

  1. Put 300g of the Biscoff biscuits in a processor and bliss to a fine crumb then pour in the melted butter and blitz again to mix.
  2. Put almost all of the biscuit mixture in the bottom of a 23cm springform cake tin and press down with the back of a spoon. Reserve a bit to sprinkle on the top later if you like or chuck the lot in.
  3. Put the mascarpone, icing sugar and Nutella in a big bowl and beat together until well incorporated. I’m lazy so use an electric beater for ease.
  4. In separate bowl beat the double cream and vanilla paste until it is fluffy and full of air but not overly stiff. Fold the double cream into the mascarpone mix and mix until all is the same colour.
  5. Put the mascarpone and double cream mix on top of the biscuit base and put in the fridge to chill for a few hours or even overnight.
  6. Once ready to serve release it from the tin and then decorate with the crushed biscuits, the remaining whole biscuits and your chocolate balls (or melted chocolate).

Easy, kickass hummus

HUMMUS

Lockdown may have eased somewhat but finances are still really strained so cheap food wins are still as important as ever and this hummus has become a weekly staple here at the cottage.

This hummus is ready in just a few minutes, it’s really easy and can be customised depending on your mood. Throw in some jarred roasted red peppers, fresh basil, coriander, roasted aubergine, make it using butter beans, cannellini beans, whatever you have to hand. If you have a glut of courgettes (as many do at this time of year!) why not make my raw courgette hummus, it’s packed full of  goodness and tastes kickass too.

Ingredients:

  • 1 can chickpeas (plus about half of the liquid in the can)
  • 3 garlic cloves (I like it really garlicky!)
  • juice of half a lemon
  • 1 tsp ground cumin
  • pinch sea salt (I like to use smoked) and pepper to taste if you like
  • 3 tblsp tahini
  • smoked paprika
  • drizzle of olive oil to serve

Method:

  1. Drain the chickpeas, reserving the liquid in a mug. Put almost all the chickpeas into a “Nutribullet (or any blender but the Nutribullet gets it really smooth and creamy) reserving a few to garnish.
  2. Add in the garlic, lemon, cumin and tahini and about half of the chickpea juice (aquafaba). Blitz and add more liquid if needed. Taste and add salt and pepper if required then blitz again.
  3. Pop into a serving bowl, scatter with reserved chickpeas, the smoked paprika and a drizzle of oil. I like to leave it to sit for at least 30 minutes before serving to allow all the flavours to develop with each other.


Very lazy sourdough loaf

sourdoughIt’s been a while since I made sourdough, probably about 4 years or so, but the lack of yeast on the shelves means it’s back on my lockdown radar.

Two weeks ago my friend Andy got in touch asking me if I had a sourdough starter that he could have. I didn’t, but said I would happily make some as my old cottage seems to make a pretty good starter.

There are LOADS of various sourdough starter recipes online, some really complicated ones, some that add all kinds of things from yoghurt to leaves, but I have no interest in complicated recipes so I do my own lazy version, and you know what? It works a treat.

All I do is put some plain flour into a Tupperware dish then add enough cold water to make it into a thick paste, like a tin of matt paint. I don’t weigh or measure the water or flour, I really can’t be arsed with dicking about weighing and measuring. Each day I add a bit more flour, maybe about 3 tablespoons and a bit more water to it and give it a good stir to get back to a thick consistency that is still liquid and drops off a spoon easily. When it separates I just stir it all together. If the Tupperware gets too full, I discard some and then add the flour and water. I leave the Tupperware, uncovered in the  kitchen out of the way at this point.

I ran out of plain flour after about 10 days so added some organic stoneground rye flour that I had knocking about and it really liked this, it bubbled better and started to get really sour smelling, happy starter.

It took two weeks to get to the point I wanted it. Starters take time, don’t rush it, it will get there. I knew it was ready as about half an hour after feeding it would have risen up the Tupperware and be bubbly and was smelling quite sour.

Then it came to making the loaf, and you know what? I did a really lazy loaf too.

Easy, lazy sourdough loaf:

sourdough top

Ingredients:

  • 270g strong white bread flour
  • 200g sourdough starter (unfed that day, see above for how I make it)
  • 130ml water, I use cold water straight from the tap, you may need a little more depending on how runny your starter is.
  • 1 1/2 tsp salt
  • 1 tsp sugar

Method:

  1. Put everything into the bowl of a mixer fitted with a dough hook and mix for about 10 minutes until supple and stretchy.
  2. Put the dough in an oiled bowl (I use the mixer bowl) and cover with a damp tea towel. Leave for 3 hours.
  3. Tip the dough onto a lightly floured surface and shape into a ball by tucking the edges into the centre.  Put into a floured proving basket seal side up. Cover with a damp cloth and leave for 3 hours. You can pop it in the fridge and leave overnight also at this stage.
  4. Get your big dutch oven pot out (I use a cheap but very heavy enamelled Le Creuset wannabe picked up from Sainsburys years ago) and some baking parchment. Cut a round of parchment to fit the base with some excess – I just trace the shape of the lid and cut it out.
  5. Preheat oven to 230C. Put the big Le Creuset style casserole pot in with its lid on for about 20 minutes to get really hot.
  6. When the pot is hot, gently upend the dough onto the parchment (I put the parchment over the bowl then flip and tip. Score the dough with a razor blade so the loaf can expand.
  7. Take the pot out of the oven, pop in your dough on the parchment (by holding the edges of the parchment) pop the lid on and get it into the oven quickly.
  8. Bake for 25 minutes then remove the lid and continue to bake for 15 minutes.
  9. Remove your bread from the pot and leave to cool completely (well if you have any self restraint, but it helps the crust set)
  10. Enjoy your sourdough loaf.


Quick and easy smoky chorizo and chickpea stew

smoky chorizo & chickpea stewLike many of you I’m having to be a little more creative with my cooking these days – delving into the back of the cupboard and pantry for long forgotten bags of “stuff” that have now become my staples. Cans, pulses, long forgotten spice mixes bought on sunny holidays and jars of pickles that have previously had their time to shine gazumped by the allure of fresh meat, pasta, plump fresh tomatoes, salad leaves and cheese, oh how I miss cheese!

Where the weeds in the garden are giving me my greens I still want something substantial in the evening as I’m generally too busy to eat during the day. Between my part time day job where I’m now working from home, and time in my studio working on silversmithing projects or homemade pamper packs (you’ll see more about this to follow I’m sure!), I just struggle to find the time to eat, so come 6pm I want something quick and hearty.

This dish is so quick to make, so packed full of flavour and so cheap, it’s the perfect lockdown meal for me. Joel is averse to eating anything without meat. I can quite happily go without any meat but he’s a confirmed meat lover and so this dish was a sure fire winner over my suggestion of “Puy lentils and beetroot with dandelion”.

I buy bags of frozen veg these days when I am able to, as there is no wastage, no half an onion to sit forlornly in the fridge for a few days or half a pepper to slowly wilt. Frozen veg is absolutely brilliant for recipes like this where the water is cooked out and it doesn’t matter if the veg is a tad mushy, of course you can use fresh if you have it though.

Ingredients:

  • 1 ring spicy chorizo, sliced into rounds
  • 1 tbsp oil
  • 2 large handfuls chopped frozen onion
  • 2 cloves garlic, chopped
  • 1 tsp dried fennel seeds
  • 2 handfuls chopped frozen mixed peppers
  • good splash red wine
  • 1 tin chopped tomatoes
  • 1 can chickpeas, drained (you can use the liquid to make vegan meringues)
  • 2 tsp smoked paprika
  • salt and pepper to taste

To garnish:

Lemon balm pesto, wild garlic flowers

Method:

  1. Gently fry the chorizo in the oil to release the gorgeous orange hued oil then add the onion, garlic and fennel seeds. Gently fry for a few minutes.
  2. Add the peppers and cook until the water has come out of the peppers and evaporated then crank up the heat and add the wine. Cook for a few minutes to boil the alcohol off then add the tomatoes.
  3. Cook for a few minutes then add the chickpeas and smoked paprika then cook long enough to soften the chickpeas. Season and serve topped with the pesto and wild garlic flowers and serve with a big chunk of crusty bread or focaccia.

Lemon balm pesto

lemon balm pesto
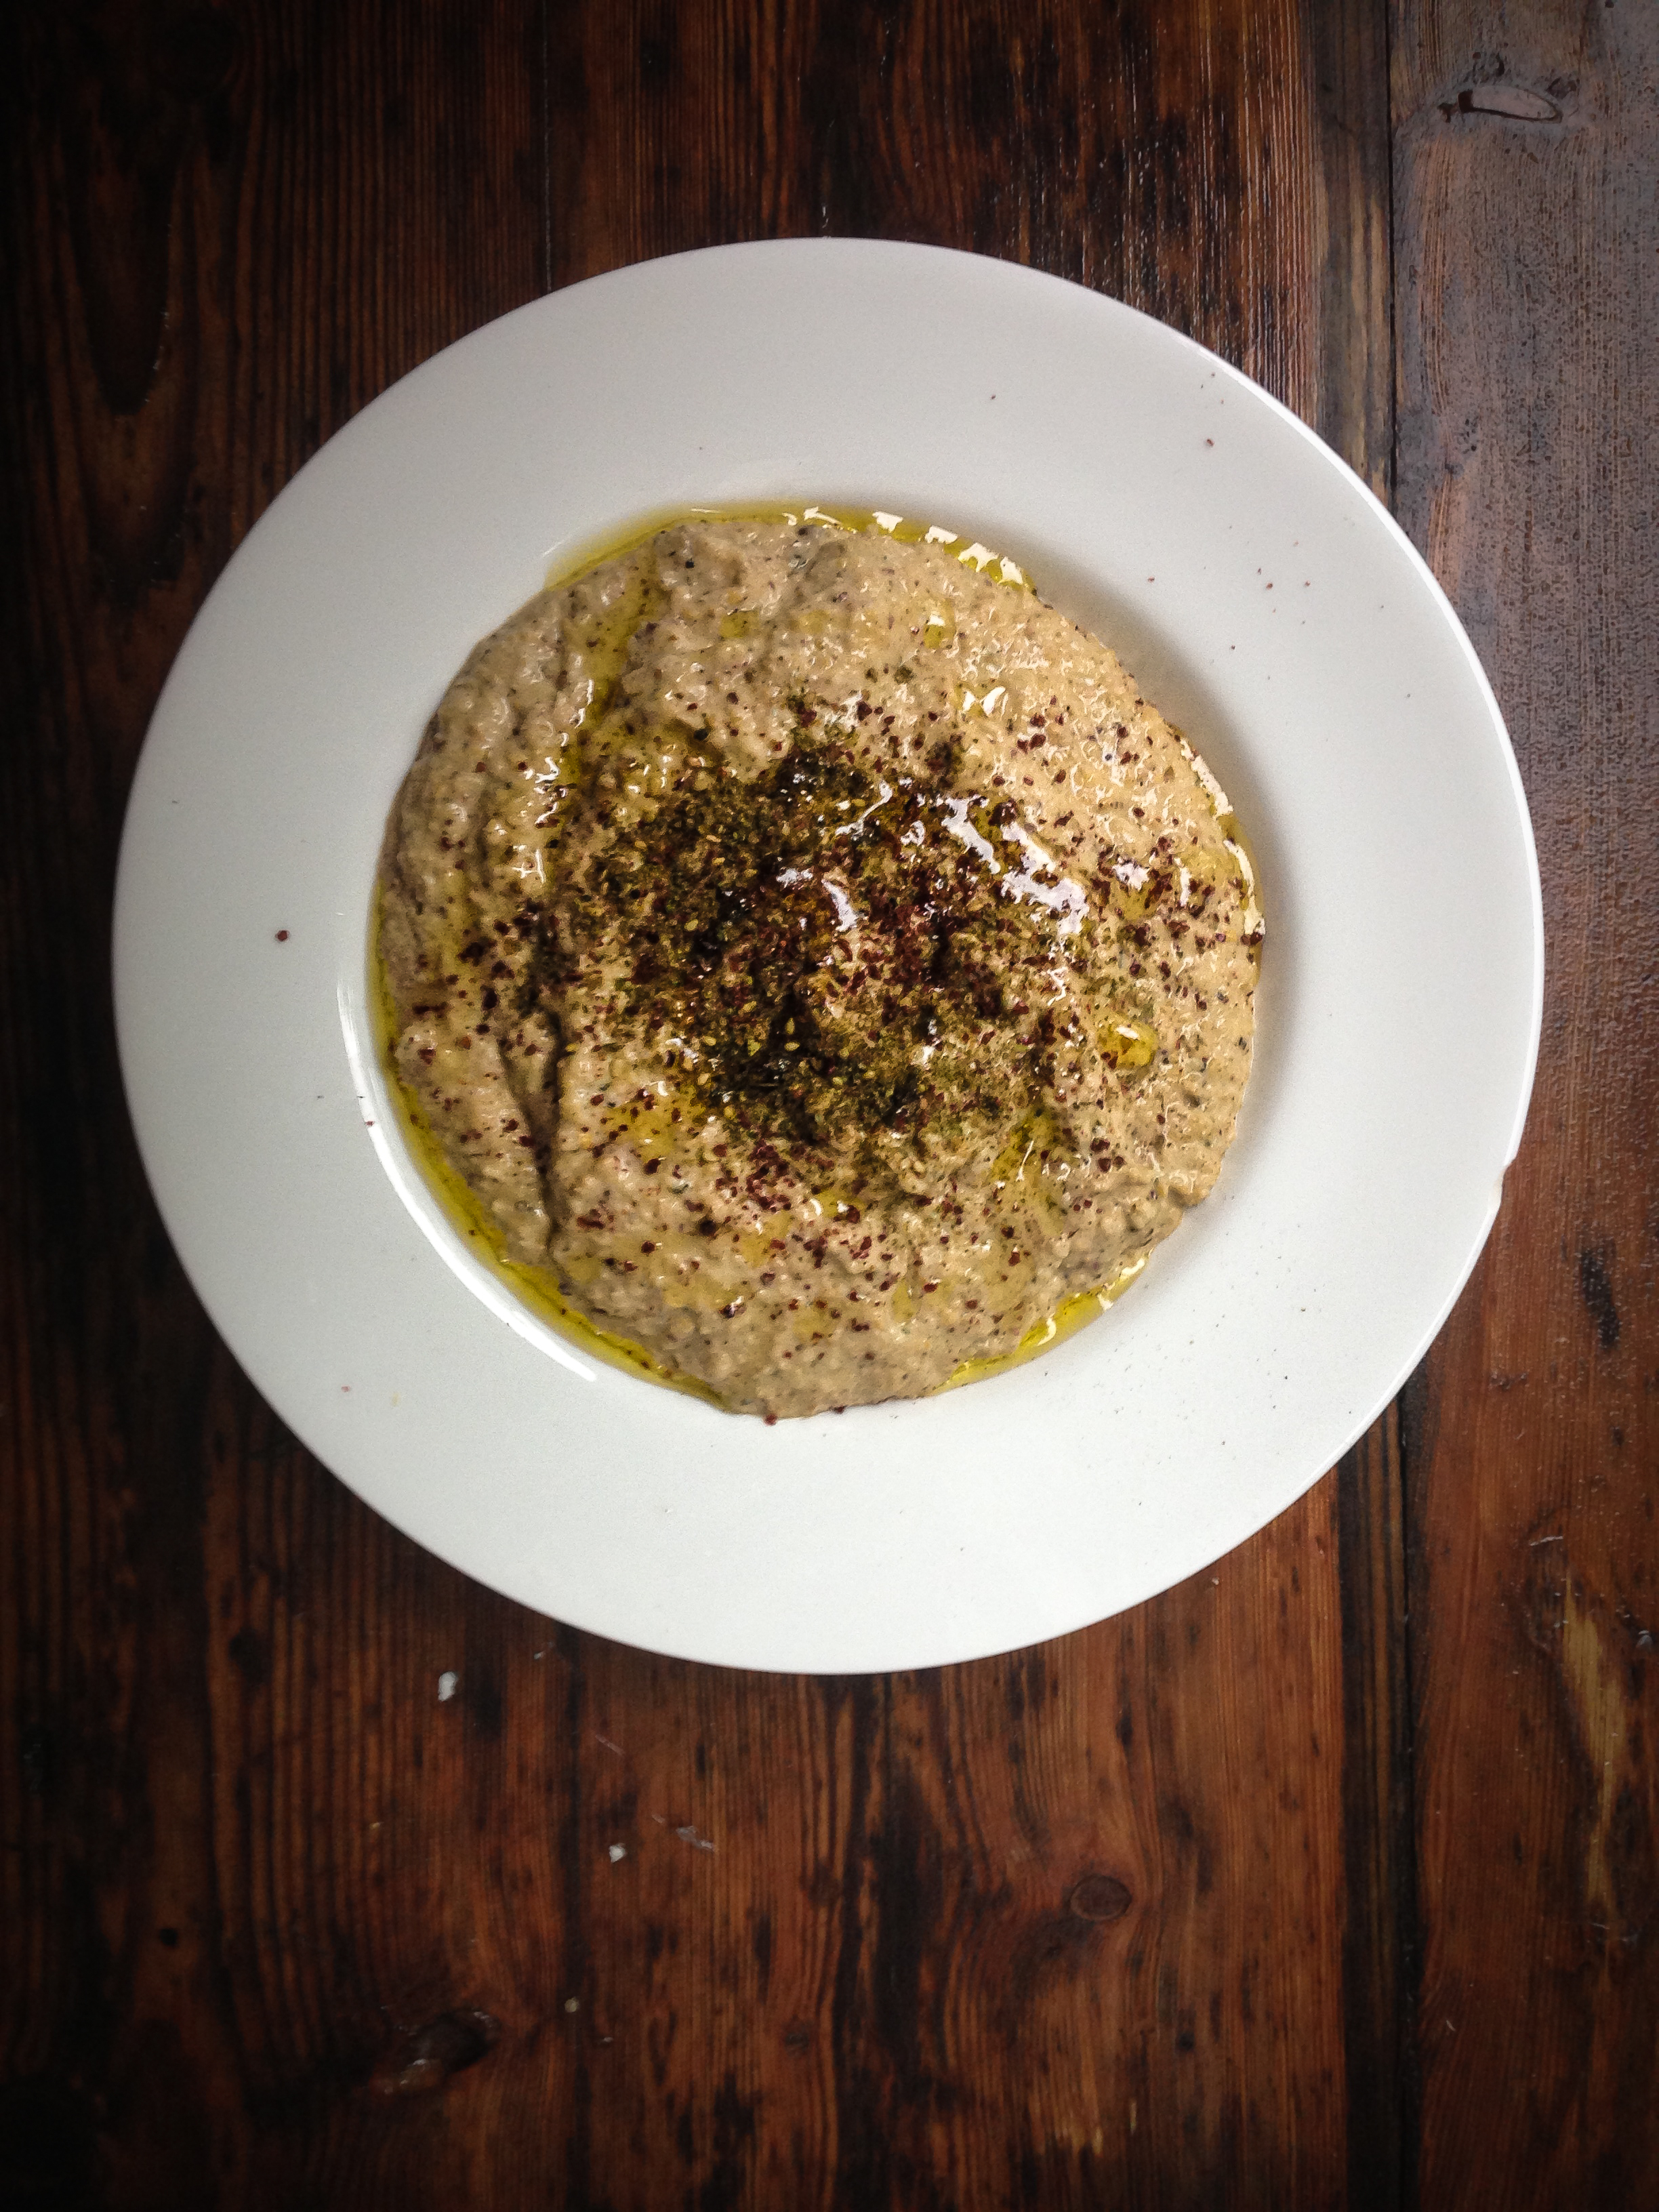
Well I don’t know how lockdown is going for you but times are pretty tough financially speaking here at Wyldelight Cottage, with just half a wage coming in to support two people. It means I’m having to be pretty creative in the kitchen and so more and more I find myself using whatever is growing in the garden to add extra flavour to the pulses and grains that we have come to rely upon. I have plenty of nettles, cleavers, dandelions and wild garlic growing alongside a huge amount of lemon balm. These greens have been an absolute saviour for adding in extra vitamins and minerals and also colour to what I’m cooking.

Lemon balm is really invasive and will take over your garden if you let it (as I have done, more through laziness than desire!), but it’s such a gorgeous plant. Great for making a tea or infusing in a jug of water on the table in the garden for a refreshing drink, popping in your G&T and oh my days THIS PESTO!

I’ve been dunking homemade focaccia in it, I topped a smoky chorizo and chickpea stew with it last night and it would be brilliant with grilled fish or chicken or just smothering new potatoes.

I have no oil but I save the oil from jars of sun-dried tomatoes/roasted red peppers etc and use that, it’s brilliant for making dressings and works incredibly well in this but use whatever you have.

Ingredients:

  • Large handful of lemon balm, mine is quite young so was I able to use leaves from all over the plant.
  • handful of whole mixed nut (brazils, hazelnuts, cashew, almond, walnut etc)
  • 3 large gloves of garlic
  • 1 heaped teaspoon dried chilli flakes
  • squeeze of orange
  • about 100ml sun-dried tomato oil left from a jar of sun-dried tomatoes (or any oil)
  • pinch of salt

Put everything in a Nutribullet or processor and blitz. It’s that easy. If you don’t have a processor or blender then you can do it in a mortar and pestle, it will just take a little longer. You could add parmesan if you have it, that would be lovely too 🙂

Blackberry and sloe gin posset with rosemary shortbread

fullsizeoutput_2cd5

It’s a dark, damp, wintery Sunday here at the cottage. The fire is lit, the cats are all snoozing contently and I’m feeling the need for something zingy, boozy and comforting to brighten the day, step up the winter posset.

Possets are ridiculously easy to create – back when I was a chef I always used to put lemon posset on the dessert menu, it’s delicious, very cheap to make and ready in no time at all which is an all round win for the kitchen.

I love, love LOVE sloe gin. It’s a hip flask staple on a winter walk through frosty fields and so easy to throw together in the last days of autumn. I have bottles of sloe gin in my cupboard dating back to 2010, they have outlasted several relationships and I ration them out as if they were made using the tears of unicorns. I anticipate feeling a great aching loss when the last of the 2010 batch is gone. If you are lucky enough to try some one day then know that you are indeed very special to me! If you don’t have any homemade to hand then you can easily buy a bottle, Sipsmith do a good one.

Now I love shortbread, according to my boyfriend I don’t make enough of it. He’s not a fan of adding any flavours to it mind, he’s a shortbread purist you see – plain, straight down the line, no fucking about shortbread or not at all. I, on there other hand, love lemon shortbread, vanilla shortbread and this wonderfully aromatic rosemary shortbread which goes so well with the rich posset.

If you fancy listening to me make this then click here (you will need iPlayer access as it’s on the BBC).

I’m using blackberries foraged last year that have been in the freezer, but there are plenty to be found on supermarket shelves even at this time of year.

Blackberry and sloe gin posset with rosemary shortbread

Ingredients:

For the posset:

  • 600ml double cream
  • 250g caster sugar
  • 150g blackberries
  • Pinch freshly ground pepper
  • Sloe gin (for quantity see recipe instructions)

Method:

  1.  Heat the cream and sugar together over a medium heat, stir frequently.
  2.  Bash the berries to release the juice then strain into a measuring jug, get all the juice out of the berries.
  3. Measure the juice and add enough sloe gin to bring the liquid up to 250ml.
  4. Once the cream mix is just simmering, remove from heat and stir in the blackberry mix.
  5. Pour into dessert glasses, leave to cool for 20mins then refrigerate for at least 2 hours.
  6.  To serve, simply dust with icing sugar and garnish with a few blackberries.

Rosemary shortbread:

  • 225g butter
  • 110g caster sugar
  • 225g plain flour
  • 110g cornflour
  • 1 tsp fresh finely chopped rosemary

Method:

  1.  Heat oven to 160C.
  2. Cream together butter and sugar.
  3. Sift in flours and add rosemary.
  4. Stir, then use hands to bring it together to resemble crumble mixture.
  5. Turn onto baking parchment. Knead a few times to form rough dough. Cover with another sheet of parchment and use a rolling pin to roll out a slab around 15mm thick.
  6. Cut into rounds with a cutter or whatever shape you prefer then refrigerate for 30mins.
  7. Bake for around 12-15 minutes. Keep a close eye on them as you don’t want them to burn.
  8. Remove from oven, sprinkle with caster sugar. Leave for 2 mins then transfer to a cooling rack.

Pan fried sea bass with smoked bacon, cockles and veg

fullsizeoutput_2ccb

I long for the sea. I long for salt spray in the air and on my lips, seagulls crying out overhead and long days bobbing up and down gently on the water with a feathered rod in my hand. I miss it terribly and I crave its bounty to compensate for this coastal yearning.

I grew up on the coast you see, long before I moved to the most landlocked county in the UK, willingly I might add. You see I’d never been without it, I had no idea of the powerful hold it would have over me once gone. This recipe brings me that little bit closer to an old home.

Pan fried sea bass with smoked bacon, cockles and veg

Ingredients:

  • sea bass fillet
  • 2 tsp rapeseed oil
  • 1 tbsp butter
  • small handful of smoked streaky bacon, diced
  • 2 shallots, finely diced
  • splash of white wine (or cider works too)
  • broad beans, skinned (I use frozen in the winter, you could also use soy beans or peas)
  • 1 head of gem lettuce, split down the middle
  • 150ml whipping cream
  • a handful of cooked cockles (not pickled)
  • a few chives, finely chopped

Method:

  1. Season the fish with a little salt and pepper. Heat the frying pan until very hot, then add the oil. Lay the fish fillet in the pan, skin-side down.
  2. Reduce the heat to medium, then leave the fish to cook for 3-4 mins, undisturbed.
  3. Flip the fillet over and fry for about 2 mins until just done, basting the skin with the oil in the pan as it cooks. Leave to rest on a warm plate, skin-side up. Cover with a plate or some foil to keep warm.
  4. Return the pan to a medium to high heat, add the butter, bacon and shallot, fry for about a minute or two until the bacon is cooked then add the booze. Once the booze has bubbled up add the cream, broad beans and lettuce. Reduce the heat to medium and cook for a few minutes or until the lettuce heart has softened  Add the cockles and heat through. Check for seasoning and add a bit of pepper if needed, you shouldn’t need any salt due to the bacon.
  5. Arrange the contents of the pan onto a plate, top with the fish and garnish with the chives.


Beef Pho

fullsizeoutput_2ccc

Spending time in the cottage kitchen in winter is one of the best ways to stay warm, likewise, having a big bowl of seductively soothing and aromatic pho is also another layer of added comfort.

I’ve tried a number of different variations when making this Vietnamese dish, from a super easy cheats method using stock cubes to the the more time consuming 48 hr bone broth method. I’ve settled on this one though as it’s the right balance of time and ease that mean I feel like it’s been a labour of love without it being a pain in the arse.

I’m lucky enough to have my beloved Derek Jones Butchers close by who, for a donation in the charity pot, will generously furnish me with some big beef bones. Make friends with your butchers, they are your allies and offer a wealth of knowledge along with their gentle pisstaking and camaraderie. Basically if they don’t take the piss out of me for something when I go in, I begin to worry.

I add a splash of vinegar to my bone broth once it is simmering, not only does it help bring all the impurities up to the surface for skimming (when it bubbles up upon addition), but the vinegar helps extract the minerals from the bones for extra nourishing broth.

This is not a traditional pho but rather one that I keep coming back to making again and again whenever the call of the bones takes me. It’s particularly good if you are feeling under the weather or recovering from anything that’s had you on your back. If you can’t be bothered to make your own stock then a couple of good cubes dissolved in hot water will do, just don’t forget to add all the broth aromatics.

fullsizeoutput_2cce

Beef Pho

Ingredients:

For the bone broth:

  • Beef bones
  • 2 tablespoons apple cider vinegar
  • 1 onion, halved
  • 1 bulb garlic
  • 200g ginger, unpeeled but sliced
  • 4 star anise
  • 2 cinnamon sticks
  • 4 cloves
  • 1 tsp coriander seeds
  • 2 tblsp fish sauce
  • salt and pepper

flat ribbon rice noodles

To serve:

  • sirloin or fillet steak, very finely sliced
  • tenderstem broccoli
  • thinly sliced butternut squash or carrot
  • spring onion, chopped
  • fresh chilli, finely sliced,
  • beansprouts
  • coriander
  • fresh lime


Method:

  1. Put your bones into a big pot, cover with water and bring to a simmer, foam will rise to the surface. Boil for 10 minutes then drain, rinse under cold water then return the bones to the pot, cover with water and then bring to a simmer.
  2. Once simmering add the vinegar, if foam bubbles up simply remove it.
  3. Char the ginger in a dry pan then add to the pot along with the onion, garlic, star anise, cinnamon and coriander. Simmer for a good 8-12 hours with the lid on, topping up the water as you need it. Leave to cool overnight.
  4. The next day you will see a thick layer of fat has formed, scoop this off and return it to a simmer, simmer away for another 4-6 hours or longer if you prefer. I often cook mine for a total of 24 hours. Add the fish sauce and season to taste.
  5. Once ready to eat, cook the noodles according to the packet instructions then divide between your bowls. Add your sliced beef then ladle over the hot broth and garnish. Serve with a big squeeze of lime and a pat on the back for being so awesome.


Lemon drizzle gin cakes

IMG_6043

Excuse my appalling icing attempts in this post, I’ve always been utterly shit at icing, one day I’ll actually learn how to do it but until then you’ll just have to try look beyond the disastrous attempts at prettying cakes and bear with me

Gin and lemon, two happy bedfellows that sing about sunnier times and come as welcome relief in these cold winter days. These cakes are light and fluffy yet boozy and indulgent, what’s not to love?

You can hear me making these cakes by clicking here (you’ll need Iplayer as it’s a BBC clip). There’s no bad language so it’s perfectly safe to listen to in the kitchen whilst whipping up a batch of these tasty treats with the kids around.

IMG_6044

Lemon drizzle gin cakes:

Ingredients:

For the cake mixture:

  • 200g Stork
  • 200g caster sugar
  • 200g self raising flour
  • 3 large eggs
  • zest of 3 lemons
  • 90ml Sipsmith Lemon Drizzle Gin (or you could use a citrusy gin)

For the drizzle:

For the icing:

  • 1 x 500g tub ready made lemon frosting (yeah I totally cheated and got one from Morrisons)
  • Edible decorations such as fondant flowers and white chocolate stars.

Method:

  1. Heat oven to 170C (fan). Place 12 cupcake cases into a muffin tray
  2. Use an electric whisk to cream together the Stork and the sugar until it’s light and fluffy.
  3. Add flour, eggs and zest and beat together.
  4. Gradually beat in the gin.
  5. Fill the cases around two thirds full, use all the mixture
  6. Bake for 12 minutes or until the cakes pass the skewer test.
  7. Make the drizzle by combining the ingredients in a pan, heat over a medium heat until the sugar has dissolved, bring to the boil and boil for 30 seconds them carefully remove the juniper berries.
  8. Prick the cakes all over the top with a pointed chopstick or skewer then carefully pour all of the syrup over them, leave to cool completely.
  9. Put the frosting in a piping bag, pipe all over the tops of the cakes (try and do a much better job that I did!) then decorate as you please.

IMG_6045


Super lazy smoky chicken traybake


IMG_6031

The wind is howling, the rain is lashing against the windows and here at the cottage we are still deeply ensconced in hibernation season – log fires, soft, warm blankets, twinkling fairy lights, full bodied wine and comfort food are all keeping spirits lifted.

These short, brooding days are brightened immensely with minimal effort in the kitchen thanks to the humble yet versatile traybake. I throw a traybake into the oven about once a week and it never fails to impress with its generosity of flavour and ease of cooking.

The foundations to this recipe remain the same whatever time of year you make it: smoky chorizo (or fresh Spanish sausage works well if you prefer), chicken thighs and veg. Easy.

Depending on what veg is in season you can make a version of this all year round with what is growing in your garden or what’s available on the shelves/on the market stall. Sometimes I add potatoes and others it may be a tin of chickpeas or simply stick to soft veg, whatever you’re in the mood for, this recipe can do it.

The below recipe is more like a rough guide, put as much in as you like, swap whatever you like, its all good.  In the summer I’ll often add slices of clementine and tarragon along with fennel and asparagus, the winter brings hardier herbs like rosemary or fennel seeds, just take the skeleton of it below and experiment away.

Easy smoky chicken traybake:

Ingredients:

  • Chanternay carrots, whole
  • Red peppers, sliced
  • Cherry tomatoes, whole
  • Baby potatoes, whole or tin of drained chickpeas
  • courgettes, chopped into large chunks
  • 1 ring spicy chorizo sliced into 1 cm rounds
  • Chicken thighs
  • Spray oil
  • Smoked paprika
  • Salt and pepper

Method:

  1. Heat your oven to 200C (fan).
  2. Put the veg, chicken and chorizo into a roasting tray and give a good mix, spray with the oil and sprinkle over the paprika and salt and pepper. Arrange your chicken on top of the veg and roast for about 35 minutes or until the chicken is cooked through and the skin deeply golden and crispy. Done 🙂


Doritos scotch eggs!

Doritos scotch egg oozing yolk

GET IN MY FACE

DORITOS SCOTCH EGGS! Yes they really are as good as they sound too!

Well it was April since I last posted anything as it’s been a rollercoaster of highs and lows here at the cottage. I had a nasty head injury and struggled to work so any recipe development went on paid work for Metro, (see my stuff here) BUT, I’m back again, revamping the site and hoping to put more time and effort now I’m pretty much back to a half functioning adult 🙂

So to kick things off here is a little recipe I did for National Sausage Week the other week, it involves crunchy cheese Doritos, sweet chilli sausage meat and a perfectly runny golden yolk, what’s not to love?

The recipe for these beauties are in this handy little film I made…

Doritos Scotch Eggs

nettle and wild garlic quiche

Wild greens quiche

nettle and wild garlic quiche

Super simple and hugely flavourful

Another of the recipes from my wild food in the kitchen talk at Old Dalby WI, this is a really simple quiche that you can chuck all your green bounty into.

Now once I’d admitted that I hadn’t made the pastry for this myself I thought I would have been politely escorted from the village hall by the WI ladies but they very generously did not revoke my speaker’s pass and allowed me to continue!

The amount of pastry from one block of Jus-Rol shortcrust pastry makes enough for one large quiche and 3 mini ones, just saying 🙂

Wild greens quiche:

a kitchen full of foraged wild garlic, nettles, goose grass and chickweed

Assorted wild greens from a gentle forage

  • A few handfuls of assorted gathered young green shoots. I used: nettle tops, chickweed, dandelion, wild garlic and goose grass, they will shrink right down.
  • 40g butter
  • half a white onion, finely chopped
  • 4 eggs
  • 1 1/2 tablespoons plain flour
  • 200ml double cream
  • 80 ml milk
  • plenty of freshly ground pepper
  • pinch of salt
  • freshly grated nutmeg (optional)
  • 1 pack Jus-Rol shortcrust pastry (or a batch of your own properly made, wonderful shortcrust pastry 🙂  )

1: Wash your greens and blanch in boiling water for a couple of minutes, drain, squeeze out any excess liquid and roughly chop.

blanched wild greens in a bowl

Blanched wild leaves and shoots

2: Roll out your pastry and put into a tart tin with removable bottom, use a bit of pastry to push the sides and base down. Cover with some baking parchment and fill with baking beans and bake in an oven heated to 180C for about 15 minutes.

3: Remove the parchment and beans, gently prick the base with a fork and return to the oven for about 7-10 minutes.

4: Fry the onion in the butter occur a low heat until soft but not coloured, allow to cool.

5: Mix the flour together with one egg and a little of the milk to form a paste, add the remaining eggs, cream and milk and mix really well.

6:Add the cooled onions and butter and season generously, add nutmeg if using.

7: Arrange the greens over the tart base and then pour over the mixture,

Arrange a few nettle leaves on the top, use gloves!

Arrange a few nettle leaves on the top, use gloves!

8: Reduce the oven temperature to 170C and bake the tart for around 35-40 minutes.

souffle/quiche!

souffle/quiche!

9: Once the tart is baked, trim off the pastry edges to tidy it up ( I haven’t yet done this in the pic above) and serve either warm straight away of allow to cool.

Wild garlic pesto ciabatta rolls

Crunchy on the outside and soft and pillowy on the inside

Crunchy on the outside and soft and pillowy on the inside

Last night I was in Old Dalby giving a talk and cookery demo to the lovely ladies of their WI about incorporating wild food into the kitchen. Regular readers of this blog and those who follow my Twitter account will know I am a huge fan of raiding the wild larder for my recipes so it was wonderful to see so many people in the village hall who were keen to know more about it.

I brought along plenty of things to try and will be popping the recipes up on here over with the tag “Old Dalby WI” if anyone wants to find them all.

First up are these little wild garlic pesto ciabatta rolls.  I always make a HUGE batch of wild garlic pesto when the season hits, I put plenty into jars and store in the fridge and the rest I portion off into ziplock bags and freeze flat allowing me to break some off throughout the year and stir into pasta, make more bread, serve with lamb, make hummus, basically I use it in most things!

wild garlic pesto

Late night and with little light for the phone to take the pic but you get the idea 🙂

Wild garlic pesto:

  • several handfuls wild garlic, washed and roughly chopped
  • enough olive oil or rapeseed oil to make a good paste
  • 100g chopped toasted hazelnuts (Morrisons sell these in 100g packets)
  • a couple of handfuls of freshly grated grand padano
  • salt and pepper to taste
  1. Place the leaves in a food processor and blitz, they will stick to the sides so start to slowly pour in the oil as the blades spin, you can add more leaves as they break down. Keep adding leaves and oil until you get a consistency you are happy with.
  2. Add the nuts and cheese and season, blitz some more and add a little more oil to loosen.
  3. Decant intio sterilised jars and cover with a layer of oil.

Wild garlic pesto ciabatta bread rolls: (makes 12)

wild garlic pesto ciabatta bread rolls


  • 400g strong white bread flour
  • 350ml warm water
  • 1 x 7g sachet fast action dried yeast
  • 1 1/2 tablespoons runny honey
  • 2 tablespoons extra virgin olive oil (plus extra for brushing)
  • 1 teaspoon salt
  • a few tablespoons of wild garlic pesto
  • blue poppy seeds (optional)

1: Put your flour and salt into a mixer, give it a stir and make a well in the centre.

2: Add the honey to the warm water and stir to dissolve, add the yeast and stir then the oil. Pour into the flour.

3: Have the bread hook attached to your mixer, start the machine on slow speed then increase to medium high, mix for a good 10-15 minutes or until the dough has formed a soft, smooth ball (my mixer is a bit rubbish so it took a while but just keep an eye on it).

4: Put the dough in an oiled bowl (the mixer bowl is fine) and cover, allow to rise until doubled in size.

wild garlic pesto bread4: Tip the dough onto a floured surface and divide into  two more manageable halves.

5: Roll and stretch the dough into as close to a rectangle as possible then cover with a layer of pesto.

wild garlic pesto bread-1-2

6: Roll lengthways from bottom to top, stretching as you go to make a swiss roll kinda thing then slice into rounds and place these into an oiled muffin tin.

wild garlic pesto bread-1-3

7: Cover and allow to rise for an hour or so in a warm place.

8:  Sprinkle with some blue poppy seeds and bake in an oven heated to 180C for around 25-30 minutes, during the last 5 minutes brush the tops with more olive oil. The rolls are ready when you tap on the base of one and it sounds hollow.

SOOOOOO good

SOOOOOO good


Simple roasted leeks with smoked Lincolnshire Poacher cheese

Let the leeks shine through

Let the leeks shine through

The humble leek is so often overlooked as a star in its own right. Google “leek recipes” on an image search and you’re met with recipe after recipe of pies and tarts and soups but to simply roast it really allows this wonderful allium to shine.

I always grow leeks in my tiny garden but once they are all devoured I turn to my wonderful growers Bridget and Maureen over the border in Lincolnshire. I buy pretty much all my veg from these fab ladies every Sunday at my local car boot sale as they can’t be beaten on quality, freshness and price.

What better to accompany these Lincolnshire leeks than some finely grated smoked Lincolnshire Poacher cheese, an easy match made in flavour heaven and the easiest of starters or side dishes to make.

The charred outer skins take on a wonderful flavour and texture whilst inside the leek is soft and sweet.  A goat’s cheese or Wensleydale would also work beautifully with this dish simply crumbled over before serving.

Roast leeks with smoked Lincolnshire Poacher cheese:

  • a few leeks, trimmed and washed
  • a fine covering of cooking spray (I used Flora olive spray, you can use butter but the spray allows the flavour of the leeks and cheese to be unimpeded)
  • freshly ground black pepper and sea salt flakes
  • a light grating of smoked Lincolnshire Poacher cheese
  • a few sprigs fresh Greek basil

trim your leeks to fit your roasting tin

trim your leeks to fit your roasting tin

  1. Trim the leeks to fit in a roasting tray. Spray lightly and sprinkle over some salt and pepper.
  2. Cook until they look like this

    Cook until they look like this

    Roast in a very hot oven (I use my max setting of 225C) for about 10 minutes or until they look like the above picture.

  3. Ready

    Ready

    Use a microplane to finely grate over your cheese, sprinkle with the Greek basil and serve immediately.

Homemade rye crisp breads with wasabi cream cheese and smoked salmon

Addicted.

Addicted.

It’s taken me a long time to try Peters Yard crispbreads but when a free box arrived in my goats cheese delivery from Brockhall Farm (best goats cheese EVER) just before Christmas I had a nibble and was immediately hooked. Those wafer thin biscuits are  SO good with cheese and a dollop of chutney but MY GOD they cost a bloody FORTUNE to buy.

The only logical option was to make my own and by my second attempt I had perfected the art of getting wafer thin crisp breads that have the perfect snap to them and are boosted by a selection of my favourite toppings.

So the crisp breads are perfect and what about the topping? Well the fab folks at The Wasabi Company sent me some of their fresh wasabi rhizome that they grow down in Dorset, along with a plant for me to plant and grow myself (whoop!). I used to use lots of fresh wasabi when I lived in Japan, we would grind some on a piece of shark skin at my friend’s sake bar in Kyoto and sip sake in between doses of wasabi or miso paste.

The tubes of “wasabi paste” that you buy over here are made up mostly of regular horseradish and only a tiny percentage of actual wasabi so finding out that it’s grown right here in the UK was a revelation, thanks Pam Lloyd and Polly Akielan!

Rye crispbreads:

  • 250g rye flour
  • big pinch sea salt flakes
  • 200g warm water
  • 9g fast action dried yeast
  • 1 tablespoon runny honey

Toppings: (optional)

  • caraway seeds
  • poppy seeds
  • sesame seeds
  • onion seeds
  • dill seeds
  • dukkah

homemade rye crispbreads

  1. In a large bowl combine the flour and salt.
  2. Mix the water, yeast and honey in a jug then mix into the flour.
  3. Cover with cling film and leave in a warm place for an hour.
  4. Heat your oven to 220C. Get a sheet of baking paper and lie it on a flat baking tray, flour it lightly.
  5. Take a small bit of dough (about the size of a ping pong ball), flour it well and also your hands. Put it on the baking paper and make a fist. Start to hit the dough with the flat side of your fist from the centre of the dough outwards, stretching it by pounding, keep it nice and floured. Once very thin sprinkle a topping on and hit it to embed with your fist again then prick it all over with a fork..
  6. Repeat that until your baking sheet is full then bake for around 8-9 minutes or until it is crisp. Repeat the process until all your mix is used up. These keep in a sealed tin for a few days easily.

Wasabi cream cheese and smoked salmon topping:

wasabi cream cheese-1


This bit couldn’t be easier, simply grate your fresh wasabi and stir into cream cheese, yep that’s it. Spread your cream cheese on the crispbread, top with smoked salmon, a squeeze of lemon, some freshly ground black pepper, sea salt flakes, chopped fresh dill and cress. So easy and so addictive.


Raw courgette “hummus”

It sounds like its going to be horrid but is really, REALLY good. Win.

It sounds like its going to be horrid but is really, REALLY good. Win.

For the last 2 weeks I’ve been living on juices of fresh vegetables and fruits. Yep, three times a day I fire up my juicer and that’s my day’s food sorted. Yes this sounds pretty weird but a few weeks ago I was feeling so poorly with a bug that was going around that I started to think a great deal about the body’s ability to heal itself.

I figured that my body wants to heal itself, indeed it does heal itself constantly throughout the day and in order to do this it needs me to give it the right nutrients. I decided to try eliminating any bad nutrients (ALL the funs stuff) and JUST give it the good stuff to see how that affected it, if at all.

The yellow courgette hummus is oh so pretty

The yellow courgette hummus is oh so pretty

It was pretty tough to start as I also write for Metro and am commissioned to create a recipe to accompany each episode of The Great British Bake Off so I’ve been baking a HUGE amount of delicious food that I wasn’t able to eat (OK so I HAD to try a bit).

The hardest may have been Pie Week as I made about 20 pork pies and they were all kinds of awesome including this gorgeous monster pork and piccalilli pie with homemade piccalilli…

This pie is the pie of the gods.

This pie is the pie of the gods.

BUT I persevered and I feel SO much better for it. Every now and then I cheat and make something to eat, always raw and packed full of nutrients though and this courgette hummus has become quite a regular fixture on my “cheat” menu. I got the idea from a brilliant book called Eat Yourself Beautiful by Lee Holmes which I was sent earlier this year, it’s an absolutely brilliant book and I highly recommend it. In the book Lee uses blanched almonds as the base with the courgette but I prefer the Omega mix and played around with the recipe until I found something that worked for me.

Raw courgette hummus

  • 1 medium courgette, grated (skin and all)
  • 1 tablespoon tahini
  • 1 handful Omega seed mix (available from shops, contains sesame, linseed, sunflower and pumpkin seeds)
  • 1 clove garlic
  • juice of half a lemon
  • freshly ground black pepper
  • pinch sea salt flakes
  • bit of water to loosen if needed

Simply put everything into a food processor and blitz until smooth, sprinkle with some more Omega seed mix.

Boozy lemon and almond drizzle cake

Boozy len and almond cake, hells yeah.

Boozy lemon and almond cake, Hells yeah.

I’m not going to waste any superlatives describing this cake, it rocks in all the best ways, end off.

Limoncello lemon drizzle cake

Ingredients:

For the cake: (makes 2 loaf tins)

  • 250g butter
  • 250g caster sugar
  • zest of 3 unwaxed lemons
  • 5 eggs
  • 150g self raising flour
  • 150g ground almonds
  • 1 teaspoon baking powder
  • 1 tablespoon poppy seeds

For the drizzle:

  • juice of 3 lemons
  • 150g caster sugar

For the icing:

  • 80g icing sugar
  • 60ml limoncello
  • lemon zest to sprinkle (optional)

lemon drizzle cake-1

poked with a skewer, drizzled and cooling in their tins

Method:

  1. heat fan oven to 180C. Line 2 loaf tins.
  2. cream together the butter and sugar, beat in the eggs, one at a time, waiting until each egg is thoroughly incorporated. Beat in the zest and poppy seeds.
  3. Stir in the ground almonds and baking powder followed by the flour. Do not over mix.
  4. Bake for approximately 50 minutes.
  5. Combine the lemon juice and caster sugar in a small saucepan and heat on a medium heat. Once the cakes are cooked poke them all over the top with a skewer then pour over the drizzle and leave to cool completely in the tins.
  6. Once cool make the icing by mixing together the icing sugar and limoncello. Remove the cold cakes from the tins and drizzle with the icing and sprinkle some more lemon zest over the top.

Humous with zataar and sumac

healthy humous

Like its spelling, everyone has their own way of making humous, I like mine without loads of oil but rammed full of added spices so I can tuck in to mountains of it guilt free. This is a really simple recipe, I vary it slightly depending on what fresh spices I’ve acquired and if guests are about I usually add more olive oil and less water (it’s the chef in me I just can’t help it).

Humous with zataar and sumac

  • 1 tin cooked chickpeas, half drained
  • 2 teaspoons dried garlic granules (sweeter than using raw)
  • juice of 1 lemon
  • 1 heaped tablespoon tahini
  • large pinch freshly ground black pepper
  • pinch sea salt flakes
  • 1 tablespoon zataar
  • 1 tablespoon sumac
  • 1 heaped teaspoon ground cumin
  • few tablespoons cold water
  • a sprinkle of zataar, sumac and a drizzle of olive oil to serve
  1. Combine the chickpeas, tahini, lemon, garlic and spices in a food processor.
  2. Blitz and loosen with more water until you have a smooth, creamy consistency. Taste and adjust seasonings.
  3. Scoop into a bowl, sprinkle with the extra zataar, sumac and olive oil and leave to sit if you can for an hour at room temperature to allow the flavours to develop.

Superfood salad with cocoa nibs

superfood salad

Usually if anyone mentions the word “Quinoa” I’m immediately turned off a dish, it’s often made so badly that it resembles a soggy mush of squirly disappointment but if cooked well and combined with some peaky flavours it’s actually rather nutty and lovely and this salad proves just that.

Superfood salad with cocoa nibs

  • 2 handfuls raw quinoa
  • 1 tablespoon powdered veg stock
  • 1 small orange
  • 2 handfuls of frozen board beans, defrosted in water and drained
  • 1 tablespoon cocoa nibs
  • 3 tablespoons salad sprinkle mix (mixture of seeds such as pumpkin, sesame, sunflower, linseed etc)
  • 1 teaspoon poppy seeds
  • 1 handful blanched almonds
  • 1 yellow chilli finely chopped
  • 1 handful of feta, crumbled
  • 1 handful of fresh mint, roughly chopped
  • freshly ground black pepper
  1. Cook the quinoa according to packet instructions but add the stock to the water. Once cooked drain in a sieve and leave to cool completely, this will also help dry it out a bit.
  2. Slice the orange into rounds and sear on a very hot griddle, turning over a couple of times then slice each round into quarters.
  3. Combine everything in a bowl, you can drizzle a little extra virgin olive oil over if you fancy it, leave for at least an hour at room temperature to allow all the flavours to mix.

Kickass parsley and fennel salad

parsley and fennel salad

I had a meeting in Leicester on Wednesday so took the opportunity to head to Radio Leicester and catch up with the wonderful Ben Jackson with whom I do the Food Friday cooking items. Ben had just been at the Chelsea Flower Show the previous day and was telling me about an amazing Lebanese meal he went for in Knightsbridge at a restaurant called Randa, he raved about a parsley dish that I knew I needed to go and experiment with.

I’ve been sprinkling this on everything: BBQ’d fish and meat, flat breads smothered in humous and my personal favourite is to dive into it using a piece of crispy smoked bacon as a spoon, yeah, all the ace.

Parsley and fennel salad

  • 1 large bunch flat leave parsley, chopped
  • 1 large handful fennel fronds, chopped
  • 1 red banana shallot, finely chopped
  • 2 cloves garlic, grated on a microplane
  • zest 1 lemon, grated on a microplane
  • juice 1 lemon
  • 2 spring onions, finely chopped
  • 5 radishes very thinly sliced
  • 1 handful cherry tomatoes, cooked on a very hot griddle for a minute or two
  • pinch sea salt flakes
  • pinch freshly ground pepper
  • drizzle of extra virgin olive oil
  • pea shoots, chervil and edible flowers to garnish

Just combine everything in a bowl, stir well and leave for at least 2 hours if you can at room temperature before serving then keep in the fridge for up to 4 days.

Black Forest chocolate brownies

Gooey, fudgy awesome.

Gooey, fudgy, awesome.

So yesterday was my first day back doing BBC Radio Leicester’s Food Friday show with Ben Jackson since my knee operation last month. I’m still wobbly and having to use a crutch or two but by far the most agonising thing has been not being able to stand up to cook. It still hurts but my body feels completely out of kilter and my mind suffers if I can’t spend at least a small amount of time each day creating stuff in my kitchen.

One of the positives of being on crutches is that I’ve had to get a cleaner to come and help me around the house, she’s all kinds of ace and as it turns out an awesome cake maker who was telling me about a Black Forest cheesecake she made recently, a lightbulb flashed on in my mind and these rather kickass fudgy brownies were created.

You can hear me making this, it’s only 11 minutes long, by clicking on this link where you will also find the recipe. We always have a blast in my kitchen and yesterday was no different, although he did edit out my “only special people get to drink out of Lady Diana’s cup” line….

What I also forgot about was the “surprise” that I mentioned in the clip, this is simply to swap the cherries for Cadburys mini eggs, perfect for Easter 🙂

Black Forest Chocolate Brownies (makes 12)

  • 300g unsalted butter, cubed
  • 250g dark chocolate broken into small pieces
  • 1 handful dried cherries
  • 2 handfuls walnut pieces
  • 1 capful vanilla extract
  • Pinch sea salt flakes
  • 80g plain flour
  • 360g caster sugar
  • 80g cocoa powder
  • 1 teaspoon baking powder
  • 4 eggs, lightly beaten
  • 1 x 400g can dark cherries in syrup, drained

For the glaze: (optional not essential)

  • 2 heaped spoonfuls morello cherry jam
  • 50ml kirsch or other alcohol such as dark rum

For the topping:

  • 300ml whipping cream
  • 3 heaped tablespoons mascarpone
  • 1 teaspoon cocoa
Method:

  1. Heat oven to 180C. Put the butter and chocolate in a bowl set over simmering water and melt until silky and thoroughly combined then add the dried cherries and nuts.
  2. Combine the flour, cocoa, sugar and baking powder in a separate bowl and stir to mix.
  3.  Add the flour mx to the melted chocolate and gently stir to combine then add the eggs and continue to mix gently with a spatula until it is all thoroughly combined.
  4.  Line a 25cm x 25cm baking tray with greased baking paper that overhangs by a few cm to make it easy to remove the brownie later, and pour in the brownie mix, scatter over half of the cherries and push them into the mix.
  5. Bake for 25-30 minutes (it will be quite wobbly, it will harden on cooling) then remove from oven and leave to cool completely in the baking tray.
  6. Put the glaze ingredients in a small saucepan and cook over a medium heat for 4 minutes. Brush over the cold brownie.
  7. Remove the brownie from the tin.
  8. Beat the whipping cream until firm then ad the mascarpone and mix well, put it in a piping bag and pipe over the top of the brownie to cover. Decorate with the remaining cherries and a dusting of coca.


Hazy Breakfast Martini

Get your brunch off to the best of starts with one of these.

Get your brunch off to the best of starts with one of these.

Well it’s been quite some time since my last post as I had to take some time out, I’ve had knee surgery and since coming out of hospital 14 days ago I’ve been so foggy with painkillers and pain that the thought of writing a post was as daunting as writing a novel. I’m  still laid up in bed wearing a knee brace but on Sunday my friend Andy came round, so excited was I to see someone who didn’t work for the NHS that I created this beauty of a cocktail to celebrate.

This gem of a tipple will kick the ass of your hangover out the back door and pep you up a treat, where the traditional Breakfast Martini uses marmalade and gin I’m using a whisky marmalade and vanilla vodka, basically because I’m stuck indoors and can’t get out to buy anything but it turns out it’s WAY nicer to boot.

Ultimate Hazy Breakfast Martini (serves 2)

  • 1 large heaped tablespoon whisky marmalade
  • 70ml vanilla vodka
  • 50ml Cointreau
  • 25ml freshly squeezed lemon juice
  1. Put a few cubes if ice into 2 martini glasses and top with water to chill down.
  2. Put the marmalade and vodka into a cocktail shaker and stir until dissolved.
  3. Add the Cointreau and lemon juice and fill shaker with ice cubes. Seal and shake until the outside of the metal shaker is frosted then discard the iced water from the martini glasses and strain the cocktail between them. In about 5 minutes you will feel pretty awesome.

Epic scampi sandwich with easy homemade tartare sauce

like a posh fish finger sandwich but better

like a posh fish finger sandwich but better

So last night I tweeted this pic of my dinner, a scampi sandwich with homemade tartare sauce and then was flooded with responses on Twitter, Instagram and Facebook. Some shocked that I would put scampi in a sandwich, which seems odd as they are perfectly happy with a fish finger sandwich, most now with hardcore cravings for scampi or fish finger sandwiches, but also many wanting to know how I do my tartare sauce, well I cheat.

If you want to make your own mayonnaise from scratch for this then Nigel Slater has a good recipe but if I’m having a scampi sandwich for tea it means I’m tired and time short and need some quick comfort food and not to be faffing about making my own mayo, which to be fair I never bother with anyway at the best of times.

Ingredients:

  • handful of good frozen whole tail scampi
  • few leaves of iceberg or gem lettuce
  • sliced cucumber
  • 2 slices of bread (don’t go posh here, go for a squishy one rather than crusty one)
  • tartare sauce (see below)

Tartare sauce:

cheats easy tartare sauce

  • 2 heaped tablespoons mayonnaise
  • 10 cornichons, chopped
  • 1 heaped tablespoon mini capers (the larger ones are too vinegary)
  • juice and finely grated zest of half a lemon
  • handful chopped parsley
  • half a finely diced shallot (I love onion in sandwiches)
  • 1 teaspoon Dijon mustard
  • 1 teaspoon garlic infused creamed horseradish (from The Garlic Farm)
  • freshly ground black pepper
  • pinch smoked sea salt to taste

Method:

  1. I prefer to oven roast my scampi to avoid an oily sandwich but cook as you prefer until golden and crispy.
  2. Make the tartare sauce by simply stirring everything together.
  3. Spread a layer of tartare on each bit of bread then a layer of lettuce, cucumber and then scampi, top with the other slice of bread, slice in half and behold the wonder of an epic scampi sandwich.